
pgAdmin is a popular open-source administration and management tool for PostgreSQL databases. It is a web-based graphical interface allowing users to manage and manipulate their databases easily. This article will explore pgAdmin in-depth, installation discussing its features, advantages, disadvantages, and conclusion.
Let’s install pgAdmin on Ubuntu.
Step 1: Configure VPSie cloud server
Those who already have a system up and running should skip this step and do update their system.
- Sign in to your system or register a newly created one by logging in to your VPSie account.
- Connect by SSH using the credentials we emailed you.
- Once you have logged into your Ubuntu instance, run these commands to update your system.
# apt-get update && apt-get upgrade -y
Step 2: Add pgAdmin repository
From the pgAdmin APT repository, you can get pgAdmin packages for all Linux distributions based on Debian.
# sudo curl https://www.pgadmin.org/static/packages_pgadmin_org.pub | sudo apt-key add
# sudo sh -c 'echo "deb https://ftp.postgresql.org/pub/pgadmin/pgadmin4/apt/$(lsb_release -cs) pgadmin4 main" > /etc/apt/sources.list.d/pgadmin4.list'
Step 3: Install pgAdmin
Please update the package list.
# sudo apt update
Then install the pgAdmin
# sudo apt install pgadmin4
The Apache service should have been started immediately after installation. You can check its status by running the following command.
# systemctl status apache2

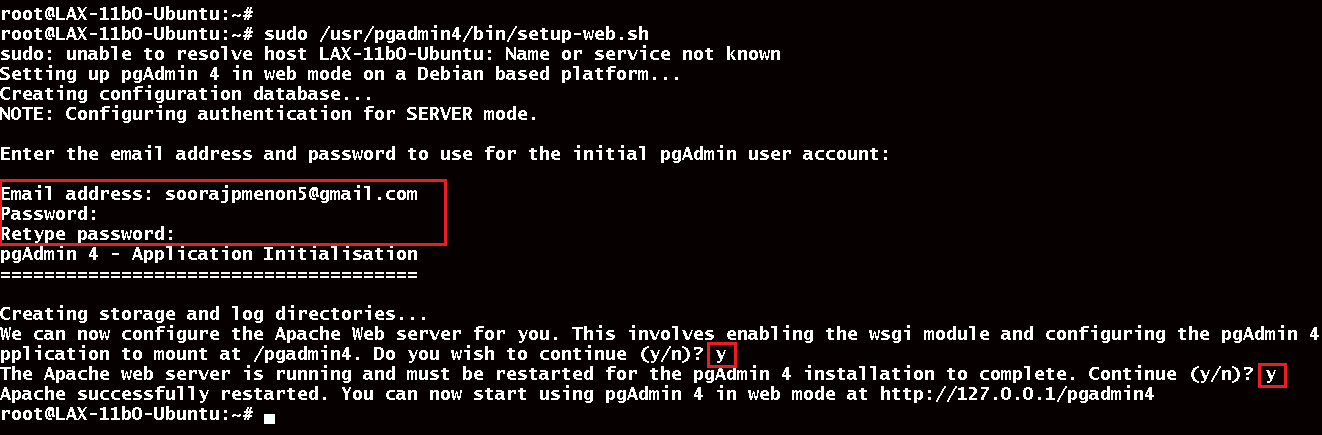
Step 4: Set up Apache for pgAdmin
Run the following command to configure Apache webserver. To complete this, you will need to enter your email address and password.
# sudo /usr/pgadmin4/bin/setup-web.sh
Step 5: Navigate to the pgAdmin Web interface
Allow http and https traffic if UFW firewall is configured.
# sudo ufw allow http

# sudo ufw allow https
Now open your browser and browse http://{ipaddressofyourserver}/pgadmin4.
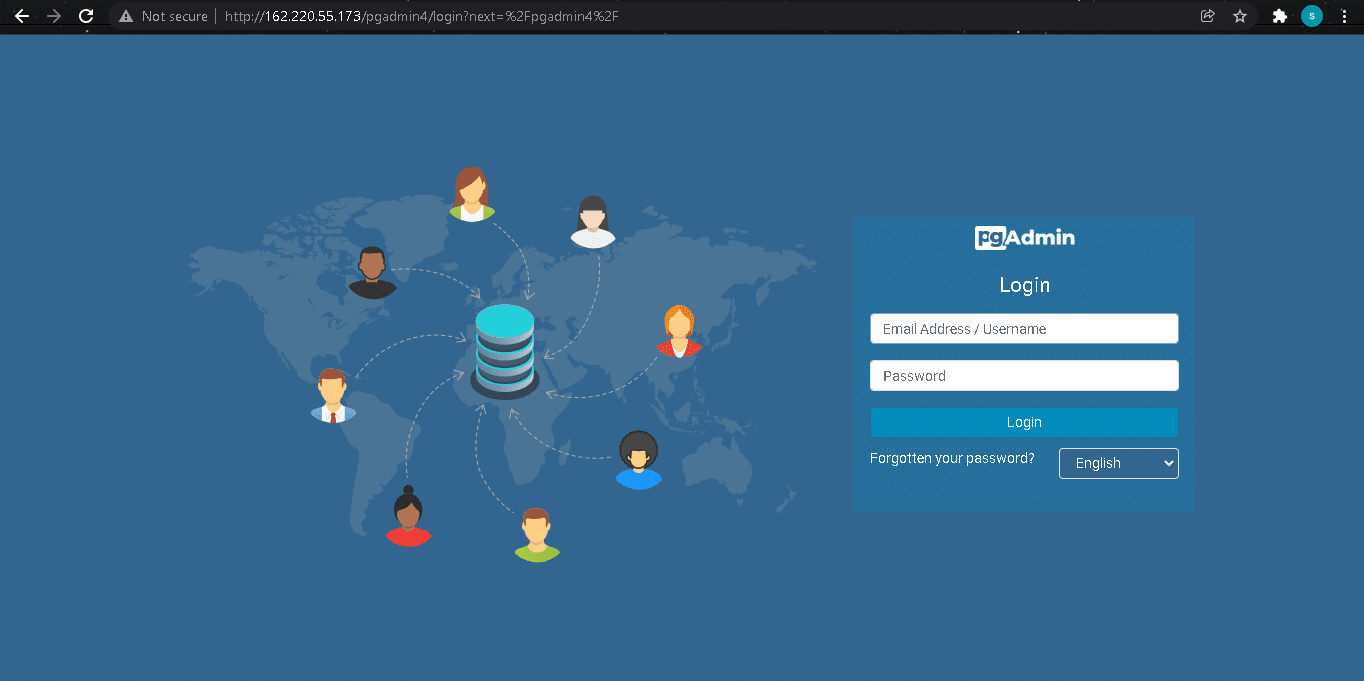
You must enter your email address and password we provided during setup and click on ‘Login‘.
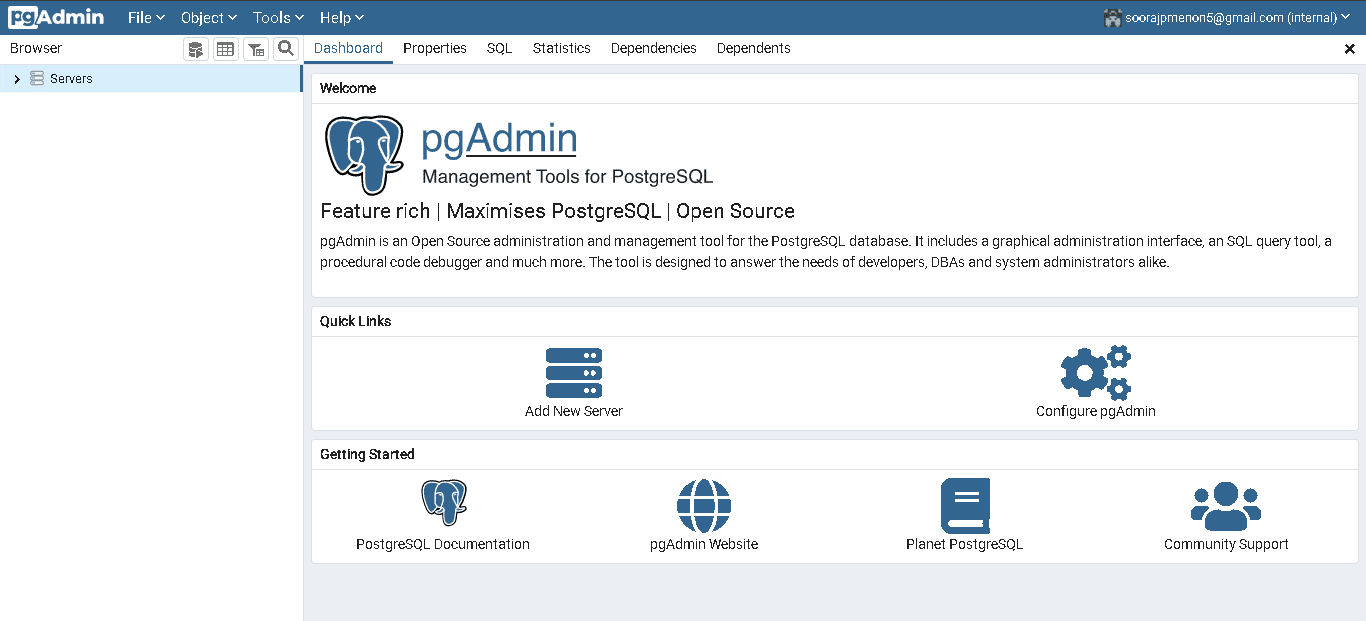
pgAdmin has been installed successfully on Ubuntu. Now you can begin to use this database. Thanks for reading; that’s all for now! I hope it was informative.
Features of pgAdmin:
pgAdmin offers a wide range of parts, making it a powerful tool for managing PostgreSQL databases. Some of its notable features include:
- Intuitive user interface: pgAdmin has a user-friendly interface that makes it easy to navigate and use. It offers drag-and-drop functionality, allowing users to move and copy objects easily.
- Query editor: pgAdmin has a built-in SQL editor that enables users to create and execute queries directly from the interface. The query editor offers syntax highlighting, auto-completion, and other valuable features that help users write complex SQL queries quickly.
- Server management: pgAdmin enables users to manage multiple PostgreSQL servers from a single interface. It lets users view server statistics, set up backups, and perform other server-related tasks.
- Data manipulation: pgAdmin allows users to manipulate data in their databases easily. It offers a wide range of data manipulation tools, including importing/exporting data, data copying, and data editing.
Advantages of pgAdmin:
- Cross-platform support: pgAdmin is a tool that runs on Windows, macOS, and Linux. This makes it a versatile tool that can be used in various environments.
- Open-source: pgAdmin is an open-source tool, which means that it is free to use and modify. This makes it ideal for users who want to save on software costs.
- Easy to use: pgAdmin has a user-friendly interface that makes it easy to use, even for users new to PostgreSQL.
- Powerful functionality: pgAdmin offers a wide range of powerful features that make it a robust tool for managing PostgreSQL databases. Its built-in SQL editor, server management tools, and data manipulation features make it a comprehensive tool for database management.
Disadvantages of pgAdmin:
- Steep learning curve: While pgAdmin is easy to use, it can have a steep learning curve for users who need to become more familiar with PostgreSQL.
- Limited customization: pgAdmin’s interface could be more customizable, which may be a drawback for users who prefer a more personalized experience.
- Resource-intensive: pgAdmin can be resource-intensive, especially when managing large databases. This may concern users who need more resources on their systems.
Conclusion About pgAdmin:
pgAdmin is a powerful and versatile tool for managing PostgreSQL databases. Its user-friendly interface, comprehensive functionality, and cross-platform support make it an ideal choice for users who want an easy-to-use, open-source tool for managing their databases. While it may have a steep learning curve and be resource-intensive, its advantages far outweigh its disadvantages. Overall, pgAdmin is a valuable tool for database administrators and developers who work with PostgreSQL databases.
pgAdmin is an open-source administration and management tool for the PostgreSQL database. It is available for Windows, macOS, and various Linux distributions, including Ubuntu.
To install pgAdmin on Ubuntu, you can follow these steps:
- Open the terminal on your Ubuntu machine.
- Add the PostgreSQL repository to your system’s software sources by running the following command: sudo sh -c ‘echo “deb http://apt.postgresql.org/pub/repos/apt/ $(lsb_release -cs)-pgdg main” > /etc/apt/sources.list.d/pgdg.list’
- Import the PostgreSQL repository signing key by running the following command: wget –quiet -O – https://www.postgresql.org/media/keys/ACCC4CF8.asc | sudo apt-key add –
- Update the software sources by running the following command: sudo apt-get update
- Install pgAdmin by running the following command: sudo apt-get install pgadmin4
Yes, pgAdmin allows you to manage remote PostgreSQL servers. To do this, you need to set up a server connection in pgAdmin. You can specify the server’s host name or IP address, port number, and database credentials. Once the connection is established, you can view and manage the server’s databases, tables, indexes, and other objects.
To launch pgAdmin on Ubuntu, you can follow these steps:
- Open the Ubuntu applications menu.
- Search for “pgAdmin” and click on the pgAdmin icon.
- Alternatively, you can open the terminal and run the following command: pgadmin4
Yes, pgAdmin allows you to run SQL queries on PostgreSQL databases. You can use the SQL Editor tool in pgAdmin to write and execute SQL statements. The results of the queries are displayed in the results panel, which can be exported to various formats, including CSV, JSON, and XML.
Yes, pgAdmin allows you to perform backup and restore operations on PostgreSQL databases. You can use the Backup tool in pgAdmin to create a backup of a database or a specific set of tables. You can also use the Restore tool to restore a backup to a PostgreSQL server. Additionally, pgAdmin provides a maintenance tool that allows you to perform tasks such as vacuuming, analyzing, and reindexing databases.