Managing cloud infrastructure efficiently is essential for teams and individuals working on multiple applications or environments. To simplify this, VPSie’s new client portal introduces the “Projects” feature a powerful tool designed to help you organize, isolate, and manage your cloud resources under dedicated workspaces.
With Projects, you can group related resources such as virtual machines, storage volumes, snapshots, and networks into a single logical unit. This makes it easier to manage billing, access control, and usage tracking for different teams, departments, or clients all from one central place.
Default Project
By default, VPSie automatically creates a Default Project, where all your virtual machines and other resources are placed initially. This ensures that you can start deploying and managing your infrastructure right away, even if you haven’t manually created any custom projects yet.
As your usage grows, you can create additional projects to better organize your resources, set boundaries, and simplify team collaboration and billing.

Creating a New Project
To create a new project in the VPSie client portal, follow these simple steps:
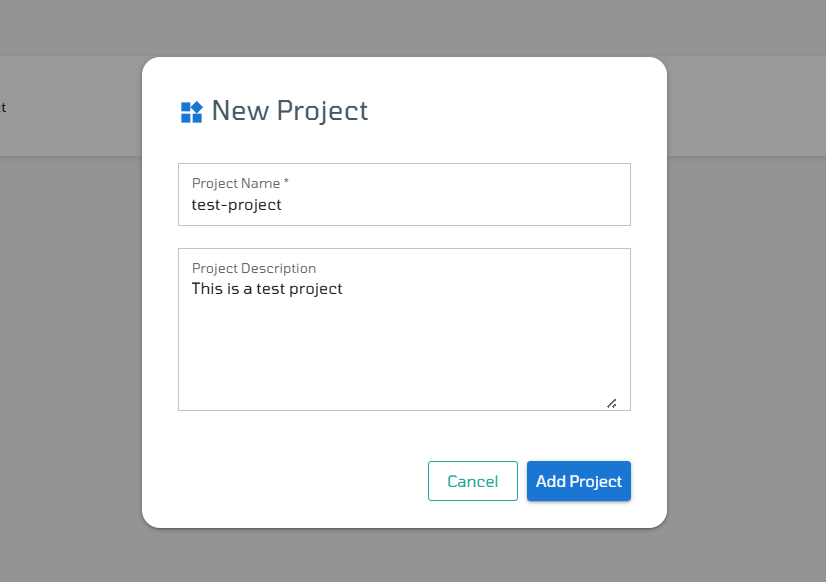
1. Click on the New Project button: Navigate to the Projects section in the client portal, then click the New Project button to begin.
2. Enter Project Details: A window will appear prompting you to fill in the following fields:
- Project Name: Choose a clear and descriptive name for the project.
- Project Description: Optionally, provide a short description to explain the purpose or scope of the project.
3. Add the Project: Once you’ve entered the details, click the Add Project button to create it.
Your new project will now appear in the list, ready to be used for organizing your resources.
Managing Your Project
Once a project is created, it will appear in the list under the Projects section of the client portal. From here, you can begin working with it in several ways:
1. Click on the Project Name: Open the project workspace to start creating and managing cloud resources specifically under this project.
2. Add a New Server: Click on the “Add Server” icon to quickly launch a new virtual machine within this project.
3. Move Existing Resources: Use the “Move Resources” icon to transfer VMs and other resources from a different project (including the Default Project) into this new one. This helps in organizing your infrastructure more cleanly.
4. Delete the Project: If the project is no longer needed, you can remove it by clicking the “Delete” icon.
(Note: A project can only be deleted if it has no active resources.)