ClamAV, an open-source antivirus engine, offers a robust solution for detecting and neutralizing various forms of malicious software. If you’re a Debian 12 user seeking to fortify your system’s defenses, installing ClamAV is a crucial step. Follow this guide for a seamless installation process that ensures your Debian 12 system remains protected against potential threats.
First, let’s begin by creating your VPSie Account if you haven’t already done so, and then proceed to install the Debian server as per your requirements.
To initiate the installation, please SSH into your system. Our first step is to advise updating your system prior to installing any software. To accomplish this, kindly execute the following commands:
sudo apt-get update
Install ClamAV
To install ClamAV using the APT package manager, execute the following command on your system:
sudo apt install clamav clamav-daemon
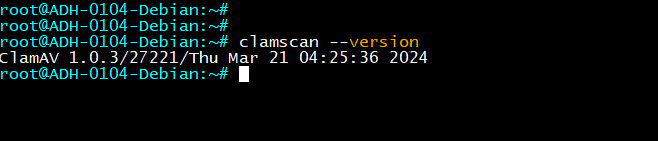
Once ClamAV has been successfully installed on your system, confirm its installation by executing the following command:
clamscan --version
Configure ClamAV
Comment out lines in the /etc/clamav/freshclam.conf file that start with “NotifyClamd” by adding a # . Run the following command:
sed -i -e "s/^NotifyClamd/#NotifyClamd/g" /etc/clamav/freshclam.conf
Cease Freshclam operation of updating the virus signature databases:
systemctl stop clamav-freshclam
Now update pattern files manually by running the following command:
freshclam

Now Start the freshclam service by running the following command:
systemctl start clamav-freshclam
Run a Scan
we’ll guide you through the process of running a virus scan now. Additionally, we’ll download a test virus file to see if ClamAV successfully cleans it.
Now Let’s scan the /home directory and its subdirectories for infected files and remove them if any are found. Run the following command to do so:
clamscan --infected --remove --recursive /home
Command Breakdown:
clamscan: This is the command-line interface for ClamAV, which is an open-source antivirus engine for detecting trojans, viruses, malware, and other malicious threats.
–infected: This option instructs ClamAV to only print infected files.
–remove: This option tells ClamAV to remove any infected files it finds.
–recursive: This option makes ClamAV scan directories recursively, meaning it will scan all subdirectories within the specified directory.
/home: This is the directory that ClamAV will recursively scan for infected files and potentially remove them if the –remove option is used.

So there you have it! Installing ClamAV on Debian 12 is a piece of cake. Just follow the steps laid out in this guide, and you’ll have a handy malware scanner up and running in no time. With ClamAV on board, you can kick back and relax, knowing your system’s security is in good hands. Happy scanning!