Nginx installation on CentOS 8
NGINX is free and open-source software. With NGINX you can host websites, perform reverse proxying, cache, load balance, and stream media. Originally, it was intended to serve websites at maximum performance and stability.
Igor Sysoev created the software, which was released publicly in 2004. The software is event-driven and asynchronous; allowing multiple requests to be processed simultaneously. In addition, the NGINX system is highly scalable, so it grows as its clients’ traffic increases. Installing Nginx on CentOS 8 is covered in this tutorial.
Step 1: Configure VPSie cloud server
- Sign in to your system or register a newly created one by logging in to your VPSie account.
- Connect by SSH using the credentials we emailed you.
- Once you have logged into your CentOS 8 instance and update your system.
Check if the box needs any updates,
# sudo yum updateinfo
Run the command if it is available,
# sudo dnf update
If you are using a new server, Make sure you have sudo privileges and no other processes are running on ports 80 or 443.
Step 2: Installing Nginx
Nginx packages are included in the default repositories.Use the following command to install Nginx.
# sudo yum install nginx
Nginx should be enabled and started as follows,
# sudo systemctl enable nginx

# sudo systemctl start nginx
Check the status of the service to make sure it’s running:
# sudo systemctl status nginx
Output
root@XXX-4937-CentOS ~]# sudo systemctl status nginx
● nginx.service - The nginx HTTP and reverse proxy server
   Loaded: loaded (/usr/lib/systemd/system/nginx.service; enabled; vendor preset: disabled)
   Active: active (running) since Sat 2021-12-25 12:03:23 EST; 10s ago
  Process: 12376 ExecStart=/usr/sbin/nginx (code=exited, status=0/SUCCESS)
  Process: 12374 ExecStartPre=/usr/sbin/nginx -t (code=exited, status=0/SUCCESS)
  Process: 12373 ExecStartPre=/usr/bin/rm -f /run/nginx.pid (code=exited, status=0/SUCCESS)
 Main PID: 12378 (nginx)
    Tasks: 2 (limit: 4504)
   Memory: 8.3M
   CGroup: /system.slice/nginx.service
           ├─12378 nginx: master process /usr/sbin/nginx
           └─12379 nginx: worker process
Step 3: Firewall configuration
Centos 8 comes with FirewallD as the default firewall. A firewalled service file is created when Nginx is installed that contains predefined rules for accessing HTTP (80) and HTTPS (443) ports. Open the following ports permanently with the following commands:
# sudo firewall-cmd --permanent --zone=public --add-service=http

# sudo firewall-cmd --permanent --zone=public --add-service=https
# sudo firewall-cmd --reload
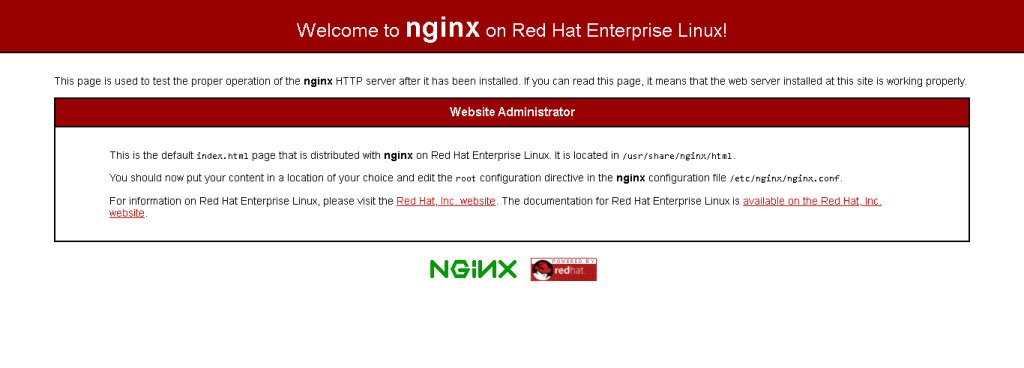
You can verify Apache is working by typing the IP address or domain name of your server into your web browser. This will display a welcome message similar to the following:
Step 4: Managing Nginx
So you’ve got your web server running; let’s discuss a few essential management commands.
# sudo systemctl stop nginx
The web server can be started by typing the following command:
# sudo systemctl start nginx
The service can be stopped and then restarted by typing:
# sudo systemctl restart nginx
Apache often reloads without losing connections. Run the following command:
# sudo systemctl reload nginx
Structure of the Nginx Configuration File
- The main configuration file for Nginx is /etc/nginx/nginx.conf.
- Files relating to Nginx configuration reside in the /etc/nginx/ directory.
- The log files for Nginx can be found in the /var/log/nginx/ directory. It would be best if you had separate access and error logs per server.
- Block files for Nginx servers must end in .conf and reside in the/etc/nginx/conf.d directory.
- It is easier to maintain the server if every domain has its configuration file.
- Following naming conventions is recommended. If, for instance, the domain is example.com, the configuration file would be example.com.conf
We have successfully installed the Nginx web server on your computer. Hopefully, you have found this helpful article and gained valuable information. Thank you for reading.
Nginx is a popular open-source web server that can be used as a reverse proxy, load balancer, and HTTP cache.
Installing Nginx on CentOS can improve the performance and security of your web applications. Nginx is known for its low memory usage and high scalability, which makes it a popular choice for high-traffic websites.
You can install Nginx on CentOS by following these steps:
Log in to the CentOS server as the root user.
Install the EPEL repository:
arduinoyum install epel-releaseInstall Nginx:
yum install nginxStart the Nginx service:
sqlsystemctl start nginxEnable the Nginx service to start automatically at boot time:
bashsystemctl enable nginxVerify that Nginx is running:
luasystemctl status nginxIf Nginx is running, you should see output that indicates that the service is active.
You can configure Nginx on CentOS by editing the main Nginx configuration file, which is located at /etc/nginx/nginx.conf. Some common configuration options include changing the default server block, configuring SSL/TLS, and setting up proxying or load balancing. There are many resources available online that provide guidance on how to configure Nginx for various use cases.
To secure Nginx on CentOS, you can follow best practices such as keeping the software up to date, configuring SSL/TLS, disabling unused modules, and configuring access controls. It is also important to monitor the server logs for signs of suspicious activity and to implement a firewall to restrict access to the server.


