How to Install Apache Web Server on Debian
It is one of the most popular web servers on the planet. Most of the Internet’s websites use this open-source and cross-platform HTTP server. The program comes with several powerful features, such as dynamically loadable modules, extensive integration with other popular programs, and support for multiple media formats.
Let’s install an Apache web server on your Debian server.
On your server, you should have a regular, non-root user with sudo privileges installed before beginning this guide. To block non-essential ports, you’ll need to enable a basic firewall.
Step 1: Getting your system up and running
- Sign in to your system or register a newly created one by logging in to your VPSie account.
- Connect by SSH using the credentials we emailed you.
- Once you have logged into your Debian instance, run these commands to update your system.
# sudo apt update

# sudo apt -y upgrade
Step 2: Installing Apache
Install Apache webserver and update package index with the following commands:
Firstly, let’s update our local package index,
# sudo apt update
Next, install the apache2 package:
# sudo apt install apache2
Apache has now been installed and is automatically running. To find out how it is doing, type:
# sudo systemctl status apache2
This is how the output should look,
root@XXX-346c-Debian:~# sudo systemctl status apache2

● apache2.service - The Apache HTTP Server
   Loaded: loaded (/lib/systemd/system/apache2.service; enabled; vendor preset: enabled)
   Active: active (running) since Fri 2021-12-24 12:34:57 EST; 50min ago
     Docs: https://httpd.apache.org/docs/2.4/
 Main PID: 1266 (apache2)
    Tasks: 55 (limit: 1060)
   Memory: 23.0M
   CGroup: /system.slice/apache2.service
           ├─1266 /usr/sbin/apache2 -k start
           ├─1268 /usr/sbin/apache2 -k start
           └─1269 /usr/sbin/apache2 -k start

Dec 24 12:34:56 LAX-346c-Debian systemd[1]: Starting The Apache HTTP Server...
Step 3: Configure the Firewall
Users of UFW will be able to open HTTP (80) and HTTPS (443) ports by activating the ‘Nginx Full’ profile:
# sudo ufw allow 'Apache Full'
NFtables can be used to filter connections to your system, implement the following commands to open the necessary ports:
# nft add rule inet filter input tcp dport {80, 443} ct state new,established counter accept
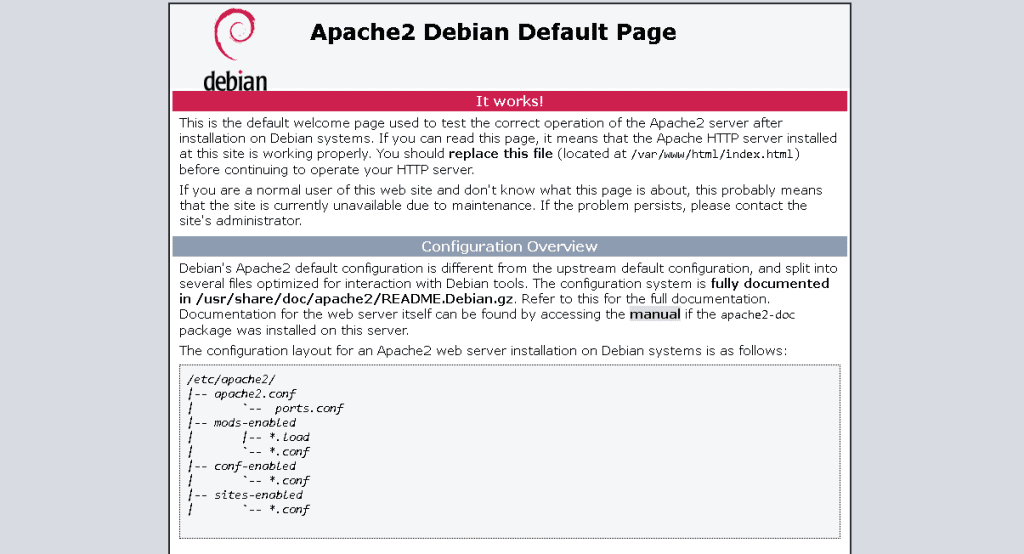
You can verify Apache is working by typing the IP address or domain name of your server into your web browser. This will display a welcome message similar to the following:
The page provides basic details on Apache configuration files, helper scripts, and directory locations.
Step 4: Managing Apache
So you’ve got your web server running, let’s talk about a few basic management commands.
Type the following command to stop your web server:
# sudo systemctl stop apache2
The web server can be started by typing the following command:
# sudo systemctl start apache2
The service can be stopped and then restarted by typing:
# sudo systemctl restart apache2
Apache often reloads without losing connections. Simply run the following command:
# sudo systemctl reload apache2
Structure of the Apache Configuration File
- According to Debian-based systems, Apache configuration files are located in /etc/apache2.
- Apache listens on the ports defined in the /etc/apache2/ports.conf file.
- Apache’s main configuration file is /etc/apache2/apache2.conf.
- Files pertaining to Apache Virtual Hosts reside in the /etc/apache2/sites-available directory.
- You should follow the standard naming convention, so if your domain is example.com then the domain configuration file should be named /etc/apache2/sites-available/example.com.conf
- You can find Apache log files under the /var/log/apache directory.
- A set of files containing global configuration fragments is located in the /etc/apache2/conf-available directory. The files in the conf-available directory can be enabled using a symlink to /etc/apache2/conf-enabled using the a2enconf command and disabled using the a2disconf command.
- Apache module configuration files can be found in the /etc/apache2/mods-available directory.
We have successfully installed the Apache web server on your computer. Hopefully, you have found this article useful and gained some useful information from it. Thank you for reading.


