How to Upgrade Ubuntu 20.04 LTS to 21.04
A feature that makes Ubuntu so great is the ability to upgrade from one version to the next. It allows you to take advantage of the latest software, such as security patches, as well as a host of upgraded features without having to do a complete system reinstall. So let’s begin the upgrade.
Step 1: Configure VPSie cloud server
Those who already have a system up and running should skip this step and do update their system.
- Sign in to your system or register a newly created one by logging in to your VPSie account.
- Connect by SSH or console using the credentials we emailed you.
- Once you have logged into your Ubuntu instance, run these commands to update your system.
# sudo apt update

# sudo apt dist-upgrade
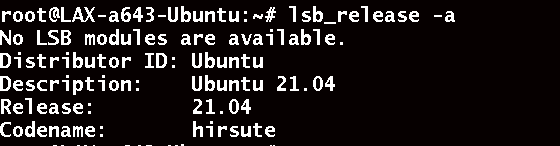
Before we get started, let’s take a look at the current Ubuntu release. Run the following command:
# lsb_release -a

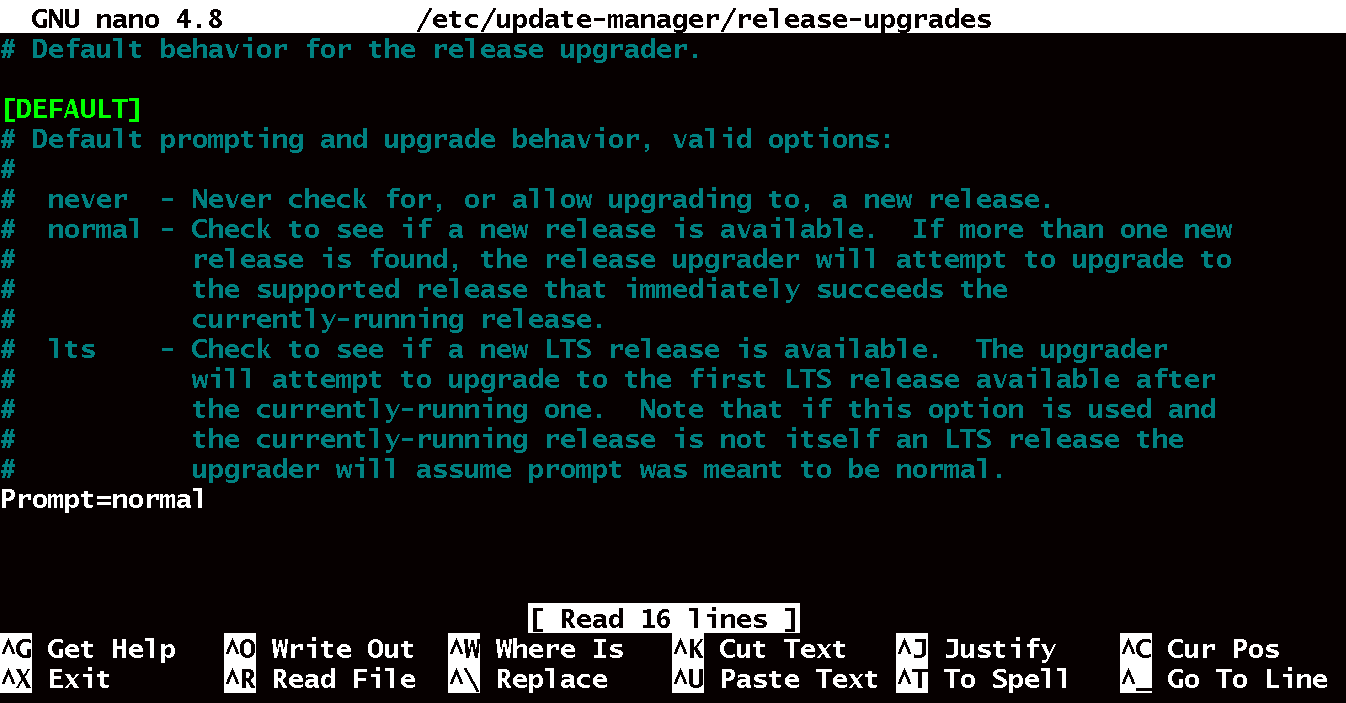
Step 2: Change LTS to normal
The following command will be used to edit the release-upgrades configuration file.
# sudo nano /etc/update-manager/release-upgrades
switch from LTS to Normal, change the Prompt value.
Prompt = normal
Step 3: Upgrade 20.04 to 21.04
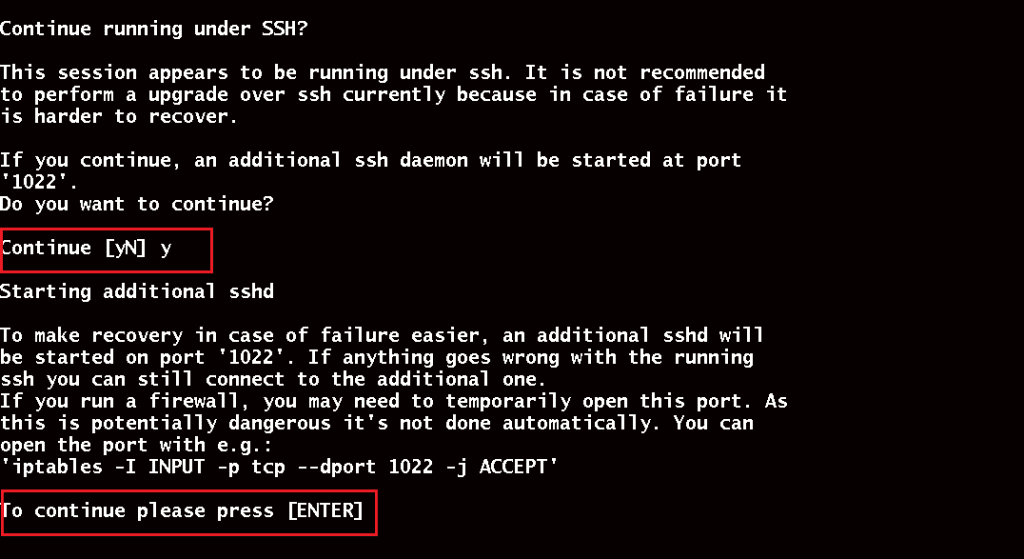
This upgrade is being done over SSH. It’s recommended not to do this over SSH because if something went wrong, it would be very difficult to recover. You can now run the system update command to upgrade your system:
# sudo do-release-upgrade
Please be patient as the upgrading process takes some time, Since we are doing this over SSH they are asking for confirmation, so please hit ‘Y‘ if you are using SSH.
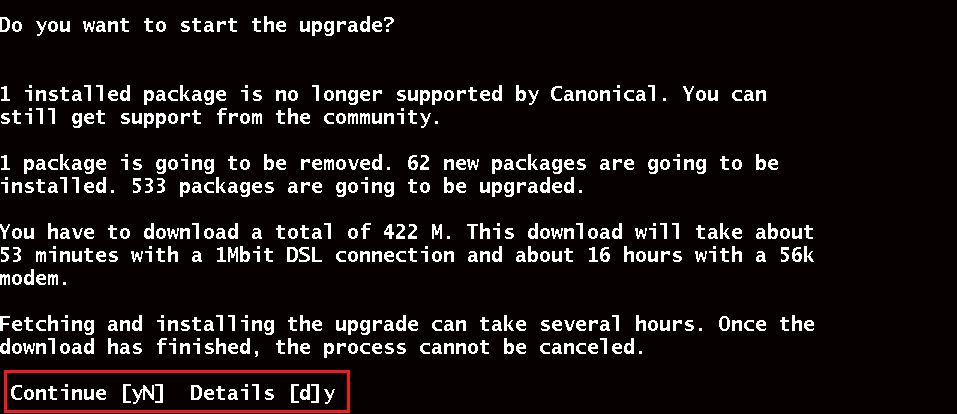
Please click ‘Yes‘ so they don’t need to bother you with every library upgrades, it’s your choice.
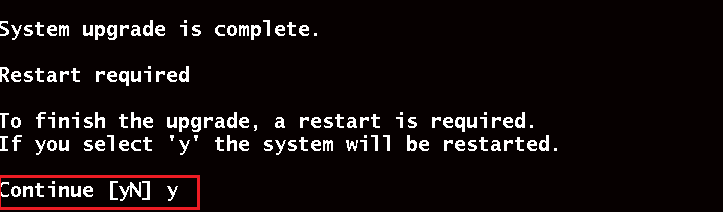
Now that the upgrade has been completed, you must restart the system. You can restart your system by typing Y and pressing Enter.
Don’t forget to verify the Ubuntu version when you’ve finished the upgrade by running the command we discussed in step 1.
Congratulations on upgrading your Ubuntu system to 21.04. Thanks for reading! I hope it was informative for you!
Upgrading Ubuntu can provide access to new features, bug fixes, and security updates. It is important to keep the operating system up to date to ensure that it remains secure and stable.
You can upgrade Ubuntu by following these steps:
Back up important data: Before you upgrade Ubuntu, it is important to back up any important data to ensure that it is not lost in case something goes wrong during the upgrade process.
Update the system:
sqlsudo apt update && sudo apt upgradeThis will update the package list and upgrade any installed packages to their latest versions.
Install the update-manager-core package:
sqlsudo apt install update-manager-coreEdit the /etc/update-manager/release-upgrades file:
sqlsudo nano /etc/update-manager/release-upgradesEnsure that the Prompt line is set to “normal” or “lts”, depending on your preference.
Start the upgrade process:
arduinosudo do-release-upgradeThis will start the upgrade process and prompt you to confirm the upgrade.
Follow the on-screen instructions: The upgrade process will take some time to complete, and you may be prompted to make decisions about package configurations and other settings. Follow the on-screen instructions to complete the upgrade.
No, you need an internet connection to upgrade Ubuntu. The upgrade process downloads new packages and updates from the Ubuntu repositories, so an internet connection is required.
If something goes wrong during the upgrade process, you can try to fix the issue by reviewing the error messages and logs that are generated. In some cases, you may need to manually resolve dependencies or package conflicts. If you are unable to resolve the issue, you may need to restore from a backup or reinstall the operating system.