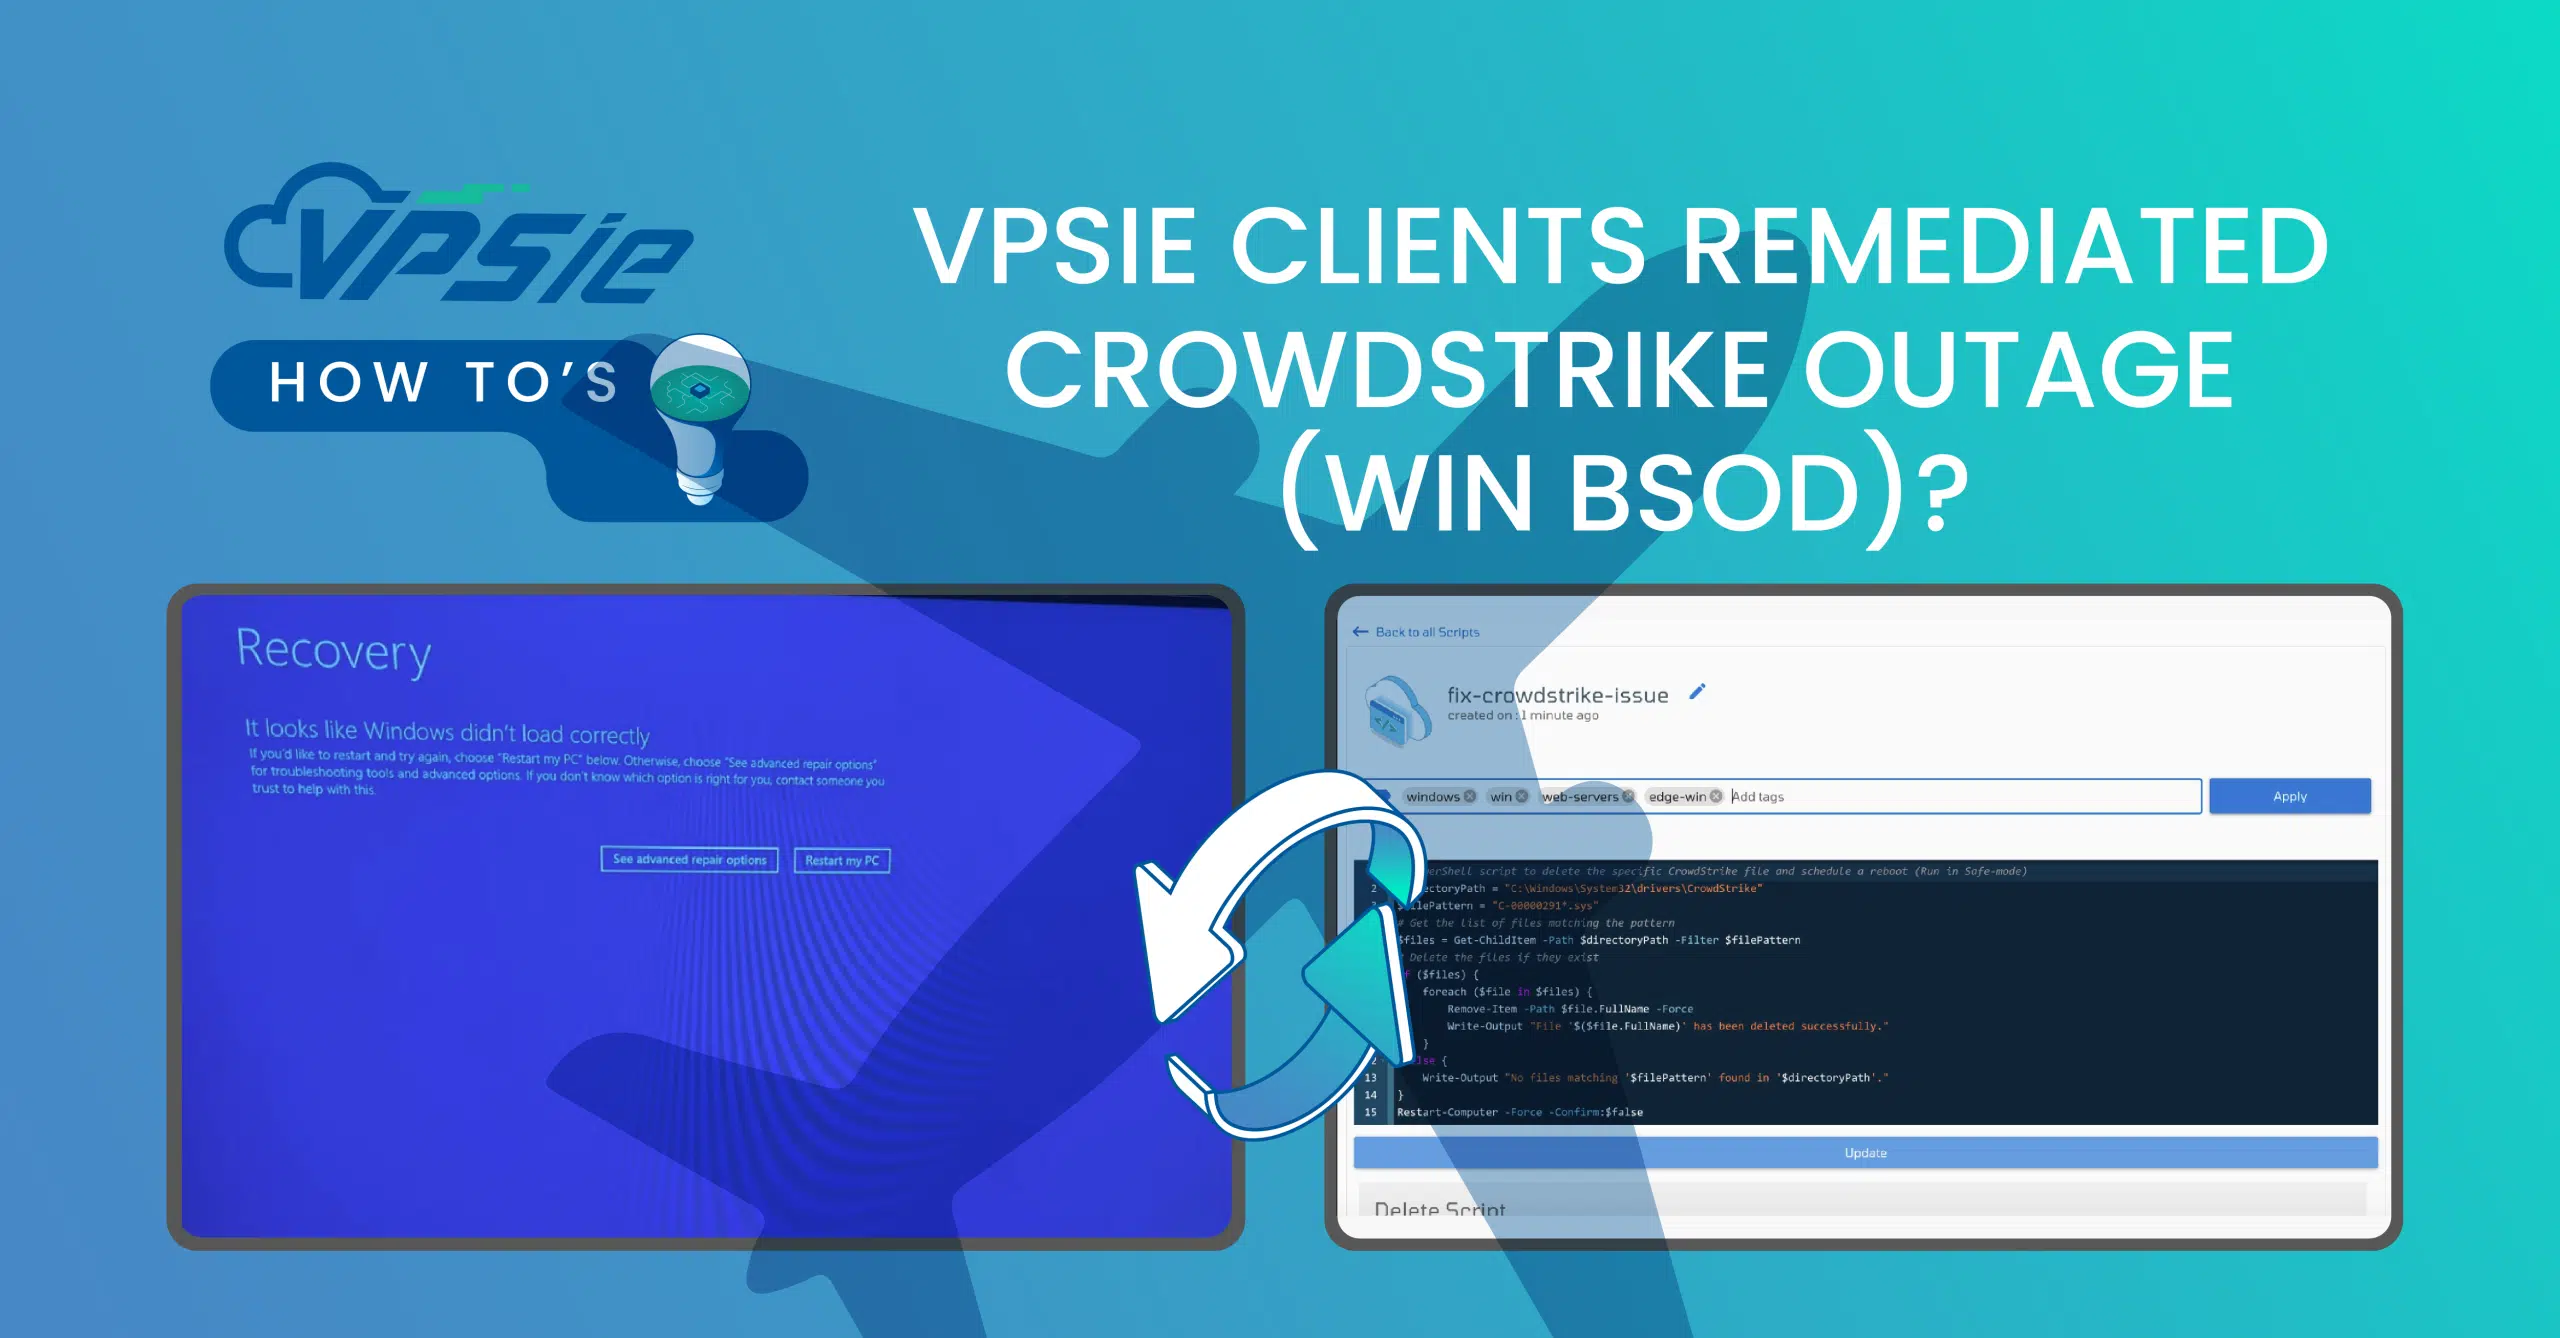
On Friday, July 19th, 2024, CrowdStrike customers faced a significant disruption as a major outage affected Windows systems running the Falcon Sensor. The issue, triggered by a bugcheck or Blue Screen of Death (BSOD), led to systems entering continuous reboot cycles. This incident had a widespread impact, causing operational disruptions across various industries and drawing attention in breaking news reports.
CrowdStrike has provided an update to correct the software glitch responsible for millions of Blue Screen of Death (BSOD) incidents. However, the update isn’t automatically reaching all systems. Some IT administrators report that rebooting PCs several times may eventually apply the fix. For those still affected, the alternative is to boot into Safe Mode and manually delete the problematic CrowdStrike update file.
In the recent CrowdStrike outage that disrupted Windows systems with continuous Blue Screen of Death (BSOD) errors, VPSie clients were able to navigate the issue with minimal impact. The VPSie control panel offers a suite of tools specifically designed to handle such unforeseen incidents, ensuring that services remain stable and operational. These tools provided our clients with the capabilities to quickly and effectively mitigate the effects of the outage, showcasing the proactive and robust nature of VPSie’s platform.
VPSie Control Panel Tools
VPSie’s control panel is equipped with a suite of advanced tools designed to prevent and manage incidents effectively, safeguarding the continuity of services. These tools have been instrumental in helping clients handle and mitigate risks associated with critical disruptions. By utilizing features such as Safe Mode restarts, snapshot rollbacks, and file restores, clients could navigate the challenges posed by the outage with remarkable efficiency. The ability to quickly recover systems, restore files, and transition to alternative servers ensured that disruptions were minimized and service continuity was maintained.
VPSie’s control panel tools not only facilitated a rapid response to the outage but also demonstrated their effectiveness in upholding system reliability and performance during critical events.
Utilize HTML5 Console for Safe Mode Restart
By using the HTML5 Console, clients can easily restart their machines in Safe Mode directly from the VPSie control panel. This approach allows for troubleshooting and resolution of critical issues without the need to log into each machine individually, streamlining the recovery process and minimizing downtime.
Utilize HTML5 Console for Safe Mode Restart:
Log In to VPSie Portal:
- Open your web browser and go to the VPSie Portal login page.
- Enter your username and password, then click Log In to access your account.
Navigate to Automation Scripts:
- In the VPSie Portal dashboard, navigate to the Automation Scripts section. This is where you can manage and execute scripts.
- In the Automation Scripts section, find the option to add or create new scripts. Although we provide a reference script for your convenience, please note that it is intended as an example. VPSie advises exercising caution when using or modifying any scripts.
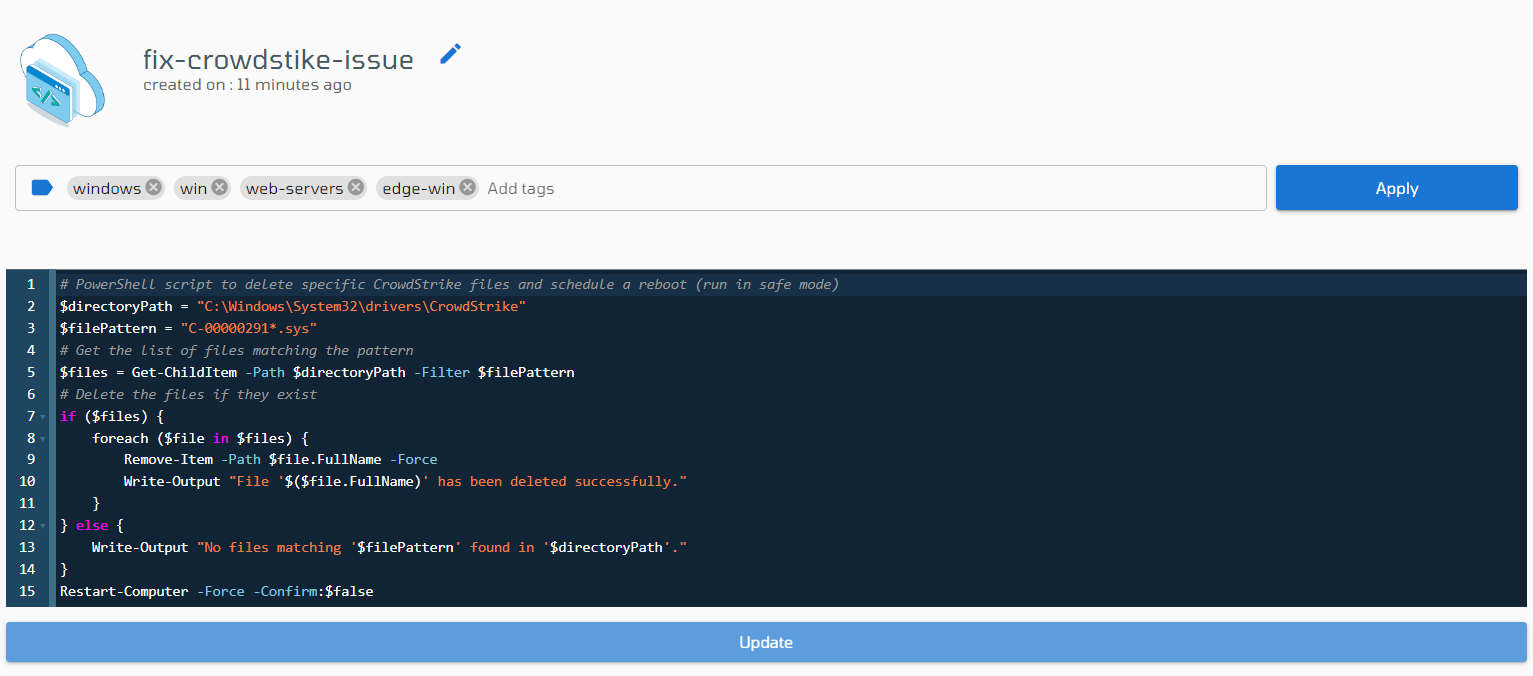
- Paste or enter the script you wish to execute into the designated text field or script editor. Be sure to save the script with a descriptive name to easily identify it for future use.
Apply Scripts to Single or Multiple Servers
- Navigate to the Apply Scripts to Multiple Servers section on the same Automation Scripts page.
- Select the script you have just added from the list.
- Choose the servers you want to apply the script to using the drop-down menu.
- In the Time to Apply drop-down menu, select the Now option.
- Click on Apply Script to execute the script on the selected servers immediately.
Rollback to Daily Snapshot
One of the most effective methods for recovering from system issues is rolling back to a daily snapshot. This feature allows clients to revert their systems to a previous state, effectively undoing any changes that occurred since the snapshot was taken. This method is particularly useful for quickly addressing problems caused by recent updates or incidents, such as the CrowdStrike outage that led to Windows BSOD errors.
Steps to Rollback to a Daily Snapshot:
Log into VPSie Control Panel:
- Access the VPSie control panel through your web browser using your login credentials.
Navigate to Snapshots Section:
- In the control panel, locate and select the Automatic Snapshots section. This area lists all available snapshots taken at various times.
Select the Appropriate Snapshot:
- Identify the daily snapshot taken before the incident occurred. Choose this snapshot to ensure that you are restoring the system to a state prior to the issue.
Initiate Rollback:
- Select the option to roll back to the chosen snapshot. This process will begin the restoration of your system to the state captured by that snapshot.
Monitor the Rollback Process:
- Observe the progress of the rollback. The time required will depend on the size and complexity of your system.
Verify System Recovery:
- Once the rollback is complete, check the system to ensure that it has been restored to its previous state and that normal operations have resumed.
Create a New Server from Snapshot
In situations where you need to preserve the integrity of the existing problematic VM while quickly restoring services, creating a new server from a snapshot is an effective strategy. This method allows you to leave the original VM untouched and transition to a new server instance that mirrors the state of the system before the issue occurred.
Steps to Create a New Server from Snapshot:
- Select the Snapshot: Locate the snapshot that was taken before the outage or issue arose. Ensure this snapshot represents a stable and functional state of your system.
- Initiate New Server Creation: start the process of creating a new server from the selected snapshot. This action involves cloning the snapshot to generate a new server instance.
- Verify Updates: Confirm that the changes have propagated and that the new server is handling requests as expected. This process typically takes around 10 minutes to complete.
- Test the New Server: Ensure that the new server is fully functional and that all applications and services are operating correctly. Perform any necessary tests to verify that the server is performing as intended.
Utilize File Restore in Safe Mode
When dealing with issues that affect specific files or folders, File Restore feature provides an effective solution. This tool is particularly useful when you want to recover individual files or directories without performing a full system restore.
Here’s how to leverage this feature while operating in Safe Mode:
- Boot into Safe Mode: First, restart the affected system into Safe Mode. This mode limits the operating system to its core functions, helping to prevent further complications during the recovery process.
- Access File Restore: Once in Safe Mode, it allows you to restore specific folders or files from existing backups.
- Restore Affected Files: Select the affected folder or files from the backup. By restoring only the necessary items, you avoid the need for a full system restore, making the process quicker and less disruptive.
- Perform a Reboot: After restoring the files, reboot the system to apply the changes and verify that the operation was successful. This method typically takes around 15 minutes and helps ensure that the system operates smoothly without a complete backup restore.
Full Backup Restore
A Full Backup Restore is a comprehensive recovery solution that involves reverting an entire system to a state captured in a recent backup. This method is particularly useful for addressing significant issues that cannot be resolved through partial restores or snapshots alone.
Steps to Perform a Full Backup Restore:
- Access Recovery section: Use VPSie’s control panel to locate and select the chosen backup for restoration.
- Start Restoration: Begin the full restore process. This action will overwrite the current system state with the data from the selected backup, effectively rolling back all changes made since the backup was created.
- Track Progress: Monitor the progress of the restore operation through the control panel. The duration of this process can vary depending on the size of the server and the amount of data being restored.
- Check System Functionality: After the restore is complete, thoroughly check the system to ensure that all services and applications are functioning as expected.
- Confirm Data Accuracy: Verify that all data and configurations have been restored accurately and that the system is operating correctly without any residual issues.
In a nutshell, VPSie’s control panel tools turned out to be a game-changer during the CrowdStrike outage. Thanks to features like Snapshot rollbacks, and quick file restores, clients managed to keep things running smoothly with minimal hassle. Whether rolling back to a previous snapshot or setting up a new server, VPSie made sure the downtime was kept to a bare minimum. So, if you ever find yourself in a similar tight spot, these tools have got you covered to bounce back fast and keep everything on track.