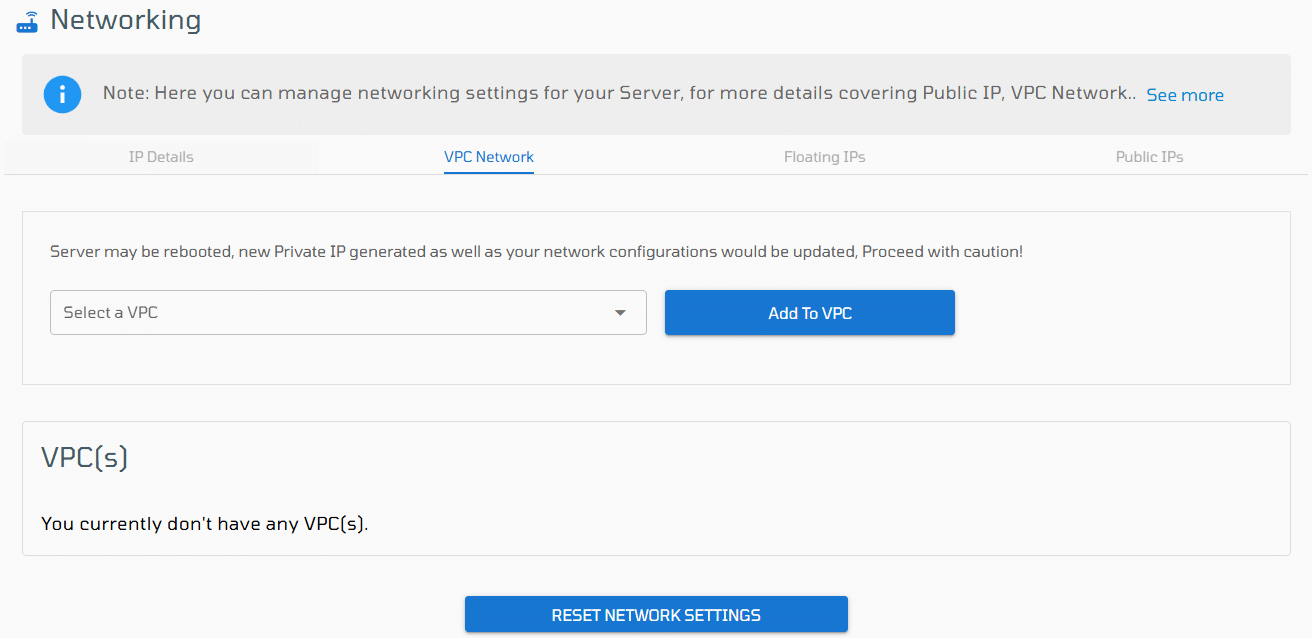
Networking Sections
VPC Network
Here, you have the ability to oversee your virtual private cloud (VPC), which serves as a digital representation of the physical network but operates within your VPSie network. Please exercise caution as many configuration adjustments may necessitate a reboot of your VPSie during the IP change process. The available actions within this interface encompass.
Integrating any of your Virtual Private Clouds (VPCs) into your VPSie server can be achieved by choosing it from the Select a VPC drop-down menu and then clicking the Add to VPC button.
1. Remove VPSie from VPC: Eliminate any of your Virtual Private Servers (VPSies) from a Virtual Private Cloud (VPC) by clicking the red trash bin icon at the end of its line in the VPC section.
2. Change VPC IP: Modify the IP address of any of your VPSies VPC by clicking the blue pen icon near the end of the VPSie line in the VPC section.
3. Connect or disconnect network interface: Manage the connection status of this network interface with the VPSie by toggling the switch in the “Connect” column within the “VPC” section.
4. Enable or disable firewall: Activate or deactivate the firewall by toggling the switch in the Firewall column within the “VPC” section. All firewall groups will be applied if you enable the firewall on this VPC.

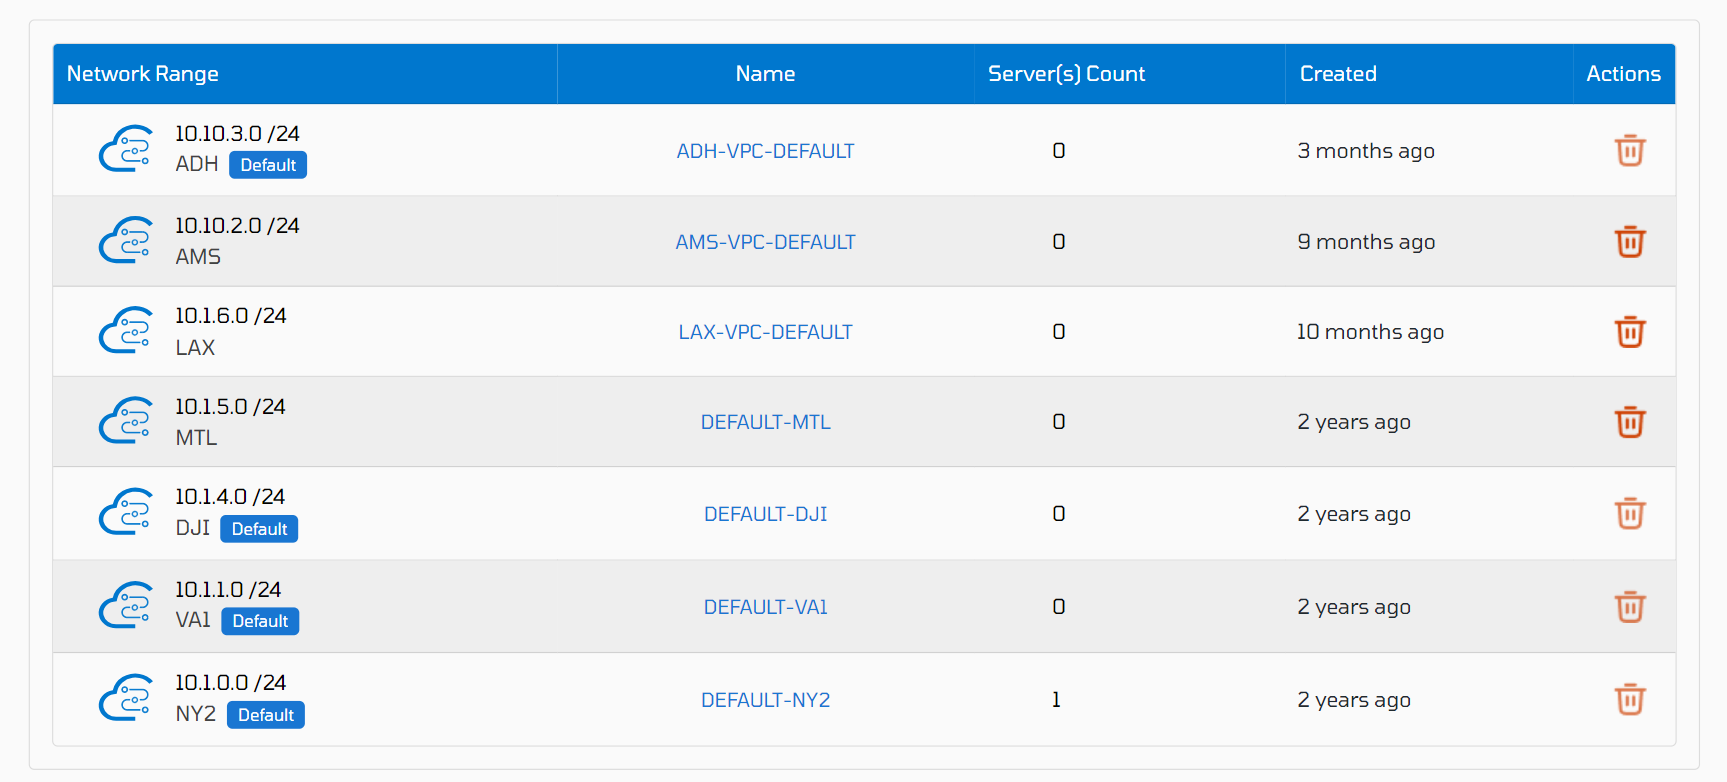
you have the capability to establish and oversee your Virtual Private Cloud (VPC) for multiple VPSies by navigating to
Resources > Networking > VPC Network.
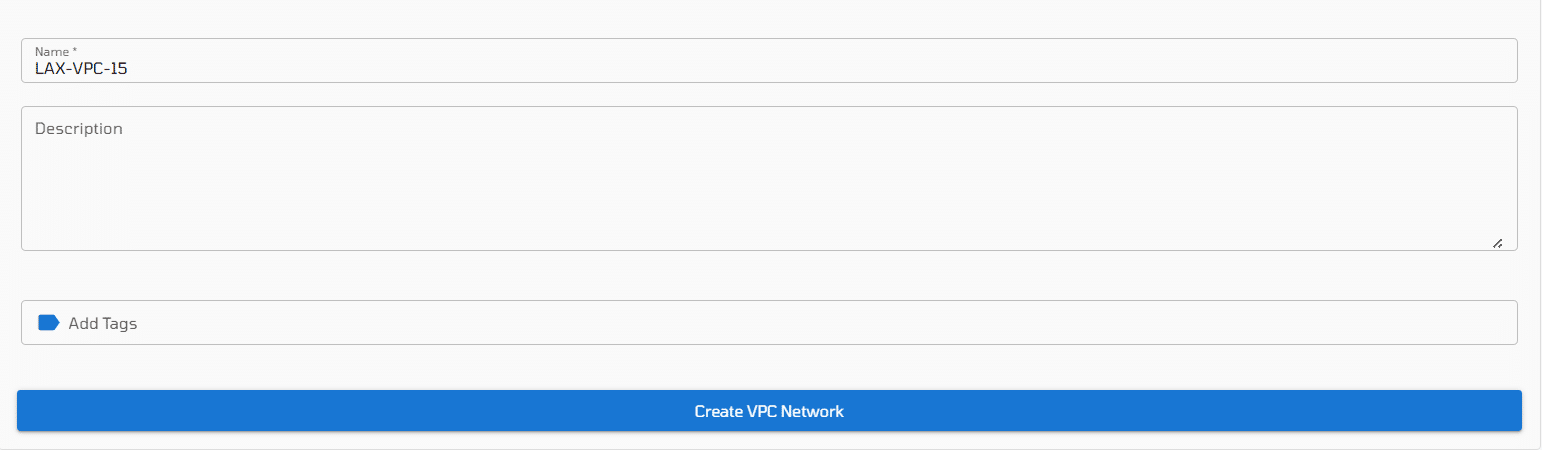
In this section, you can initiate a new VPC and integrate it with your VPSie by opting for the Add New VPC option.
- Select a Datacenter Region: Specify the location of your VPC based on your business requirements.
- Configure Options: Customize your subnet or let VPSie generate one for you, choose according to your preferences.
- Name: Assign a name to your VPC.
- Description: Provide a description for your VPC.
- Tags: Attach tags to categorize and organize your VPC.
After completing these steps, proceed to click on Create VPC Network.
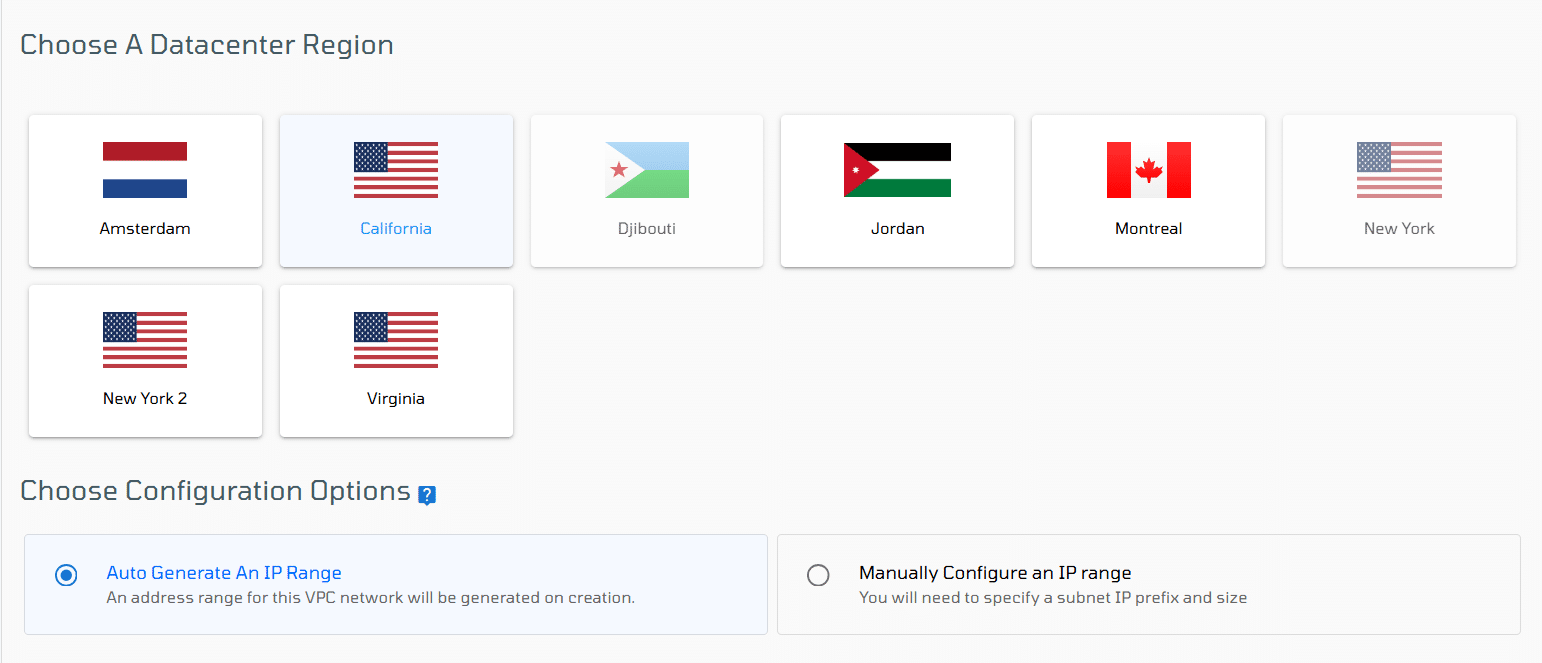
As a reminder, VPSie provides Default VPCs in all our data centers for your convenience. Feel free to utilize them if you prefer not to create a new one.
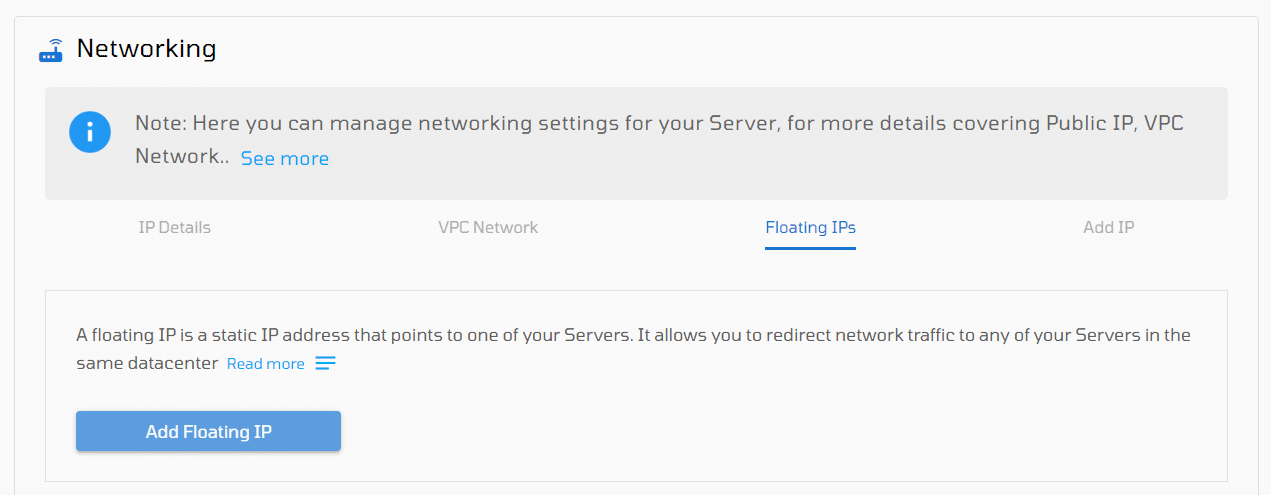
Floating IPs
A floating IP is a fixed IP that enables the redirection of network traffic to multiple VPSie’s within the same datacenter, depending on specific conditions. The available actions in this context involve:
Adding a floating IP: Simply click the Add Floating IP button, and VPSie will automatically generate a static IP for you.
- By clicking on this option, you can attach tags to your FIP.
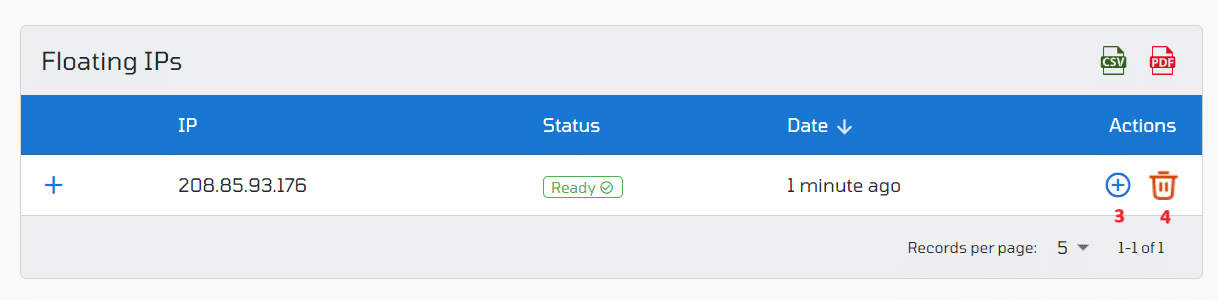
- Click the blue three-line icon located near the end of the VPSie line in the “Floating IPs” section to release the IP, halting its rental cost.
- This operation is identical to assigning a floating IP to the VM.
- Select the red trash bin icon at the end of the VPSie line in the “Floating IPs” section to detach the VPSIE from this floating IP.

Moreover, you have the capability to include and control Floating IPs for multiple VPSies by navigating to
Resources > Networking > Floating IPs.
To create one, begin by choosing your VPSie for the addition of a Floating IP. Optionally, you can add tags, and then proceed by clicking Assign IP to finalize the process.

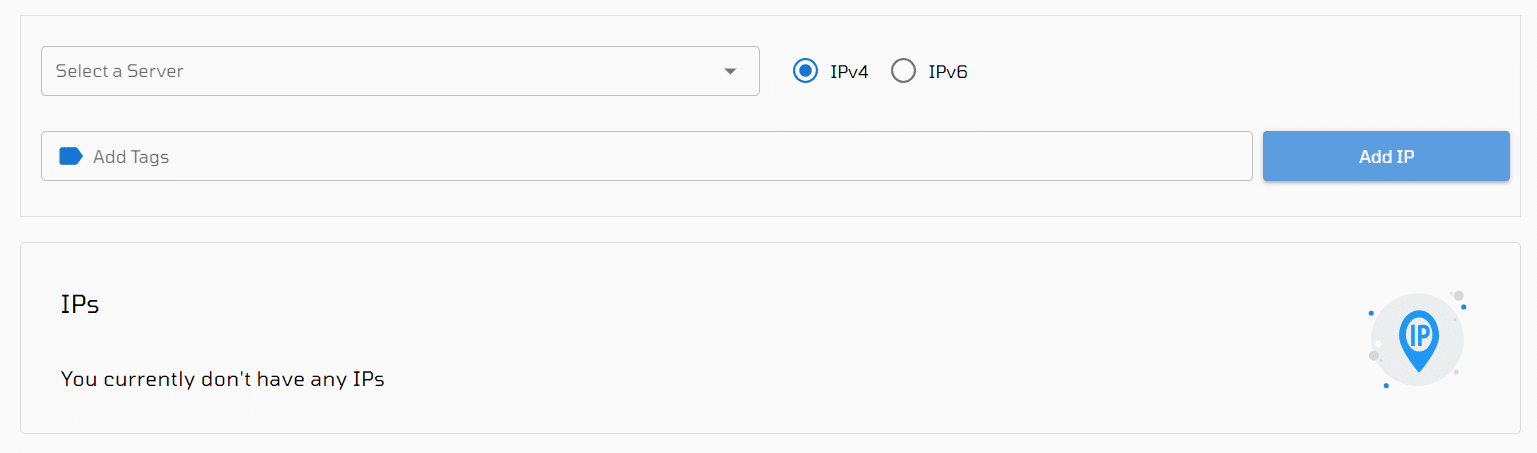
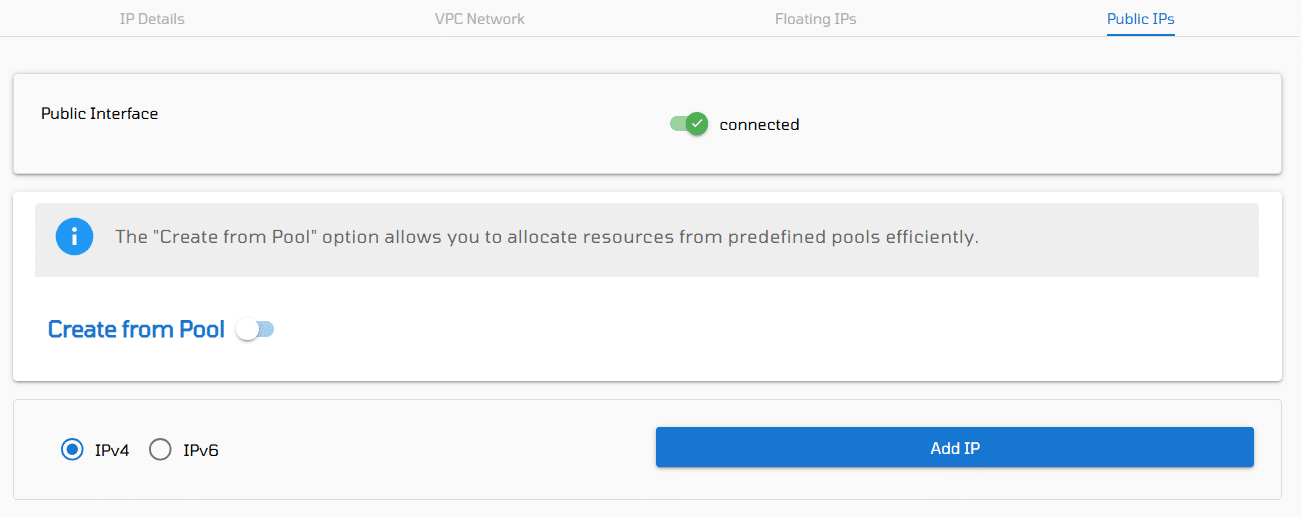
Additional IPs
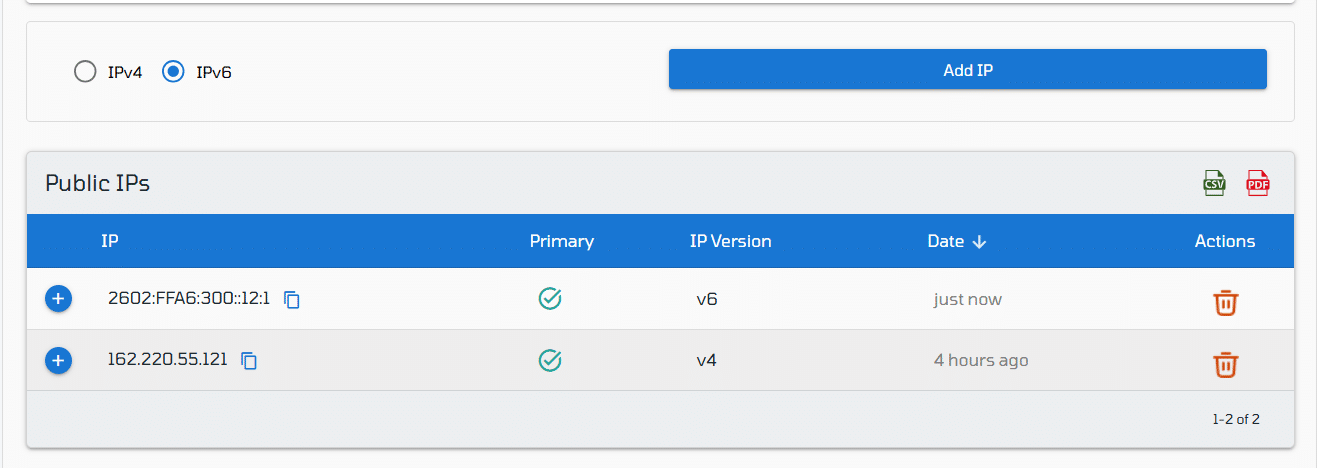
To add a new IP, begin by choosing between the two radio buttons to specify whether you prefer an IPv4 or IPv6 address. Next, click the Add IP button, and a new IP will be automatically generated and assigned to your existing VPSie.
To Remove an IP, click on the red trash bin icon located at the end of your IP line in the section, allowing you to delete any IPs assigned to the current VPSie.
For exporting the IPs list, utilize the green CSV or the red PDF icons to generate a file containing the list of IPs assigned to your VPSie in either of the mentioned file formats.
Moreover, you have the capability to include and administer IP addresses for multiple VPSies by navigating to Resources > Networking > Additional IPs.
To create one, begin by choosing the specific VPSie to which you intend to add IPs. Optionally, you can assign Tags, and then proceed by clicking on Add IP to finalize the process.