This guide will show you How to deploy Windows 2008 Server R2 or Windows server 2012 R2 on VPSie in 2 minutes
Windows Server is a brand name for a group of server operating systems released by Microsoft. It includes all Windows operating systems branded “Windows Server”, but not any other Microsoft product.This includes the Windows Server editions of the Microsoft Windows operating system itself, as well as products targeted at the wider business market.
First, you need to create an account in VPSie.You can create a free account by following this link.After, fund your account and click Add VPS button.
Now follow all my steps.
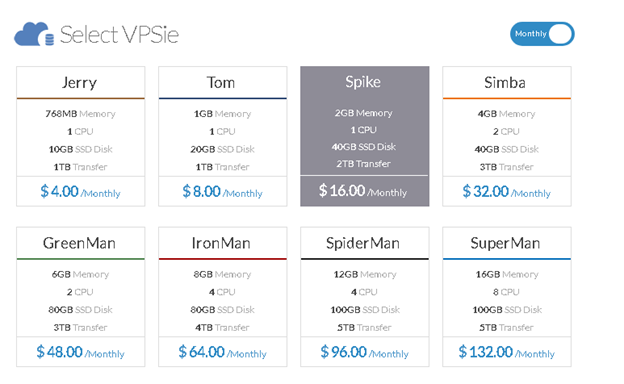
Select VPSie plan that you want to install Windows Server on it.Windows Server needs much space.
The plan can be Spike or more.
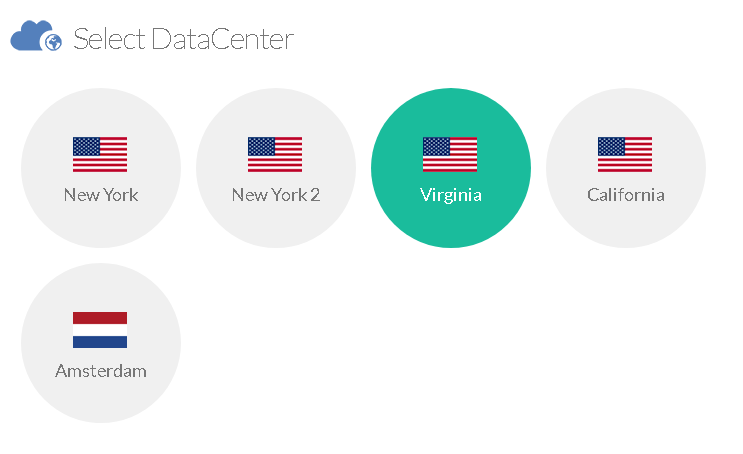
When you choose data center you will need to be secure that the clients are close to data center not with your location.If you are from Europe but have clients from USA you need to select USA locations.
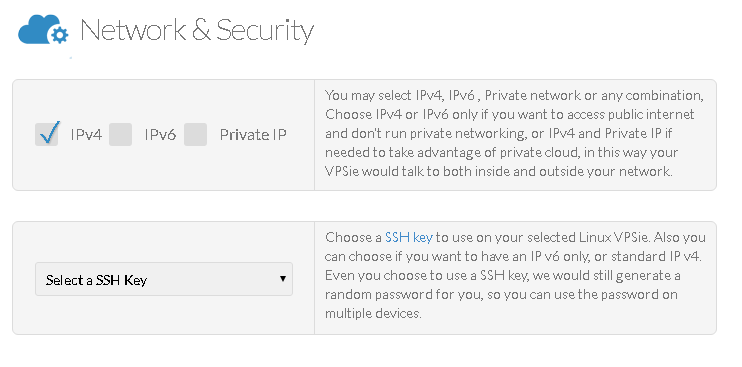
For the IP selection, we will suggest you to default (only IPv4 checked).
The select an SSH Key section is not required.
If you have added SSH key you can select it.If you do not understand it just skip.
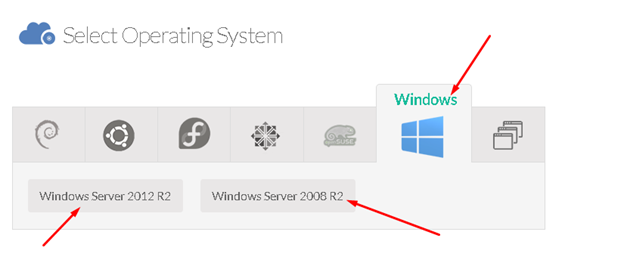
In Select Operating System section you will need to click Windows and select which ever you want.
VPSie supports only Windows Server 2008 R2 and Windows Server 2012 R2.This does not mean that in the future we cannot support other versions.
After, give one Hostname for your server.The hostname may be according to your will.
For the final step, click Create Vpsie button.After 30 seconds your server will be up.
Your access details will be emailed to you.After getting access details, log in by Windows default remote desktop client or third party client such as Parallels RDP 2x or similar for Mac OS.
Enjoy Windows Servers!