
Protect your data on your own schedule. While automatic backups handle your routine security, On-Demand Backups let you create a full, point-in-time copy of your database whenever you need it like right before a major site update or code deployment.
Follow this quick guide to learn how to create and manage manual backups in just a few clicks.
1. Go to the On-Demand Backup Page
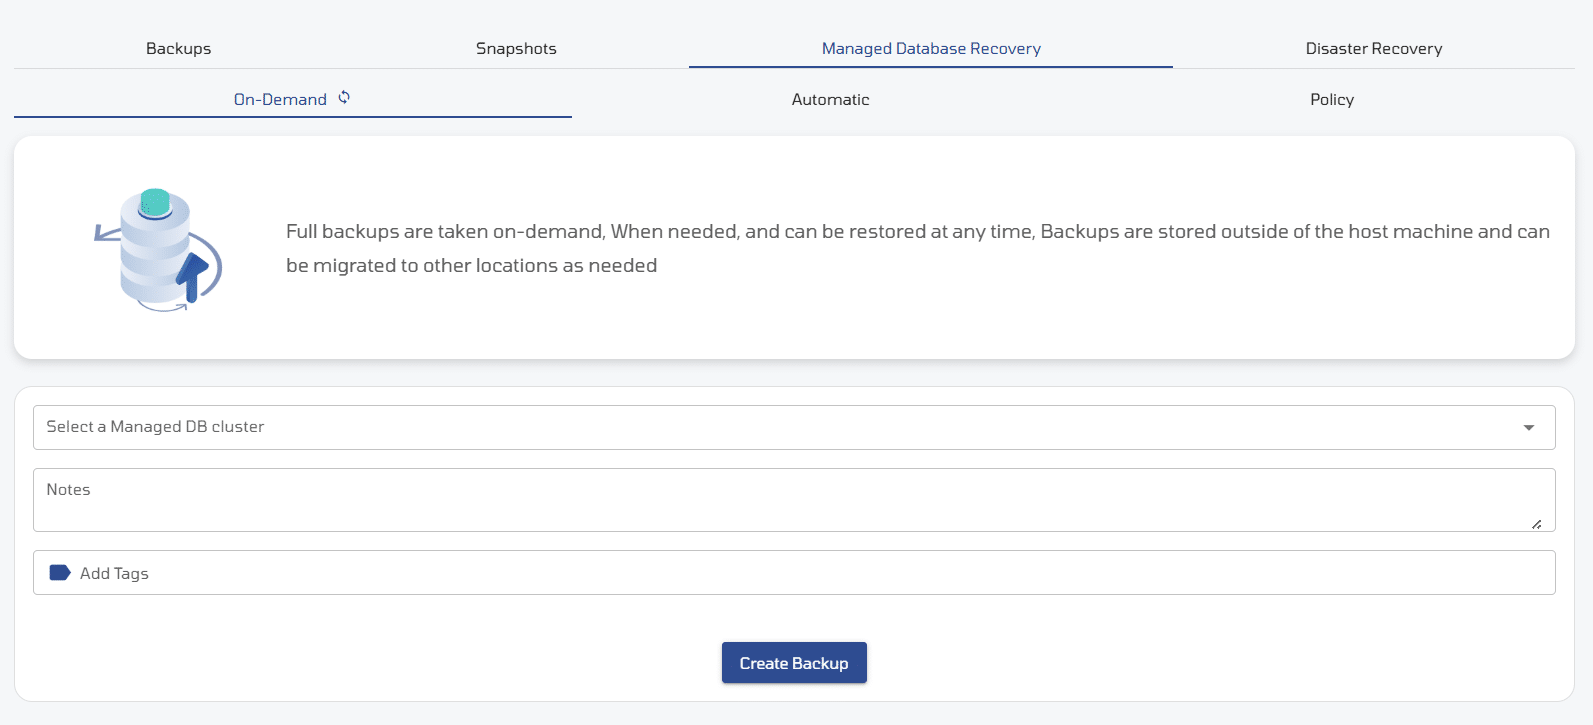
- Navigate to the Managed Database Recovery tab at the top of your dashboard.
- Make sure Managed Database Recovery is highlighted, then select On-Demand.
2. Choose Your Database
- Click the Select a Managed DB cluster dropdown menu and choose the database you want to back up.
3. Add Details (Optional)
- Notes: Add a quick description (e.g., “Pre-update backup v1.4”) so your team knows why it was created.
- Tags: Click Add Tags to organize and label your backups for easy filtering later.
4. Create the Backup
- Click the blue Create Backup button.
5. Managing Your Backups
Once your backup is successfully created, it will appear in the Managed DB On Demand Backups list. From here, you can perform several quick actions:

- Download Backup: Click the Download icon to save a local copy of the backup file directly to your device for offline storage or local testing.
- Restore Database: Click the Restore icon to revert your database back to the exact state captured in this backup.
- Delete Backup: Click the Trash icon to permanently remove backup.
- View Backup Details (Clickable Backup Name): Click directly on the Backup Name link to open its detailed overview page, where you can view additional metadata.