
Policy-Based Backups give you total control over your backup schedules and retention rules. Instead of relying on default schedules, you can create customized backup jobs that run on specific days or times and automatically prune older copies to keep your storage organized.
Follow this quick guide to learn how to create and manage manual backups in just a few clicks.
1. Navigate to the Policy Tab
- Go to Managed Database Recovery.
- Click on the Policy tab.
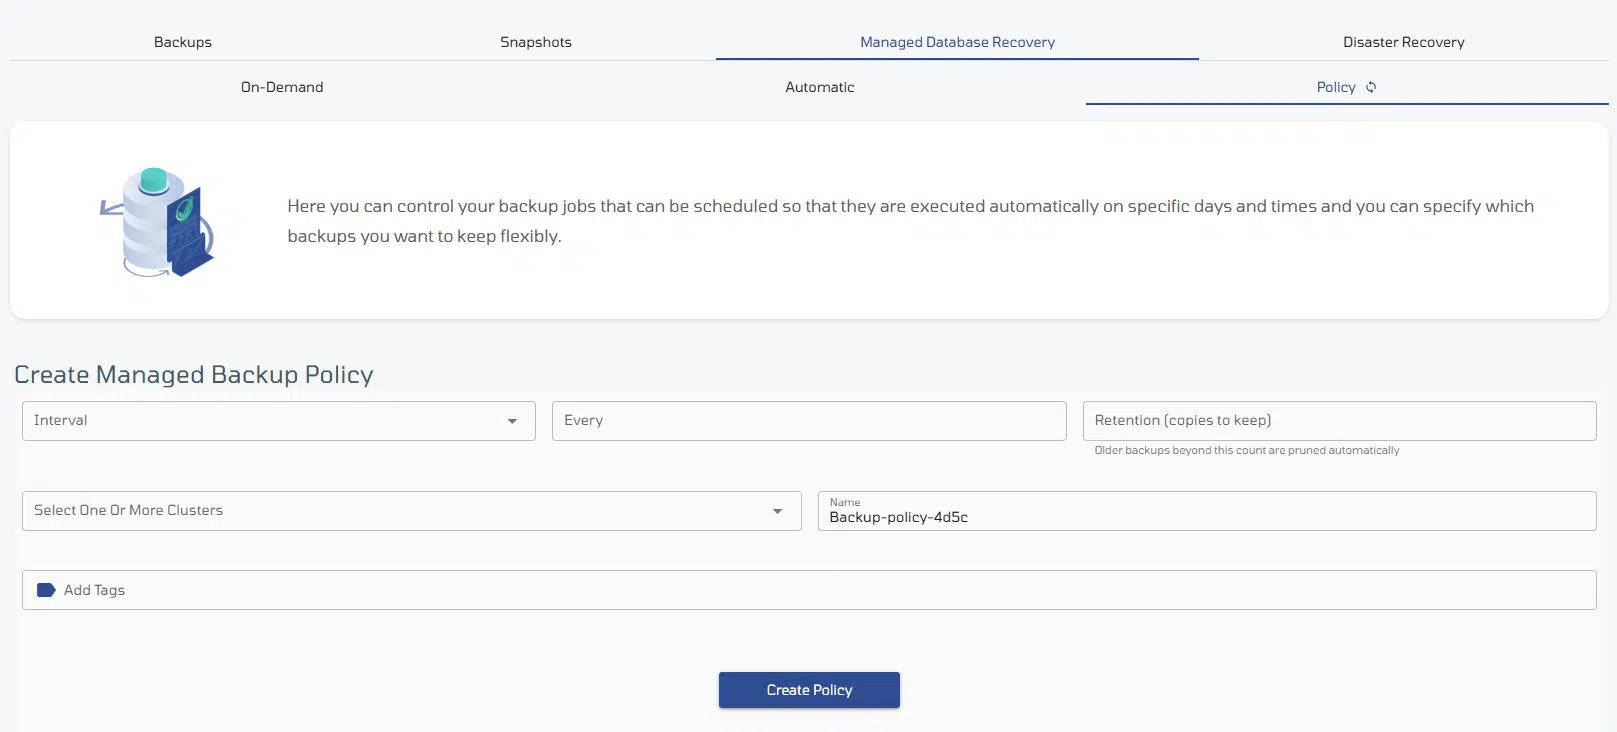
2. Configure the Schedule & Retention
- Interval: Choose the backup frequency unit from the dropdown (e.g., Hours, Days, Weeks).
Every: Specify the numerical unit for how often the backup job runs.
Retention (copies to keep): Set the maximum number of backup copies you wish to store.
3. Assign Clusters and Details
- Select One Or More Clusters: Open the dropdown menu and choose which database clusters this policy applies to.
- Name: Enter a recognizable name for your policy, or use the auto-generated policy name.
- Add Tags (Optional): Click Add Tags to attach custom labels or metadata for easy sorting.
4. Save and Activate
- Click the blue Create Policy button.
5. Managing Your Policies
Once a policy is created, it will appear under the Backup Policies table at the bottom of the page.

1. Edit Policy Settings (Clickable Policy Name)
Click directly on the Policy Name (e.g., Backup-policy-4d5c) on the left side to open the settings page and make adjustments to the schedule, retention count, or associated clusters.
2. Enable / Disable Policy (Active Toggle)
Use the Active switch to temporarily pause or resume the policy execution without deleting it.
3. Delete Policy (Trash Icon)
Click the Trash icon under the Actions column on the right to permanently delete the backup policy.