This tutorial will demonstrate How to Install Active Directory on Windows Server 2012
Active Directory is a service provided by Microsoft that allows for the centralized management of network resources, including users, groups, computers, and applications. Active Directory is used primarily in Windows-based environments but can also be integrated with other operating systems.
Active Directory is a hierarchical database that stores information about network resources in a structured format. This database is partitioned into multiple domains, with each part representing a logical boundary for the management of resources. Fields can be subdivided into organizational units (OUs), which group resources based on common characteristics.
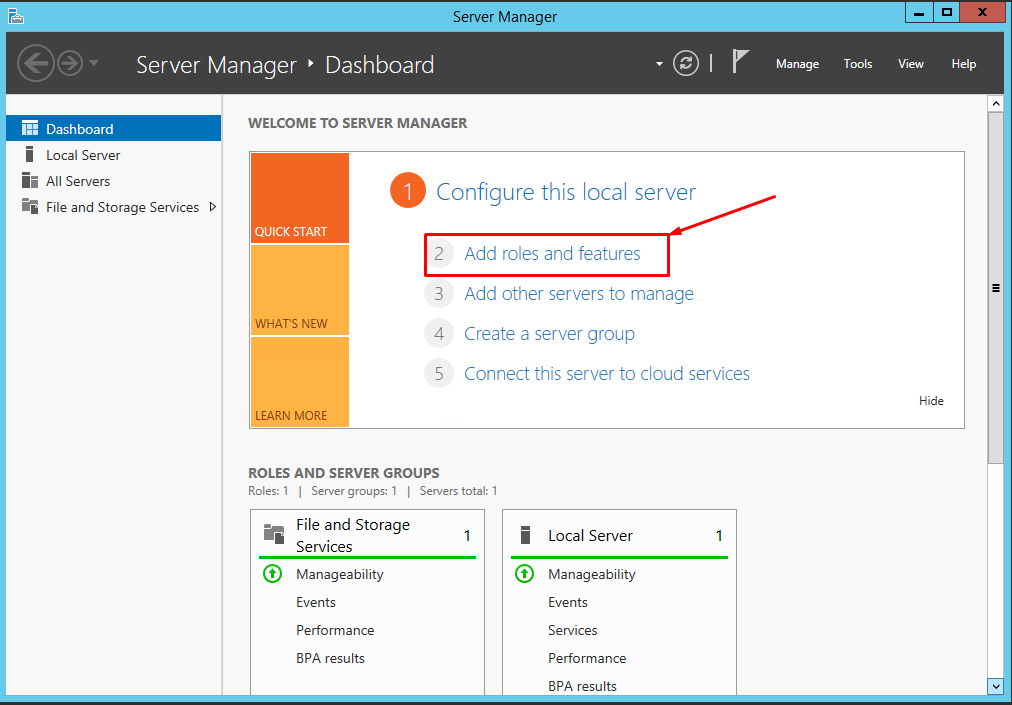
To install Active Directory, log in to your windows server and open Server Manager.
After opening, select Add roles and feature.
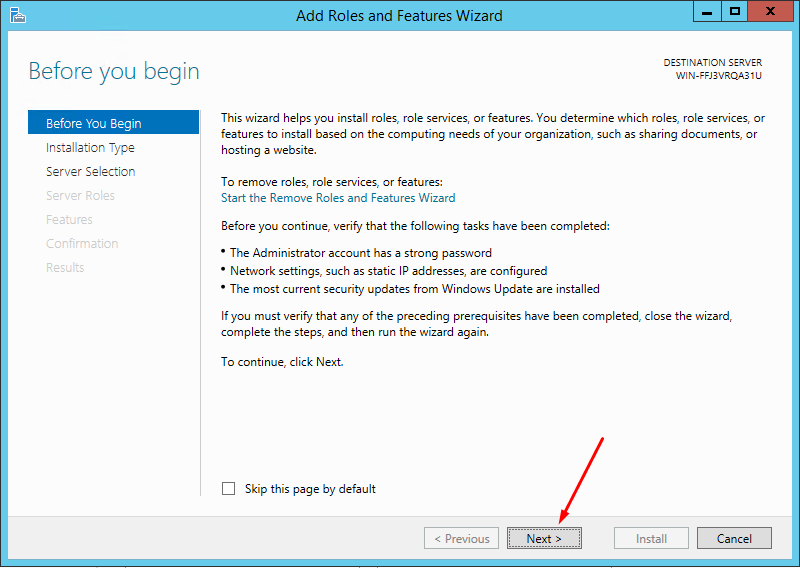
In the Before You Begin page, click Next.
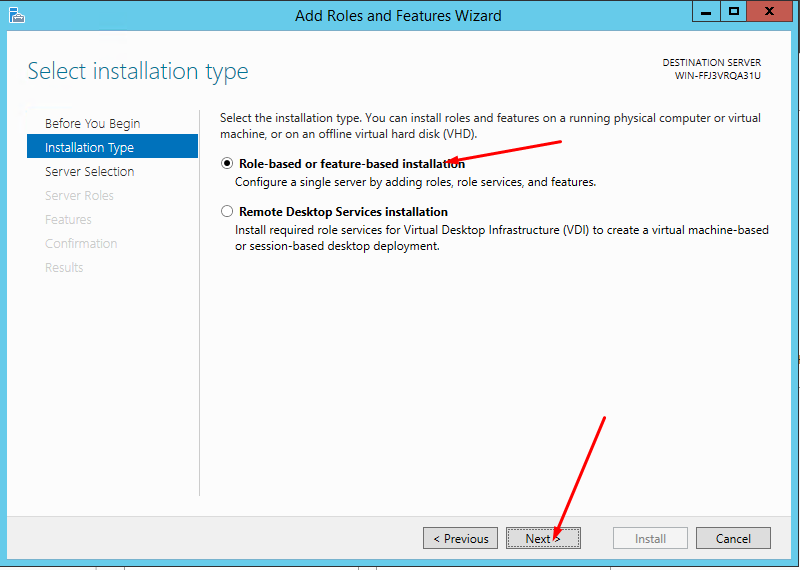
Select the installation type name as Role-based or feature-based installation and go Next.
After, Server Selection leaves as default and goes Next.
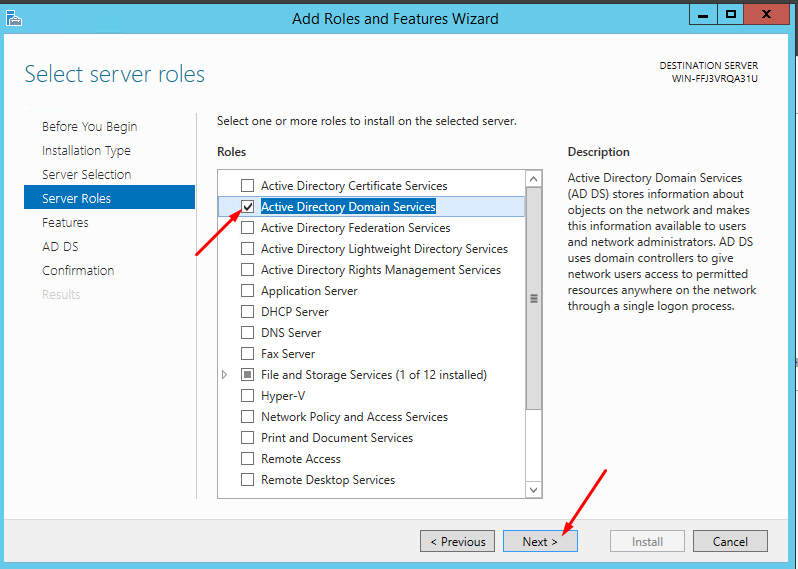
In Server Roles, mark Active Directory Domain Services role and go Next.
After, skip the Feature page by clicking Next. Also, click Next on the AD DS page.
On the Confirmation page, review page, and click Install.
After installing, start Remote Registry Service.
To do it, open Control Panel and select Administrative Tools.
Then select Services and find Remote Registry.
Right-click the Remote Registry Service and fix Properties.
In Startup Type, select Automatic; in Startup Status, choose Start.
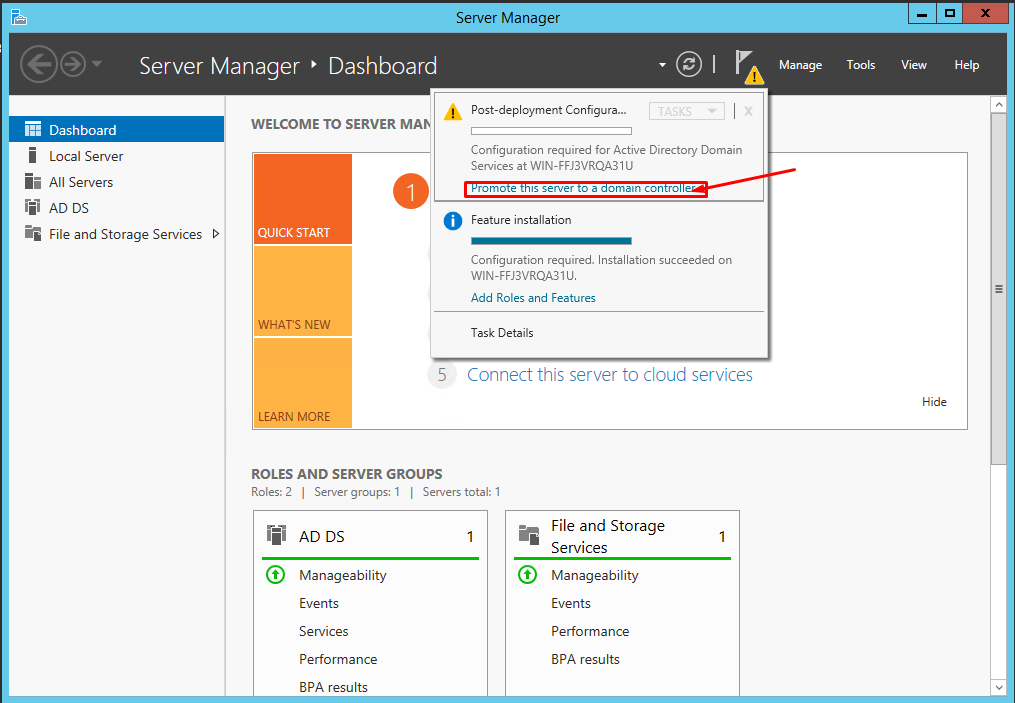
Now configure the AD DS role to a domain controller.
To configure the AD DS role click on Promote this server to a domain controller.
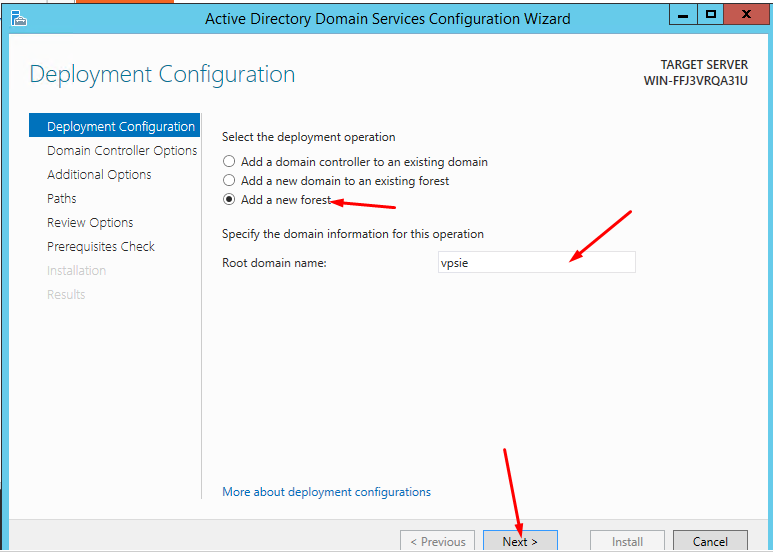
After, select New Forest and type Root domain name
In the Domain Controller Option tab, like domain and forest functional level and input the password. After clicking Next. When you hit Next, you will go to the DNS Options tab to review and go Next.
Additional Options, Paths, and Review Options tabs are accessible. In Prerequisites Check, click Install. Your windows server will reboot automatically when installed.
After rebooting, you can reconnect again via RDP.
You have successfully installed Active Directory on Windows Server 2012.
If you have any problem, don’t hesitate to get in touch with us and open the ticket in VPSie.
!
If you have questions, you can always ping us on chat or open a support ticket for help.
Active Directory provides several key features that make it a valuable tool for managing network resources.
Active Directory Key features
Authentication and Authorization: Active Directory provides a way to authenticate users and authorize their access to network resources. When users log in to a computer, Active Directory verifies their identity and grants them access to the help they can use.
Group Policy Management: Active Directory allows administrators to define and apply policies to groups of computers and users. These policies can be used to enforce security settings, configure software, and enforce compliance with organizational standards.
Resource Management: Active Directory provides a centralized location for managing network resources, including users, groups, computers, and applications. This can simplify network administration and improve resource utilization.
Directory Replication: Active Directory supports directory replication, which allows administrators to distribute the directory database across multiple servers for redundancy and fault tolerance.
Active Directory is often used in large organizations with complex network environments. It can be used to manage resources across multiple locations and be scaled to accommodate large numbers of users and devices.
Active Directory can also enforce security policies and ensure compliance with regulatory standards.
However, there are some disadvantages to using Active Directory. These include:
Complexity: Active Directory can be complicated to set up and manage, requiring specialized intelligence and skills. This can make it easier for smaller organizations or those with dedicated IT staff to implement and maintain.
Cost: Active Directory is a commercial product, which means it can be expensive to license and implement. Smaller organizations may find the cost prohibitive.
Vendor Lock-In: Once a company has invested in Active Directory, switching to a different solution can be difficult and expensive. This can limit a company’s ability to adopt new technologies or exploit new features and capabilities.
Despite these disadvantages, Active Directory is famous for managing Windows environment network resources. It provides a range of features and capabilities that can simplify network administration and improve resource utilization. Active Directory can be an excellent choice for organizations that need a robust, scalable solution for managing their network resources.
Active Directory is a directory service provided by Microsoft that allows for the centralized management of network resources, including users, groups, computers, and applications.
Active Directory provides several key features that make it a valuable tool for managing network resources, including authentication and authorization, group policy management, resource management, and directory replication.
Yes, once a company has invested in Active Directory, switching to a different solution can be difficult and expensive. It can limit a company’s ability to adopt new technologies or exploit new features and capabilities.
Active Directory is often used in large organizations with complex network environments. It can manage resources across multiple locations and be scaled to accommodate many users and devices.
Views: 1,912
Need help with this topic? Ask our AI Assistant!
Assistant focuses on: Install Active Directory on Windows Server 2012
Hello! How can I help you with "Install Active Directory on Windows Server 2012"?