How to Install Zabbix Server on Ubuntu 20.04
Among the many tools, Zabbix offers for monitoring IT components including networks, servers, virtual machines (VMs), and cloud services.
Monitoring metrics, such as CPU load, network utilization, and disk space consumption, are available with Zabbix. Monitoring is possible on Linux, HP-UX, Mac OS X, and Solaris; Windows monitoring can only be done using an agent.
The objective of this article is to provide instructions on how to install Zabbix on Ubuntu 20.04. Let’s get started.
Step 1: Configure VPSie cloud server
- Sign in to your system or register a newly created one by logging in to your VPSie account.
- Connect by SSH using the credentials we emailed you.
- Once you have logged into your Ubuntu instance, run these commands to update your system.
# apt-get update
Step 1: Install and Setup Apache
You can install Apache by running the following command if you don’t already have it.
# sudo apt install apache2 –y
Installed Apache need to be started and enabled. Execute the following command.
# sudo systemctl start apache2

# sudo systemctl enable apache2
Step 2: Install PHP and associated modules
The following apt command can be used to install PHP packages:
# sudo apt install php php-mbstring php-gd php-xml php-bcmath php-ldap php-mysql
After you have completed the PHP installation, you will need to edit the PHP configuration file under /etc/php/7.4/apache2/php.ini.
# sudo vim /etc/php/7.4/apache2/php.ini
The following information should be added to the file.
memory_limit 256M
upload_max_filesize 16M
post_max_size 16M
max_execution_time 300
max_input_time 300
max_input_vars 10000
date.timezone = ‘America/New_York’
The Apache service must be restarted for the changes to take effect.
# sudo systemctl restart apache2
Step 3: Install MariaDB database server
Run the following command to install MariaDB Server packages:
# sudo apt install mariadb-server
When your database server is installed, ensure it is hardened using the following command:
# sudo mysql_secure_installation
You should start by setting the root password. All remaining prompts should be answered with ‘Y‘:
Step 4: Create Zabbix user and database
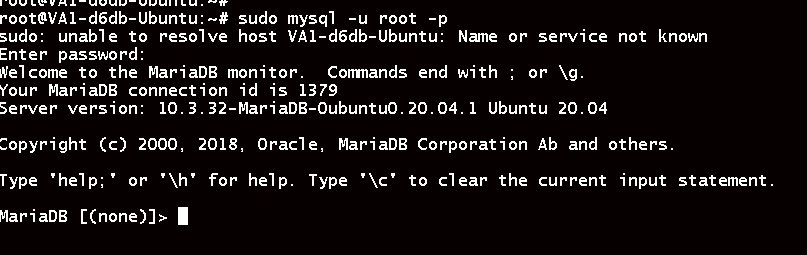
After that, we will create a database user on the Zabbix server. To do so, you must first log in to the MariaDB instance:
# sudo mysql -u root -p
Set up a Zabbix user and database as shown, and grant the user all permissions as indicated
CREATE DATABASE zabbix_db character set utf8 collate utf8_bin;
CREATE USER ‘zabbix_user’@’localhost’ IDENTIFIED BY ‘zabbix123’;
GRANT ALL PRIVILEGES ON zabbix_db.* TO ‘zabbix_user’@’localhost’ WITH GRANT OPTION;
FLUSH PRIVILEGES;
Step 5: Enable Zabbix repository
Download the Zabbix release Debian package using wget in order to add the repository to your system.
# wget https://repo.zabbix.com/zabbix/5.0/ubuntu/pool/main/z/zabbix-release/zabbix-release_5.0-1+focal_all.deb
After that, type the following to enable Zabbix:
# sudo dpkg -i zabbix-release_5.0-1+focal_all.deb
Run the following command to update the system,
# sudo apt update
Step 6: Install Zabbix Server on Ubuntu 20.04
Execute the following command,
# sudo apt install zabbix-server-mysql zabbix-frontend-php zabbix-agent zabbix-apache-conf
Step 7: Configure Zabbix server
open the file /etc/zabbix/zabbix_server.conf using the following command.
# sudo vim /etc/zabbix/zabbix_server.conf
Update your database settings according to your database user settings
DBHost=localhost
DBName=zabbix_db
DBUser=zabbix_user
DBPassword=zabbix123
After that, load the default Zabbix schema.
# cd /usr/share/doc/zabbix-server-mysql
# zcat create.sql.gz | mysql -u zabbix_user -p zabbix_db
Then, enable the Zabbix service to start automatically as soon as the computer starts and restart the service to apply your settings.
# sudo systemctl enable zabbix-server

# sudo systemctl restart zabbix-server
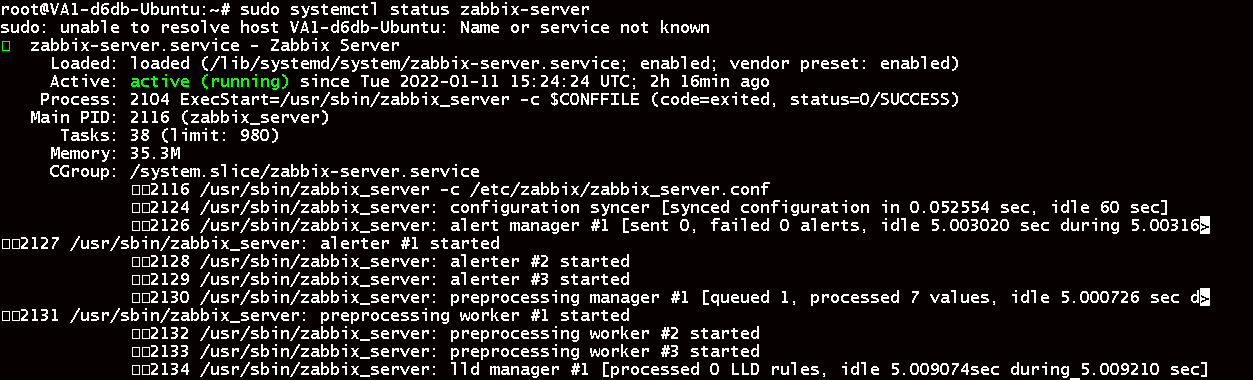
Use the following command to check Zabbix’s status:
# sudo systemctl status zabbix-server
Attempt to restart again the apache
# sudo systemctl restart apache2
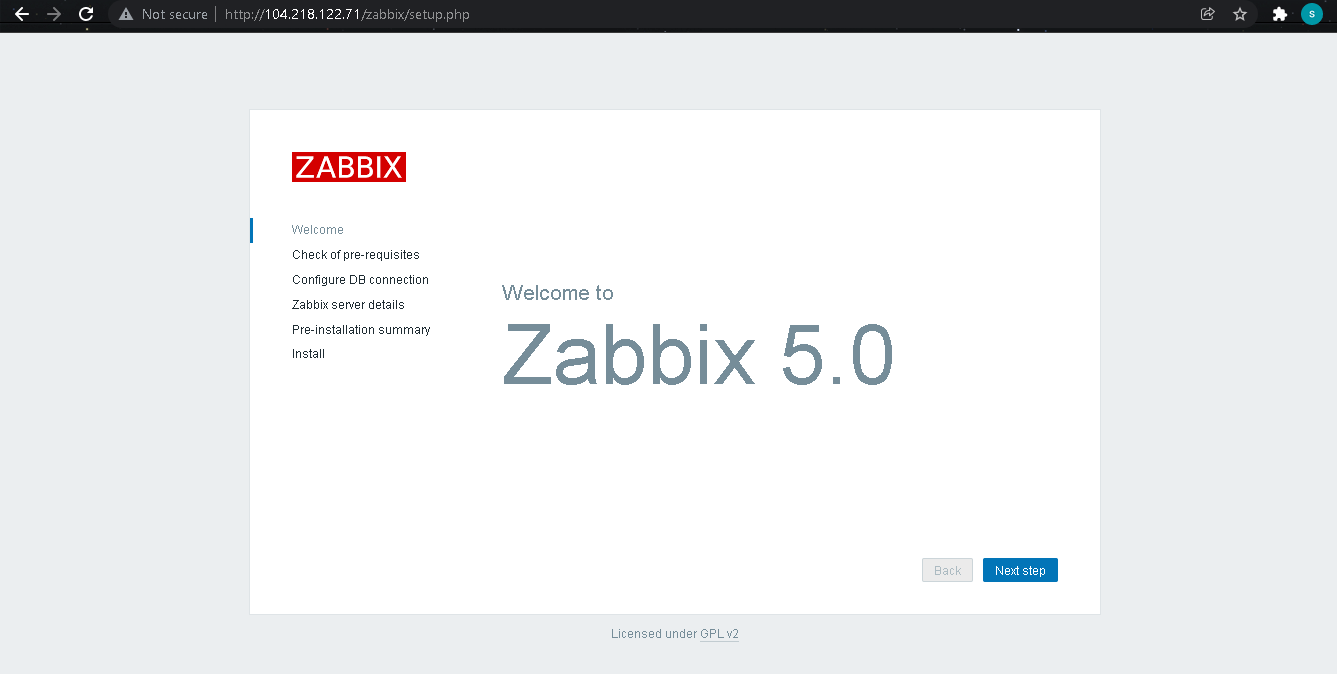
Step 7: Complete Zabbix installation on a browser
Everything is in order now. Now you just have to complete the web interface installation. To do this, open your web browser and enter the following address:
http://{Yourserverip}/zabbix
During the Zabbix web installation, you will be required to enter your database credentials, Click the install button once you have completed all the steps.

We have successfully installed and configured Zabbix on Ubuntu 20.04. Our work is now complete. You may now add devices and hosts etc to monitor. Refer to the official Zabbix documentation for more information. Thanks for reading! I hope it was informative for you!