
How to Install Arduino IDE on Ubuntu 20.04 LTS
The Arduino platform provides easy-to-use software and hardware that is open-source and free. Arduino is designed to facilitate the creation of interactive objects or environments for artists, designers, hobbyists, or anyone who wants to create interactive objects and environments. Arduino IDE allows developers to write code and upload it to Arduino boards. IDE is compatible with a variety of operating systems such as Windows, Mac OS X, and Linux. It supports C and C++ programming languages. Let’s get started with the installation.
For Ubuntu systems to be registered with VPSie, you need to create a VPSie account if you don’t have one already.
Our example is based on an Ubuntu instance with GUI installed. Here is a link that will guide you to installing Ubuntu’s GUI if you do not already have it installed.
Now open your terminal and run the following commands to update your system.
# apt-get update && apt-get upgrade -y
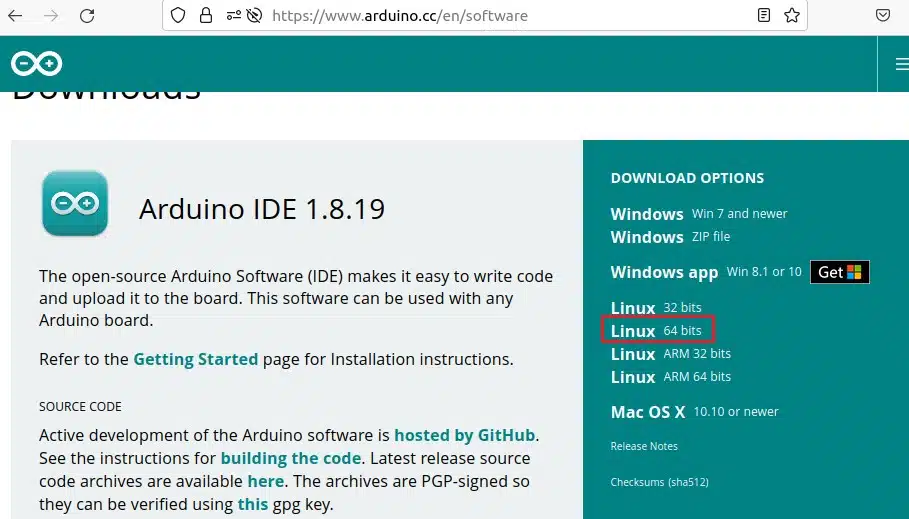
Step 1: Download Arduino Package
Visit the official website for the latest Package.

Step 2: Install Arduino IDE
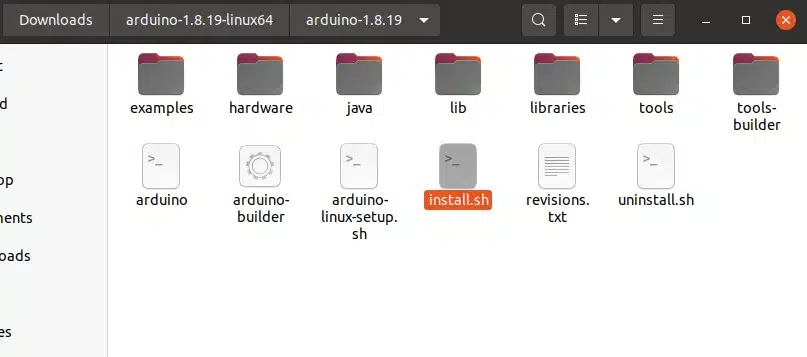
When the package is successfully downloaded, extract it into the downloads folder. If you navigate to the extracted folders, you will see a file named install.sh. This should be installed through the terminal.
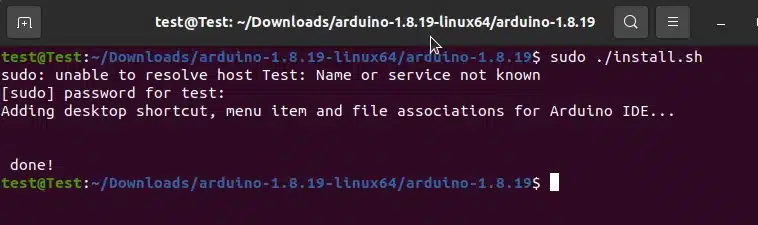
Browse to the folder where install.sh is installed using the cd command and run the following command to install the Arduino IDE:
# sudo ./install.sh
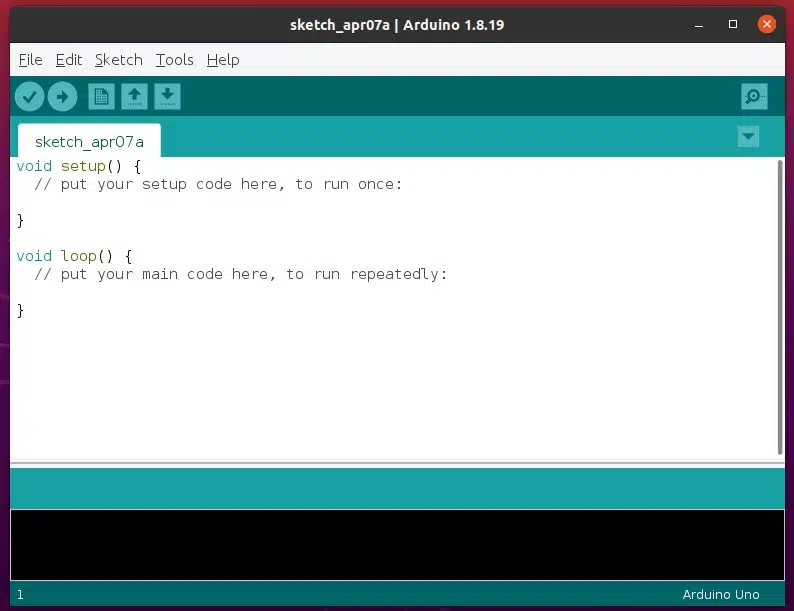
Step 3: Launch Arduino IDE
Upon successful installation, verify that the Arduino IDE icon appears in the Application menu and open it.

Your Ubuntu instance now contains the Arduino IDE, which has been successfully installed. It is our hope that you have enjoyed this article.
IP to ASN Mapping and GeoIP Services
FAQ
Arduino IDE is an open-source software used to write and upload code to Arduino microcontrollers. It includes a code editor, a compiler, and a debugger.
The process for installing Arduino IDE on Ubuntu involves the following steps:
Step 1: Open a terminal window and run the following command to update the package repository:
sudo apt update Step 2: Run the following command to install the Arduino IDE package:
sudo apt install arduino Step 3: Once the installation is complete, you can launch the Arduino IDE from the Applications menu or by running the following command in the terminal:
arduinoThe minimum system requirements for installing Arduino IDE on Ubuntu are:
- Ubuntu 16.04 or later
- 2GB of RAM
- 1GB of disk space
Yes, Arduino IDE is available for many Linux distributions, including Debian, Fedora, and CentOS. The installation process may vary slightly depending on the distribution, but the basic steps are similar.
Once you have installed Arduino IDE, connect your Arduino board to your Ubuntu computer using a USB cable. In the Arduino IDE, select the board type and serial port from the Tools menu. You can then write and upload code to the board using the IDE.
After installing Arduino IDE on Ubuntu, you may need to install additional libraries or drivers depending on your project and hardware. You can find many libraries and resources for Arduino online, including on the official Arduino website.