How to Install Apache Tomcat 10 on Ubuntu 20.04 | 18.04
The Apache Foundation’s Tomcat is a free and open-source web server that supports Java-based applications. Different java technology is supported by Apache Tomcat, including JavaServer Pages (JSP), JavaServlet, and Java Expression Language. Apache Tomcat may be installed from the Ubuntu software repository, which displays the latest, most stable version of Tomcat.
If you want to learn more about Apache Tomcat, visit:
The following article will demonstrate how to install Apache Tomcat on Ubuntu 20.04 with the Web Application Manager .
Step 1: Getting your system up and running
- Sign in to your system or register a newly created one by logging in to your VPSie account.
- Connect by SSH using the credentials we emailed you.
- Once you have logged into your Ubuntu instance, run these commands to update your system.
apt-get update && apt-get upgrade -y
Step 2: Install Java
Java runtime environment (JRE) must be installed on your system. In order to install Tomcat 10, you need a JRE 8 or higher version on your system. Execute the following command.
$ sudo apt update
$ sudo apt install default-jdk -y
Check the JAVA verson:
# java -version
openjdk version "11.0.11" 2021-04-20
OpenJDK Runtime Environment (build 11.0.11+9-Ubuntu-0ubuntu2.20.04)
OpenJDK 64-Bit Server VM (build 11.0.11+9-Ubuntu-0ubuntu2.20.04, mixed mode, sharing)
Step 3: Set up a Tomcat user
It is recommended for production deployments to create a new user for security reasons. Using this command will create a new user and group in your system named “tomcat“.
sudo useradd -m -d /opt/tomcat -U -s /bin/false tomcat
Step 4: Install Tomcat 10
To download Tomcat 10, run the following command:
# sudo apt install wget
# wget https://downloads.apache.org/tomcat/tomcat-10/v10.0.8/bin/apache-tomcat-10.0.8.tar.gz
Once the archive is downloaded, extract it as follows:
sudo tar xzvf apache-tomcat-10*tar.gz -C /opt/tomcat --strip-components=1
Don’t forget to set the right file permissions.
# sudo chown -R tomcat:tomcat /opt/tomcat/
# sudo chmod -R u+x /opt/tomcat/bin
Now that you have the latest Tomcat application installed, you are ready to go.
Step 5: Create Tomcat User
Next, create user accounts to secure access to admin/manager pages. In order to do this, edit conf/tomcat-users.xml using your editor and paste the following code between the <tomcat-users> </tomcat-users> tags. This configuration should be changed to a more secure password.
sudo nano /opt/tomcat/conf/tomcat-users.xml
Please enter the following values. Admin and manager passwords need to be changed and Close the file after saving.
<!-- user manager can access only manager section -->
<role rolename="manager-gui" />
<user username="manager" password="_SECRET_PASSWORD_" roles="manager-gui" />

<!-- user admin can access manager and admin section both -->
<role rolename="admin-gui" />
<user username="admin" password="_SECRET_PASSWORD_" roles="manager-gui,admin-gui" />
Step 6: Enable Remote Tomcat Access
Localhost is the only host accessible to Tomcat’s default manager and host manager. The following configuration files must be modified in order to allow remote access to this page.
sudo nano /opt/tomcat/webapps/manager/META-INF/context.xml
To allow connections from anywhere, remove the IP address restriction.
<Context antiResourceLocking="false" privileged="true" >
  <CookieProcessor className="org.apache.tomcat.util.http.Rfc6265CookieProcessor"
                   sameSiteCookies="strict" />
  <!-- <Valve className="org.apache.catalina.valves.RemoteAddrValve"
         allow="127\.\d+\.\d+\.\d+|::1|0:0:0:0:0:0:0:1" /> -->
  ...
</Context>
For the host manager application, edit context.xml as follows and Close the program after saving all files.
<Context antiResourceLocking="false" privileged="true" >
  <CookieProcessor className="org.apache.tomcat.util.http.Rfc6265CookieProcessor"
                   sameSiteCookies="strict" />
  <!--<Valve className="org.apache.catalina.valves.RemoteAddrValve"
         allow="127\.\d+\.\d+\.\d+|::1|0:0:0:0:0:0:0:1" /> -->
  ...
</Context>
Step 7: Create a Tomcat Systemd Unit File
To start and stop Tomcat, bash scripts are provided. But to make it easier, you can create a systemd startup script to manage Tomcat. The following content will be included in the tomcat.service file:
sudo nano /etc/systemd/system/tomcat.service
 Unit]
Description=Tomcat
After=network.target

[Service]
Type=forking

User=tomcat
Group=tomcat

Environment="JAVA_HOME=/usr/lib/jvm/java-1.11.0-openjdk-amd64"
Environment="JAVA_OPTS=-Djava.security.egd=file:///dev/urandom"
Environment="CATALINA_BASE=/opt/tomcat"
Environment="CATALINA_HOME=/opt/tomcat"
Environment="CATALINA_PID=/opt/tomcat/temp/tomcat.pid"
Environment="CATALINA_OPTS=-Xms512M -Xmx1024M -server -XX:+UseParallelGC"

ExecStart=/opt/tomcat/bin/startup.sh
ExecStop=/opt/tomcat/bin/shutdown.sh

[Install]
WantedBy=multi-user.target
Then restart the systemd daemon and Launch the Tomcat application for the first time.
sudo systemctl daemon-reload
sudo systemctl start tomcat.service
Enable the Auto-start option for the Tomcat service
sudo systemctl enable tomcat.service
Execute the following command to check the service status,
sudo systemctl status tomcat.service
Execute the following command to check the service status,
tomcat.service - Tomcat
     Loaded: loaded (/etc/systemd/system/tomcat.service; enabled; vendor preset: enabled)
     Active: active (running) since thu 2021-11-26 08:12:42 EST; 1h 31min ago
    Process: 481049 ExecStart=/opt/tomcat/bin/startup.sh (code=exited, status=0/SUCCESS)
   Main PID: 481056 (java)
      Tasks: 28 (limit: 4539)
     Memory: 268.2M
Step 8: Access Web Interface
Tomcat runs by default on port 8080. Your system can access the web interface after you have configured Tomcat on it. In your web browser, enter the IP address of your server or a domain name that points to the server, followed by port 8080:
http://{your ip/domain}:8080
Here is what your web experience will be like…
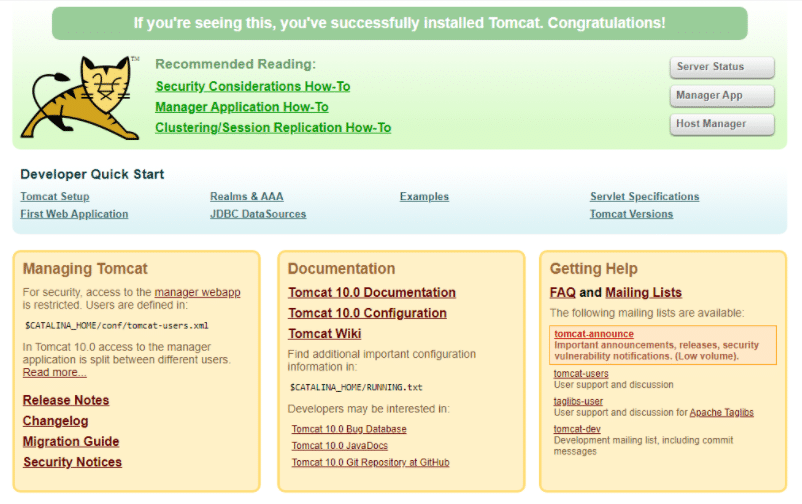
Further discussion of the web interface won’t be conducted here,it’s best to visit the official website for more information. We have completed the Apache Tomcat setup. Those interested in using it can now deploy their own applications.
Thanks for reading! I hope it was informative for you!
Enable Telnet on a Windows computer
Apache Tomcat is an open-source web server and servlet container that is used to run Java-based web applications.
Apache Tomcat 10 can be installed on Ubuntu 20.04 LTS or higher.
Apache Tomcat 10 requires at least 1 GB of RAM and 100 MB of disk space.
You can install Apache Tomcat 10 on Ubuntu by following these steps:
Update the Ubuntu package index:
sudo apt updateInstall Java Development Kit (JDK) 11:
sudo apt install default-jdkDownload Apache Tomcat 10 from the official website:
wget https://downloads.apache.org/tomcat/tomcat-10/v10.0.0-M12/bin/apache-tomcat-10.0.0-M12.tar.gzExtract the downloaded file:
tar -xvf apache-tomcat-10.0.0-M12.tar.gzMove the extracted folder to the /opt directory:
sudo mv apache-tomcat-10.0.0-M12 /opt/tomcatSet the appropriate permissions:
sudo chown -R ubuntu:ubuntu /opt/tomcatsudo chmod +x /opt/tomcat/bin/*.shCreate a Systemd service file for Apache Tomcat:
sudo nano /etc/systemd/system/tomcat.servicePaste the following contents into the file:
makefile[Unit] Description=Apache Tomcat Web Application Container After=network.target [Service] Type=forking Environment=JAVA_HOME=/usr/lib/jvm/default-java Environment=CATALINA_PID=/opt/tomcat/temp/tomcat.pid Environment=CATALINA_HOME=/opt/tomcat Environment=CATALINA_BASE=/opt/tomcat ExecStart=/opt/tomcat/bin/startup.sh ExecStop=/opt/tomcat/bin/shutdown.sh User=ubuntu Group=ubuntu UMask=0007 RestartSec=10 Restart=always [Install] WantedBy=multi-user.targetSave and close the file, then reload Systemd:
sudo systemctl daemon-reloadStart the Apache Tomcat service:
sudo systemctl start tomcatVerify that Apache Tomcat is running:
sudo systemctl status tomcat
Once Apache Tomcat is running, you can access the web interface by navigating to http://<your-server-IP>:8080 in your web browser.
Q: How can I customize Apache Tomcat’s settings? A: You can customize Apache Tomcat’s settings by modifying the configuration files located in the /opt/tomcat/conf/ directory. However, it is important to make backups of the configuration files before making any changes.