
Set it and forget it! Automatic Backups continuously safeguard your data by taking full backups on a regular, scheduled basis. This ensures you always have recent recovery points without needing to create backups manually.
Key Benefits:
- Effortless Protection: Full server backups run automatically in the background.
- Flexible Recovery: Restore your database or create a new Server Clone from any saved backup image whenever you need.
1. Navigate to Automatic Backups
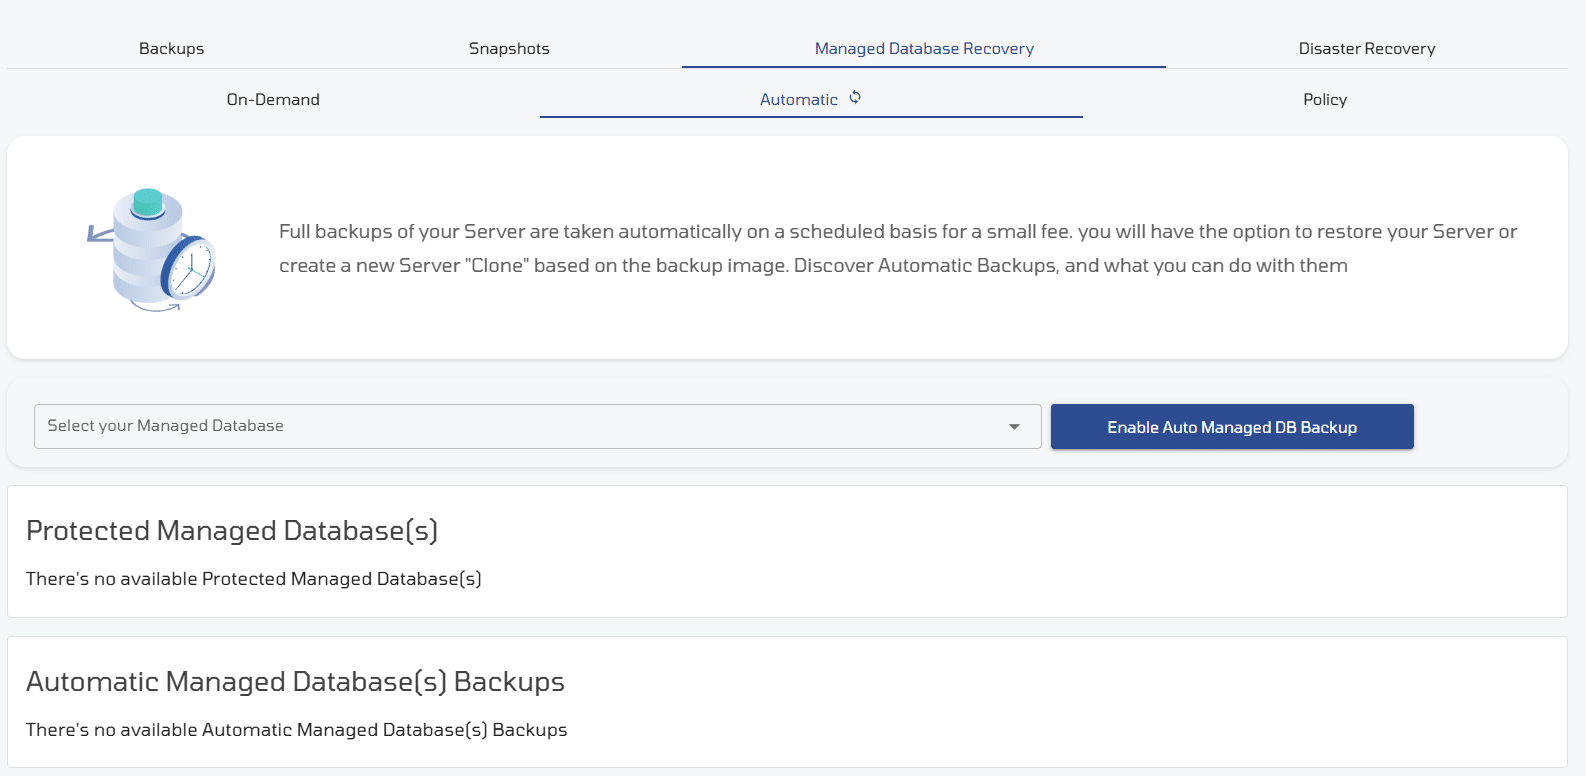
- Go to Managed Database Recovery.
- Select the Automatic tab.
2. Select Your Managed Database
- Click the Select your Managed Database dropdown menu and choose the database you want to protect.
3. Click Enable Backup
- Click the blue Enable Auto Managed DB Backup button.
- Set Your Backup Schedule (Pop-up).

A configuration window will appear. Toggle your preferred backup frequency using the available switches:
Daily: Captures daily recovery points for fast-changing data.
Weekly: Takes a full snapshot once a week.
Monthly: Stores monthly milestone backups for longer-term retention.
Confirm your schedule to activate automated protection.
4. Managing Protected Databases
Once automatic backups are enabled, your database will appear under the Protected Managed Databases table.

Adjusting Backup Frequency Toggles (Right Side)
Under the Actions column, you can toggle backup schedules on or off in real time without opening a new settings menu:
- Hourly / Daily / Weekly Toggles: Click the toggle switch next to any frequency to turn that schedule ON (blue) or OFF (gray).
- You can have multiple schedules active at once (e.g., keeping both Daily and Weekly enabled) depending on your backup needs.
Configuring Cluster Details (Left Side)
Click directly on the Cluster Name (e.g., LAX-MDB-f0c7) on the left side to navigate to the detailed overview page for that specific database cluster.