Welcome to our comprehensive tutorial on fortifying your Apache web server with the added layer of security provided by Let’s Encrypt SSL certificates on Debian 12. Online security is of utmost importance, ensuring that data transmitted between your server and users remains confidential is non-negotiable. Apache, renowned for its reliability, coupled with Let’s Encrypt user-friendly SSL certificate management, forms a powerful combination to create a secure and encrypted environment. Follow along as we guide you step-by-step through the process, empowering you to enhance the security of your web server and provide a safer online experience for your users.
Configure Debian 12 server on VPSie
Let’s create a Debian 12 Virtual Machine (VM) with a Fully Qualified Domain Name (FQDN). If you’ve already completed this step, feel free to skip ahead.
Please log in using your user credentials on the VPSie Controls panel and navigate to the page for creating a new server and select Debian 12 as the OS image.

Now, choose a convenient datacenter location that suits your business needs. Select an appropriate server package and choose a public IP as well.
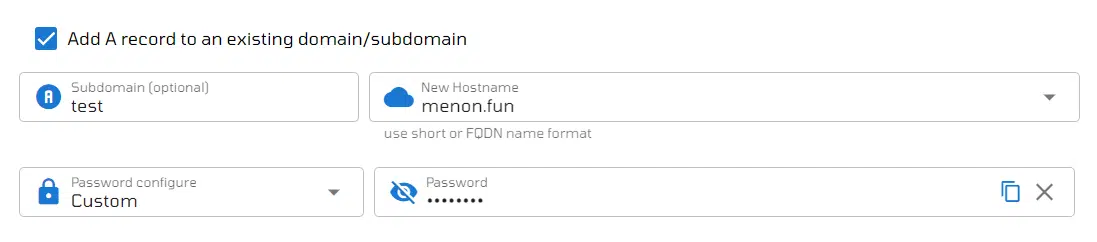
Tick the box labeled Add A record to an existing domain/subdomain to include your domain in the server. Subsequently, press the Add Server button to initiate the creation process.
Set up the Apache server
Access your server using your credentials through SSH. Prior to installing any new software, it is advisable to update the system packages to their most recent versions, execute the following commands to do so.
sudo apt update -y
Install Apache now:
sudo apt install apache2
sudo systemctl enable apache2 && sudo systemctl start apache2
Verify the status of Apache to ensure everything is functioning correctly.
sudo systemctl status apache2
sudo nano /var/www/html/index.html<!DOCTYPE html>
<html lang="en">
<head>
<meta charset="UTF-8">
<meta name="viewport" content="width=device-width, initial-scale=1.0">
<title>VPSie Tutorials</title>
</head>
<body>
<h1>Welcome to VPSie Tutorials</h1>
<p>This is a simple webpage on your VPSie server.</p>
</body>
</html>
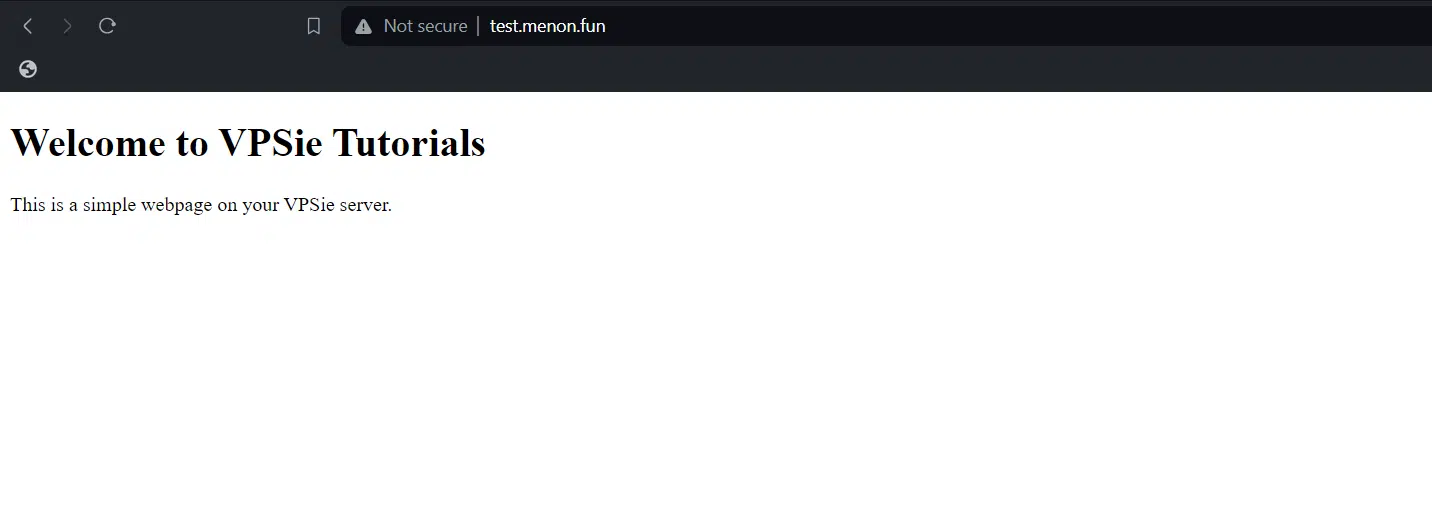
sudo chmod 644 /var/www/html/index.htmlAccess your website by opening a web browser and entering your server’s IP address or domain name in the address bar.
Set up an SSL certificate using Certbot.
To set up snapd, execute the provided command for installation:
sudo apt install snapdFollowing this step, proceed to install the core snap to ensure that you have the most up-to-date snapd:
sudo snap install core
If you have Certbot packages installed through an OS package manager like apt, it’s recommended to uninstall them before installing the Certbot snap. This ensures that when you execute the command certbot, it utilizes the snap version instead of the one installed via your OS package manager:
sudo apt-get remove certbot
Now run this command on the command line on the machine to install Certbot:
sudo snap install --classic certbot
Run the provided command to ensure that the certbot command can be executed:
sudo ln -s /snap/bin/certbot /usr/bin/certbot
Execute the following command to obtain a certificate using Certbot and automatically configure your Apache settings. This process will enable HTTPS access in a seamless single step:
sudo certbot --apache
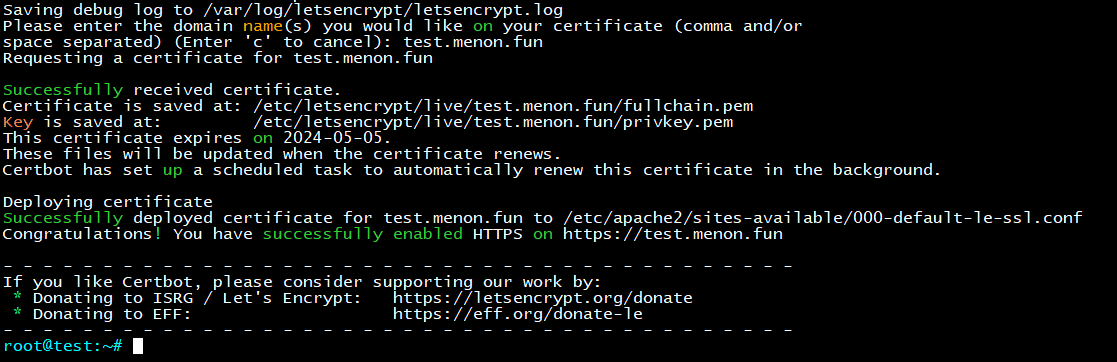
Upon executing the provided command, you will receive prompts to input your email address to receive notifications, agree to the Terms of Service (TOS), and provide your Fully Qualified Domain Name (FQDN) for attaching the SSL certificate. Please input the information as per the given instructions.
Upon inputting all the required information, you should see the output as follows.
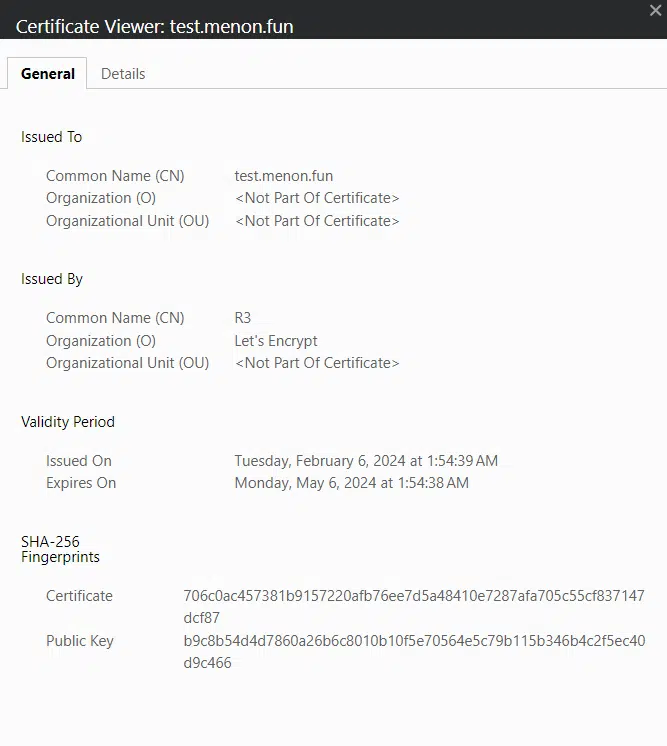
Check SSL certificate verification and website access
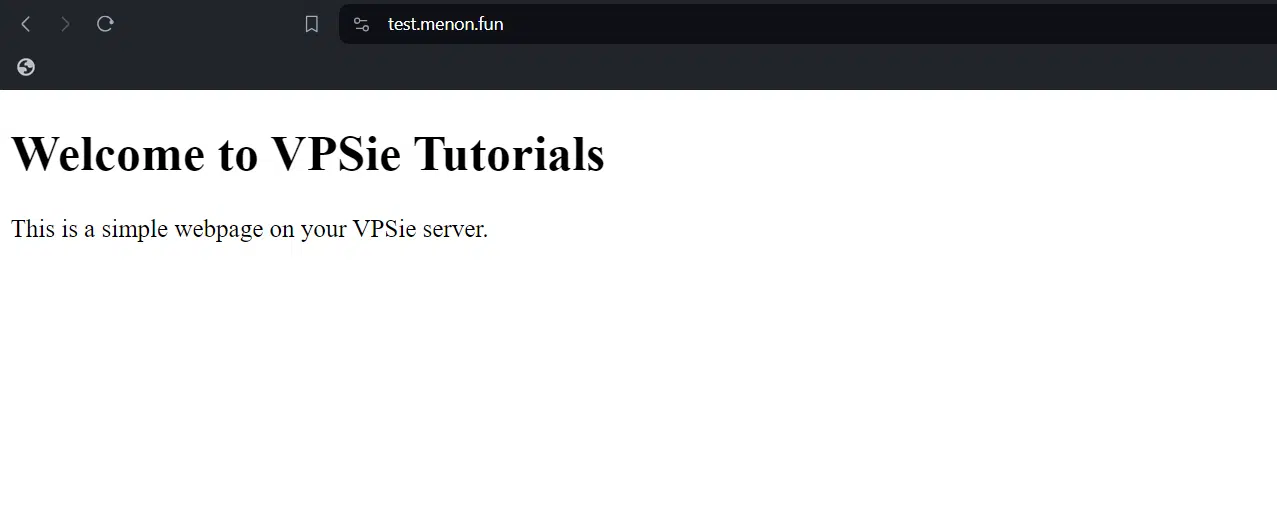
Verify that the SSL certificate is correctly assigned to your website. Access your website by entering the domain name (FQDN) into the address bar of your web browser.
https://yourwebsite.com/
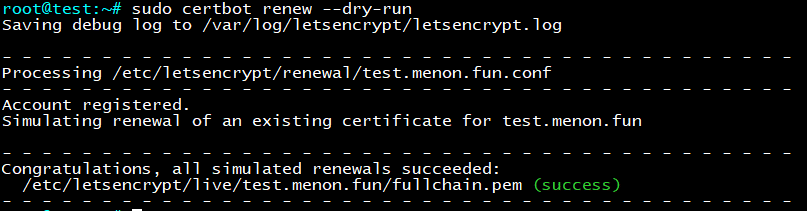
The existing certificate has a validity period of only 3 months, but you can easily set up automatic renewal. The Certbot packages installed on your system include a cron job or systemd timer that automatically renews your certificates before they expire. You won’t have to manually run Certbot again unless you modify your configuration. To test the automatic renewal for your certificates, you can execute the following command:
sudo certbot renew --dry-run
The instruction for renewing Certbot is available in one of these locations:
/etc/crontab/
/etc/cron.*/*
systemctl list-timers
In conclusion, implementing Certbot SSL certificates to secure Apache on Debian 12 provides a robust solution for enhancing the security of web servers. By following the steps outlined in this article, users can effectively safeguard their Apache installations, ensuring encrypted connections.