Create and Manage VPSie Load Balancer
Welcome to the comprehensive guide on creating and managing VPSie Load Balancer. Explore the intricacies of load distribution, optimizing website performance, and ensuring seamless user experiences. This article provides step-by-step instructions and insights to help you master the art of efficient load balancer configuration.
Create a Load balancer
Create a load balancer by clicking the + button, then choose Load Balancer from the drop-down.

Choose a Datacenter Region

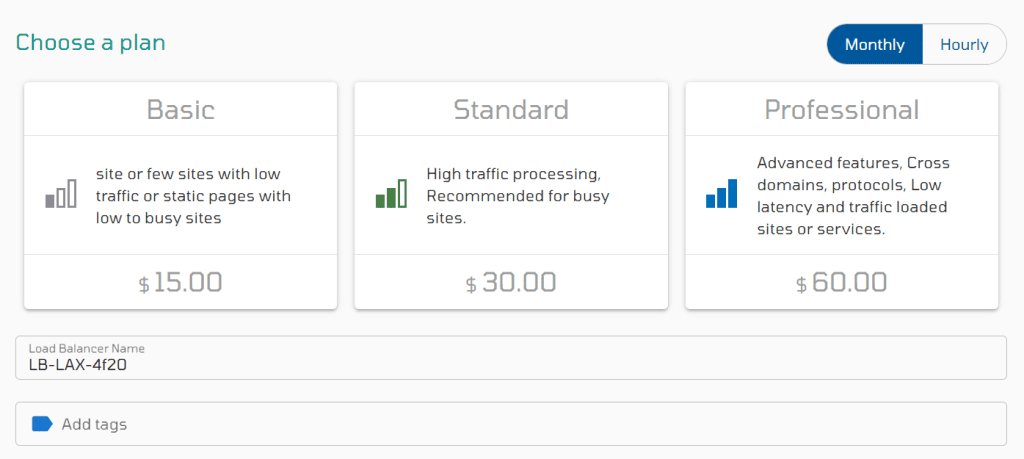
Select a pricing plan for your Load Balancer.
You have the option to either provide a custom name or VPSie will generate one for you.
Additionally, include relevant tags to categorize your project effectively.
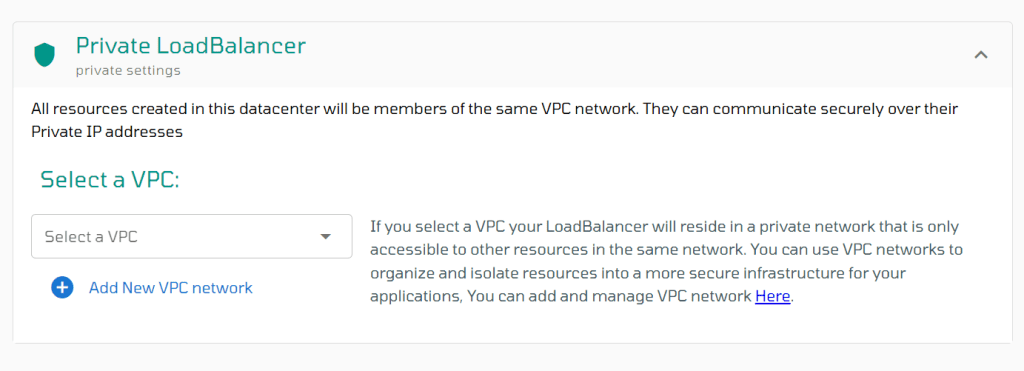
This section covers Private Load Balancer setup.
You can select VPSie’s default VPC subnet based on the chosen Datacenter or create a customized one for your project.
If your intention is to establish a Public LB, you can bypass VPC configuration.
Next, create a front-end rule for the Load Balancer, selecting a Protocol from the dropdown menu.
For HTTP protocol, specify a unique port number due to internal use of common ports by Load Balancers.
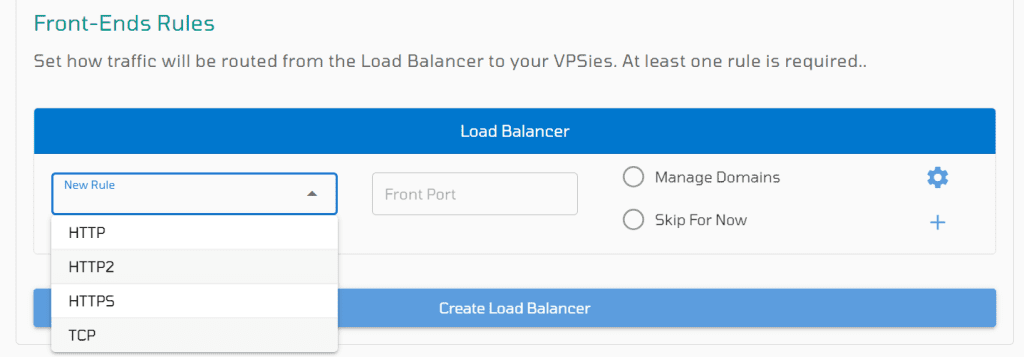
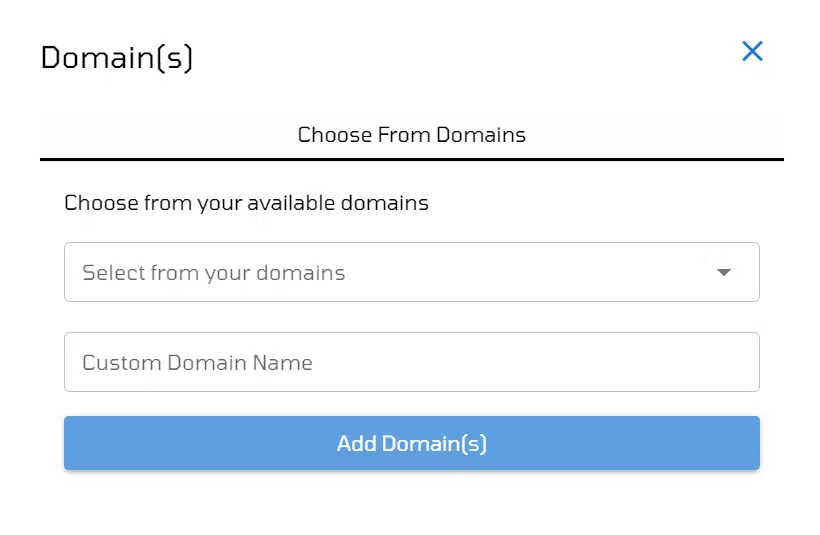
After setting up the front-end rule form, utilize the Manage Domain feature to add your domain to the LB. A popup will appear, enabling you to add your VPSie domain or a custom domain.
Then Create load balancer.
After the creation process is complete, you can effortlessly navigate to the list of Load Balancers and click on the LB name to control its settings.
Manage a Load balancer
VPSie offers a user-friendly GUI for Load Balancer management, with straightforward controls and intuitive navigation.

Domain Addition: Incorporate domains post LB creation using the + icon. Integrate custom or existing domains seamlessly.
Front-end Port Adjustment: Modify existing front-end ports effortlessly. Save changes to implement adjustments.
Adding Additional Front-end Rule: Similar to LB creation, append new front-end rules by completing the ‘New rule’ and front port fields. Enhance LB through the + icon inclusion.
Tag Addition: Include numerous tags as necessary, then select Apply for them to take effect within the Load Balancer configuration.
After adding the domain, proceed to include servers and perform necessary backend configurations as required.
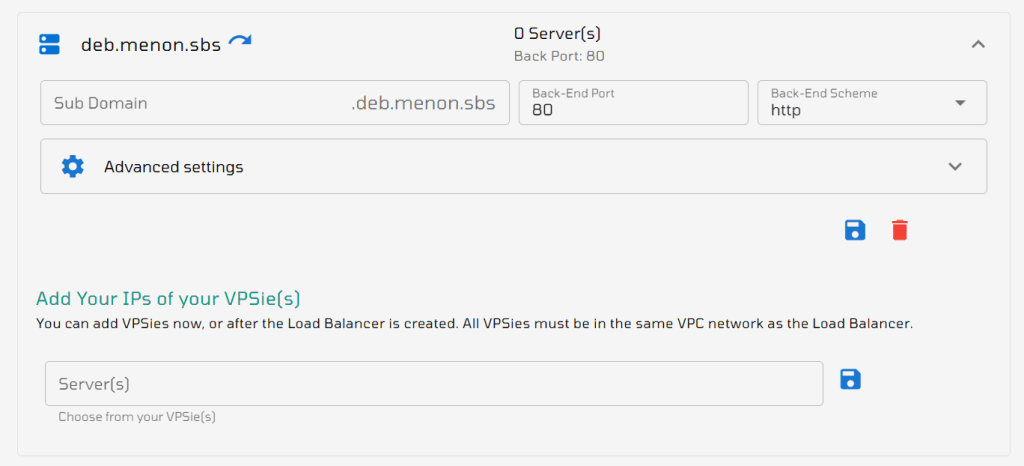
Backend Port: Designate the destination ports on backend servers for directing requests; easily adjustable by modifying the port number in the provided field.
Backend Scheme: Determine the communication protocol used for these connections by choosing from the available options in the dropdown menu [HTTP & HTTPS].
Adding Servers: clicking on the field reveals the available server list in a dropdown. From there, select the IP tags, and by clicking the save button, you can effectively add them.
Advanced Settings: It encompass the setup for balancing algorithms, cookie settings for sticky sessions, and health check parameters within the configuration.
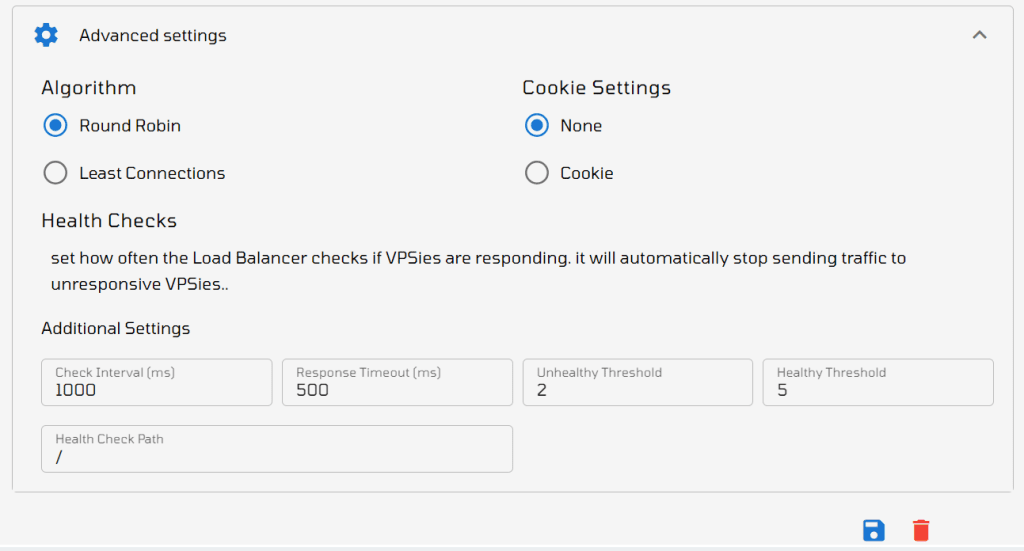
Here, you can select your preferred load balancing algorithm and configure cookies if needed.
The Health Check section offers default values for assessing backend server health, which can be customized to suit your needs.
Delete Load Balancer: To remove the load balancer, just click Delete and VPSie will take care of deleting the LB for you.