The LOMP stack, comprising Linux, OpenLiteSpeed, MySQL/MariaDB, and PHP, is a powerful and efficient combination for web development and hosting. OpenLiteSpeed, an open-source web server developed by LiteSpeed Technologies, is renowned for its high performance, flexibility, and ease of use, making it a popular alternative to Apache and Nginx. When paired with Ubuntu 22.04, a stable and secure Linux distribution, the LOMP stack provides a robust foundation for deploying dynamic websites and applications.
In this guide, we will walk you through the step-by-step process of installing and configuring the LOMP stack on Ubuntu 22.04. Whether you are setting up a development environment or preparing a server for production, this tutorial will help you get started quickly and efficiently. By the end of this article, you will have a fully functional LOMP stack ready to serve your web projects. Let’s dive in!
To start, make sure you’ve created a VPSie account if you haven’t already. Next, proceed by deploying an Ubuntu 22.04 server configured to meet your specific needs.
Once the server is deployed, SSH into the command line interface. Before installing any packages, it’s essential to update your system’s package list to ensure you have access to the latest versions. Open a terminal and run the following command:
sudo apt-get update -y
Install OpenLiteSpeed
Install OpenLiteSpeed
OpenLiteSpeed package is not included in the Ubuntu default repository. To add the OpenLiteSpeed repository to your system, run the following script:
wget -O - http://rpms.litespeedtech.com/debian/enable_lst_debian_repo.sh | bash
After adding the OpenLiteSpeed repository, you can install OpenLiteSpeed using this command:
apt install openlitespeed -y
To check the status of OpenLiteSpeed after installation, use the following command:
systemctl status lsws

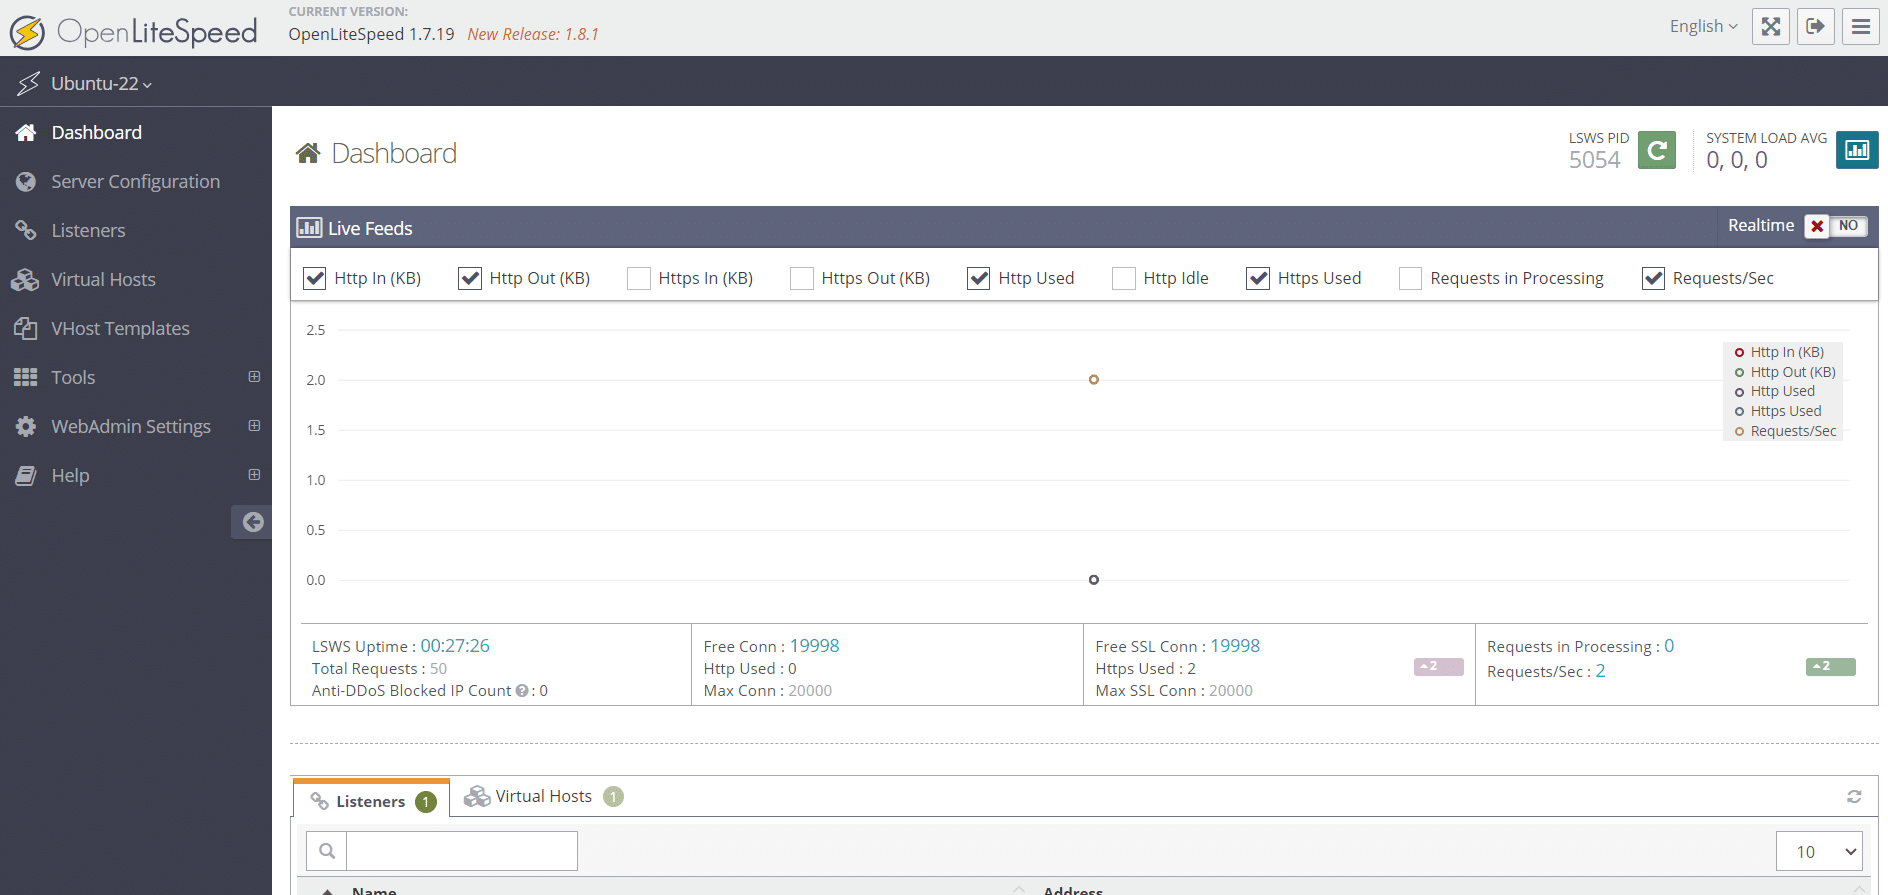
Now the installation is successfull, you can open your web browser and visit the server’s IP address followed by port 8088 (e.g., http://<server_ip>:8088). You should see the default index.html page of the OpenLiteSpeed web server.

Install MySQL/MariaDB
You can choose between MySQL or MariaDB. We’ll use MariaDB for this guide. Install MariaDB by running:
sudo apt install mariadb-server mariadb-client -y
Secure the installation:
sudo mysql_secure_installation
Follow the prompts as shown below:
Enter current password for root (enter for none):
Set root password? [Y/n]: N
Remove anonymous users? [Y/n]: Y
Disallow root login remotely? [Y/n]: Y
Remove test database and access to it? [Y/n]: Y
Reload privilege tables now? [Y/n]: Y
Start and enable MariaDB with:
sudo systemctl start mariadb
sudo systemctl enable mariadb
Install PHP
The OpenLiteSpeed web server comes with PHP version 7.4. You can verify this by visiting the URL http://<server_ip>:8088/phpinfo.php. You should see a page displaying the following information:

Before installing LiteSpeed PHP (lsphp), you can search for available lsphp packages in the Debian repositories using the following command:
sudo apt-cache search lsphp
This command will list all available LiteSpeed PHP packages, allowing you to choose the appropriate version for your setup. At this moment 8.3 is the latest version and we will install the latest one.
Now install the PHP 8.3 version with extensions using the following command:
sudo apt install lsphp83 lsphp83-common lsphp83-mysql -y
Run the following command to ensure that the PHP 8.0 is installed on your system. The PHP installation directory for OpenLiteSpeed is available at the ‘/usr/local/lsws’ directory.
/usr/local/lsws/lsphp83/bin/php8.3 -v

Configure OpenLiteSpeed to Use PHP 8.3
Now change the admin password for OpenLiteSpeed, its a crucial step in securing your server. Run the following command to do it:
sudo /usr/local/lsws/admin/misc/admpass.sh
You will be prompted to enter a new password. Make sure to choose a strong password to enhance security. Once completed, you can log in to the OpenLiteSpeed web admin interface using the new credentials.

Now we need to configure OpenLiteSpeed to Use PHP 8.3, Access the OpenLiteSpeed WebAdmin console by navigating to http://<server_ip>:7080 and Login using the Admin User credentials.

Please enter your admin username and password, then click the Login button.
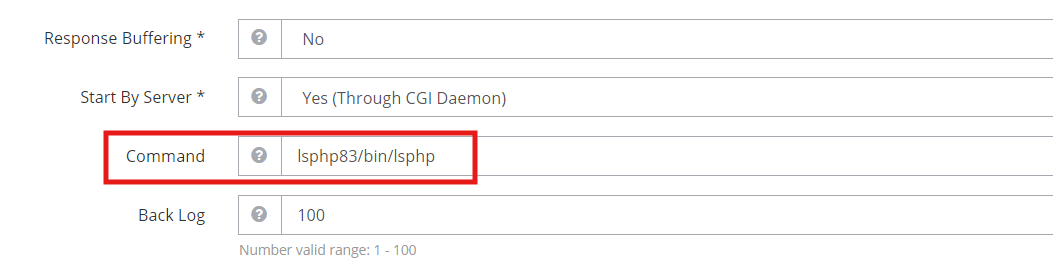
Next, navigate to Server Configuration and select External App. You should now see the following page:
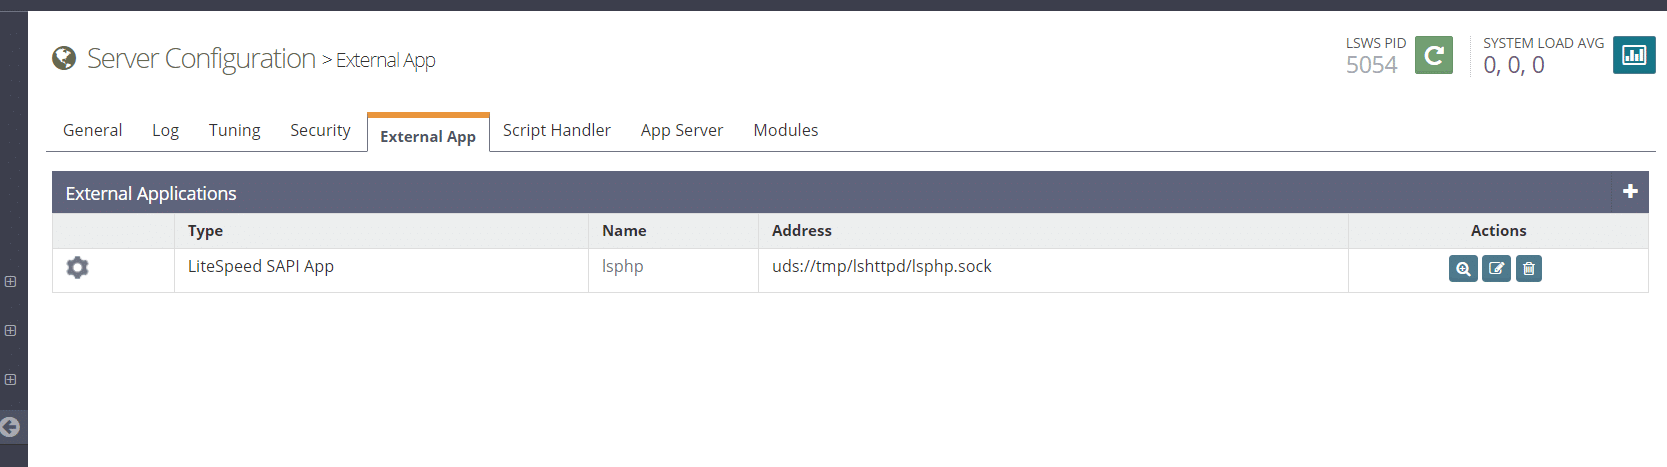
Click on the “Edit” button in the “Actions” column. Scroll down to the Command field and change the value from lsphp74/bin/lsphp to lsphp83/bin/lsphp. Then, click the “Save” button.
Now Click on the Graceful Restart green Icon to apply the changes.

Now, open your web browser and visit http://server_ip:8088/phpinfo.php. The page should display PHP version 8.3.

In conclusion, configuring the LOMP stack on Ubuntu 22.04 offers a powerful foundation for hosting web applications using Linux, Nginx, MariaDB, and PHP. By adhering to these steps, you can effectively deploy and maintain a secure and high-performance server environment tailored to your development requirements.