Flarum is a free, open-source, and modern forum software that is designed to be fast, lightweight, and easy to use. It was first released in 2015 and has gained popularity among developers and website owners who want to create online communities. In this article, we will talk through how to install and use Flarum on Ubuntu, and explore its features, advantages, disadvantages, and more.
What is Flarum?
Flarum is a next-generation forum software that is built with PHP and uses the Laravel framework. It is designed to be fast and easy to use, with a modern and responsive interface that works well on mobile devices.
You will need one VPS Server with Ubuntu 14.04 OS installed on it. For the VPS server click here Vpsie.
To install Flarum you need to have root access.
Update your server system.sudo apt-get updatesudo apt-get -y upgrade
After, install the packages that Flarum require.sudo apt-get install software-properties-common git nano
Install MySQL Server
Now you need to install MariaDB server. To install it run these commands one by one:sudo apt-key adv --recv-keys --keyserver hkp://keyserver.ubuntu.com:80 0xcbcb082a1bb943db
Add MariaDB repository:sudo add-apt-repository 'deb http://ftp.osuosl.org/pub/mariadb/repo/10.0/ubuntu trusty main'
Update the system:sudo apt-get update
And install it:sudo apt-get install -y mariadb-server
Now secure your MySQL installation by running this command:mysql_secure_installation
After, create a new database for Flarum.mysql -u root -p
CREATE DATABASE flarum;
GRANT ALL PRIVILEGES ON flarum.* TO 'flarum'@'localhost' IDENTIFIED BY 'yourpassword';
FLUSH PRIVILEGES;
quit
Install PHP 7.0
Now install PHP 7.0 and required modules.
sudo add-apt-repository -y ppa:ondrej/php-7.0
Update your server system.
sudo apt-get update
And install PHP and required PHP modules.sudo apt-get -y install php7.0-fpm php7.0-cli php7.0-gd php7.0-mysql php7.0-mcrypt php-pear php7.0-curl
After installing, run those commands to install composer.curl -sS https://getcomposer.org/installer | php
sudo mv composer.phar /usr/local/bin/composer
Install Flarum
Now it’s time to install Flarum. First, create root directory for Flarummkdir -p ~/myFlarum.org/public_html
Run the composer to create a new Flarum installationcomposer create-project flarum/flarum ~/myFlarum.org/public_html --stability=beta
Now create a new file for your user
Notice: Do not forget to change your_username with your preferred usernamesudo nano /etc/php/7.0/fpm/pool.d/your_user.conf
And add the lines[your_user]
user = your_user
group = your_user
listen = /var/run/php-fpm-your_user.sock
listen.owner = your_user
listen.group = your_user
listen.mode = 0666
pm = ondemand
pm.max_children = 5
pm.process_idle_timeout = 10s
pm.max_requests = 200
chdir = /
Save the changes and restart PHP-FPMsudo service php7.0-fpm restart
Install Nginx
Now you need to install Nginx.
To install it first add nginx repositorysudo add-apt-repository -y ppa:nginx/stable
Update the system:sudo apt-get update
And install it:sudo apt-get -y install nginx
Generate SSL certificate
After, generate a self-signed SSL certificate:
Run commands one by one.
Create SSL directory in nginx and go into the directory:sudo mkdir -p /etc/nginx/ssl
cd /etc/nginx/ssl
After this generate signed SSL certificate:sudo openssl genrsa -des3 -passout pass:x -out flarum.pass.key 2048
In next:sudo openssl rsa -passin pass:x -in flarum.pass.key -out flarum.key
After, remove flarum.pass.keysudo rm flarum.pass.key
Create a new flarum keysudo openssl req -new -key flarum.key -out flarum.csr
And finish it by running this command:sudo openssl x509 -req -days 365 -in flarum.csr -signkey flarum.key -out flarum.crt
Next, you need to create Nginx block.sudo nano /etc/nginx/sites-available/myFlarum.org
After, add lines:
server {
listen 443;
server_name myFlarum.org;
index
root /home/your_user/myFlarum.org/public_html;ssl on;
ssl_certificate /etc/nginx/ssl/flarum.crt;
ssl_certificate_key /etc/nginx/ssl/flarum.key;
ssl_session_timeout 5m;
ssl_ciphers ‘AES128+EECDH:AES128+EDH:!aNULL’;
ssl_protocols TLSv1 TLSv1.1 TLSv1.2;
ssl_prefer_server_ciphers on;access_log /var/log/nginx/flarum.access.log;
error_log /var/log/nginx/flarum.error.log;location / {
try_files $uri $uri/ /index.php?$query_string;
}location /api {
try_files $uri $uri/ /api.php?$query_string;
}location /admin {
try_files $uri $uri/ /admin.php?$query_string;
}location /flarum {
deny all;
return 404;
}location ~* \.html$ {
expires -1;
}location ~* \.(css|js|gif|jpe?g|png)$ {
expires 1M;
add_header Pragma public;
add_header Cache-Control “public, must-revalidate, proxy-revalidate”;
}location ~ \.php$ {
fastcgi_split_path_info ^(.+\.php)(/.+)$;
fastcgi_pass unix:/var/run/php-fpm-your_user.sock;
fastcgi_index index.php;
include fastcgi_params;
fastcgi_param SCRIPT_FILENAME $document_root$fastcgi_script_name;
fastcgi_intercept_errors off;
fastcgi_buffer_size 16k;
fastcgi_buffers 4 16k;
}location ~ /\.ht {
deny all;
}
}server {
listen 80;
server_name myFlarum.org;add_header Strict-Transport-Security max-age=2592000;
rewrite ^ https://$server_name$request_uri? permanent;
}
Notice: Change your_user with your real username.
Now enable the Nginx block that you created.sudo ln -s /etc/nginx/sites-available/myFlarum.org /etc/nginx/sites-enabled/myFlarum.org
Restart the Nginx:sudo service nginx restart
Open your server like https://yourdomain.com or https://yourIPadress in the preferred web browser.
Follow the wizard installation and setup the database in the wizard.
Now you have successfully installed Flarum in Ubuntu 14.04.
Enjoy!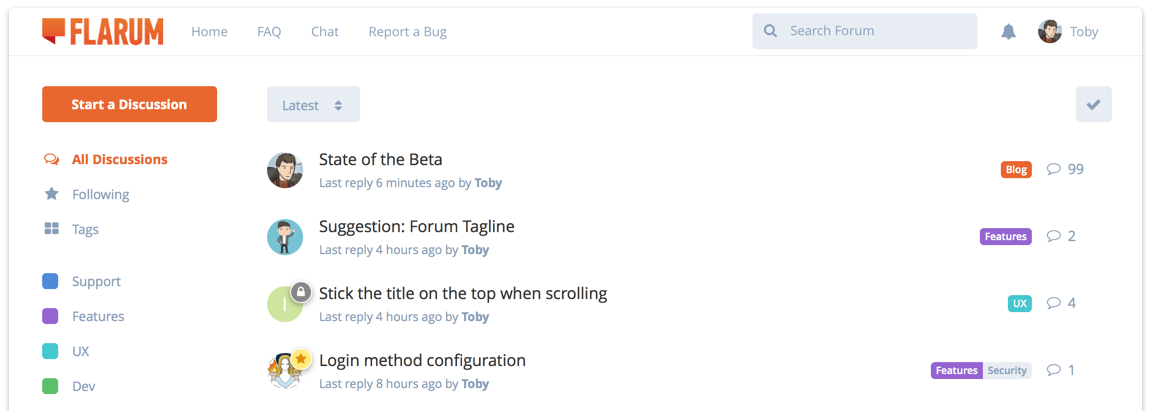
Flarum Features
Flarum has many features that make it an attractive option for creating online communities, including:
- User-friendly interface: Flarum has a clean and modern interface that is easy to navigate and use, making it ideal for new and experienced users.
- Lightweight: Flarum is built with performance in mind and is optimized to be light, fast, and efficient.
- Extensions: Flarum has a powerful extension system allowing you to add new features and functionality to your forum quickly.
- Mobile-friendly: Flarum is designed to be responsive and mobile-friendly, so your users can access your forum from any device.
- Open-source: Flarum is free and open-source software, meaning you can modify and distribute it as you see fit.
Why use Flarum?
You should use Flarum to create an online community for many reasons. Some of the main benefits of using Flarum include:
- Easy to use: Flarum has a simple and instinctual interface that makes it easy for users to navigate and participate in your community.
- Fast and efficient: Flarum is optimized to be quick and efficient, meaning your users will have a smooth and responsive experience when using your forum.
- Customizable: Flarum has a powerful extension system allowing you to add new features and functionality to your forum quickly.
- Mobile-friendly: Flarum is designed to be mobile-friendly, so your users can access your forum from any device.
- Community support: Flarum has a growing community of developers and users actively contributing to its development and supporting new users.
Advantages of Flarum
- User-friendly: Flarum has a clean and modern interface that is easy to navigate, even for users unfamiliar with the forum software.
- Fast and efficient: Flarum is designed to be lightweight and fast, which means it can handle many users and posts without slowing down.
- Customizable: Flarum has a robust extension system that allows users to customize their forums with a wide range of features and functionality.
- Mobile-friendly: Flarum is optimized for mobile devices, meaning users can access and participate in your forum from their smartphones or tablets.
- Open-source: Flarum is free and open-source software, which means that users have complete control over their forums and can modify the software to suit their needs.
- Active community: Flarum has a dedicated community of developers and users who contribute to its development, support new users, and create new extensions.
Disadvantages of Flarum:
- Limited themes: Although Flarum has a variety of themes to choose from, the selection is relatively small compared to other forum software. This can limit your ability to create a unique and custom look for your forum.
- Limited features: While Flarum has many valuable features, it may not have all the features some users need. For example, some users may require more advanced moderation tools, while others may need more robust analytics or integration with other software.
- Learning curve: While Flarum is designed to be user-friendly, there is still a learning curve for new users unfamiliar with the forum software. This can be a barrier for some users looking for a more straightforward solution.
Conclusion
Flarum is a powerful and modern forum software that is easy to use, fast, and efficient. It has many features that make it an attractive option for creating online communities, including a user-friendly interface, customizable extensions, mobile-friendly design, and an active community of developers and users. While Flarum may have some limitations, its many advantages make it an excellent choice for anyone looking to create an online community.