Securing your VPSie-hosted services with SSL is essential for protecting data and establishing trust with your users. VPSie offers two methods to manage certificates:
- Generate Auto Certificate
- Upload Custom Certificate
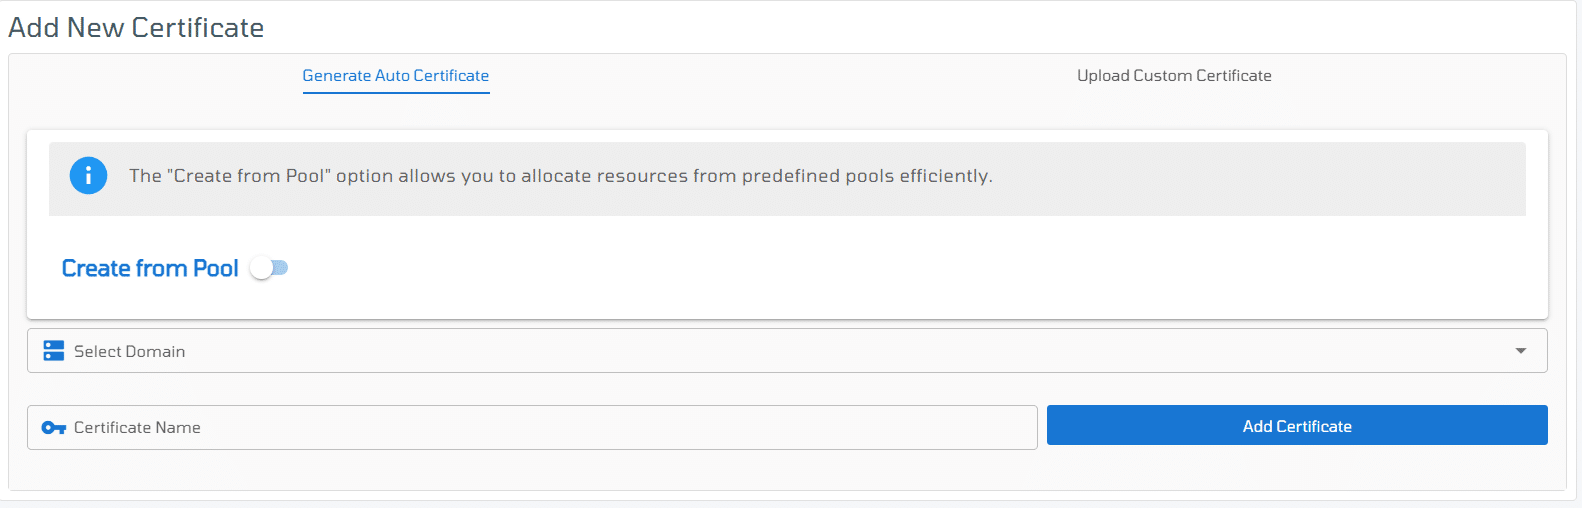
Here you can generate Auto certificates for your domains or upload a custom one. You can complete the form here as follows:
Generate Auto Certificate: If you already have a verified domain in our control panel you can generate an auto certificate and assign it to a domain or in any custom subdomain.
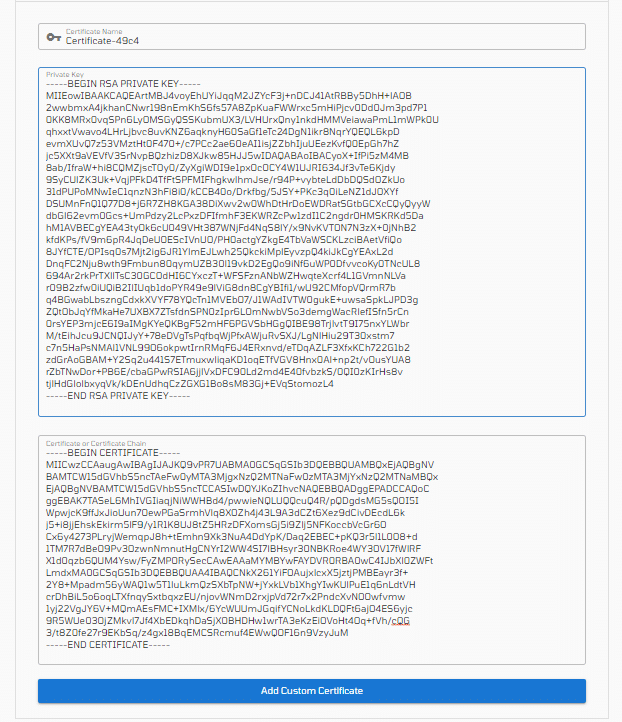
Upload Custom Certificate:
If you have an SSL certificate from a third-party Certificate Authority (CA), you can upload it to secure your services on VPSie.
1. Certificate Name (Auto-generated by VPSie) : You don’t need to enter this. VPSie will automatically assign a name to your uploaded certificate for easy reference.
2. Private Key: Paste the contents of your private key file (.key). This key must match the certificate being uploaded.
3. Certificate or Certificate Chain: Paste the full certificate content here. This can be:
- Just the certificate (.crt or .pem)
- Or the full certificate chain including the intermediate CA(s) and root, if applicable
🔐 Important: Always ensure the certificate and private key match. If using a chain, place the server certificate first, followed by intermediate certificates.