The Load Balancer feature on VPSie helps you efficiently distribute traffic across multiple backend instances, improving availability, performance, and reliability of your applications. This guide will walk you through setting up a Load Balancer using the VPSie Control Panel.
Steps to Create a Load Balancer
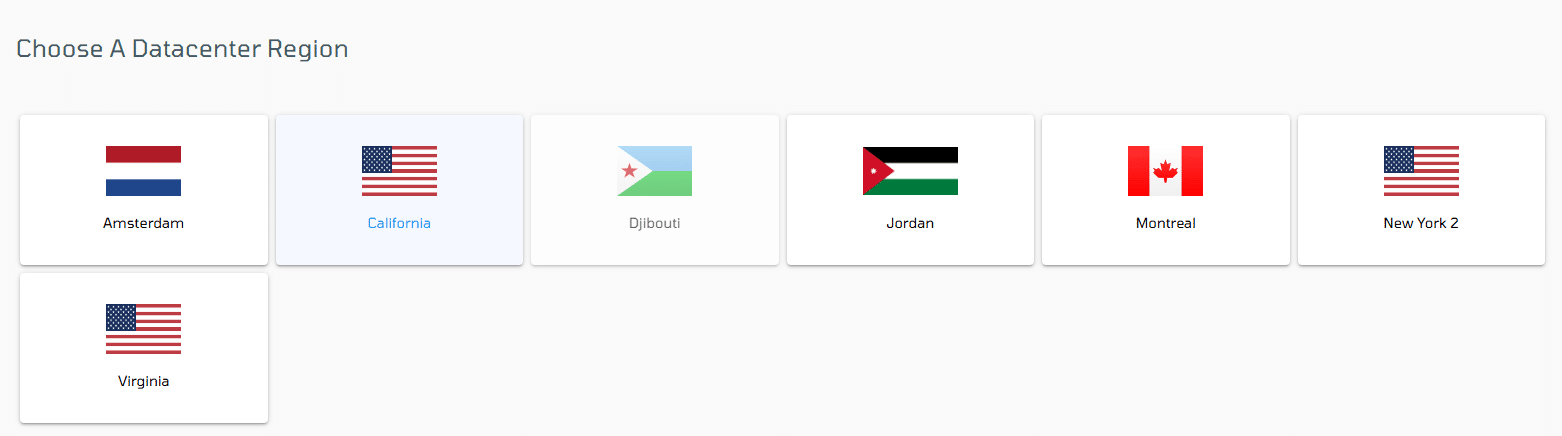
Step 1: Choose a Datacenter Region
Start by selecting the region where your Load Balancer will be deployed.
🔹 All resources (instances, LB, storage, etc.) created in this datacenter will operate within the same VPC environment for optimized performance and private networking.
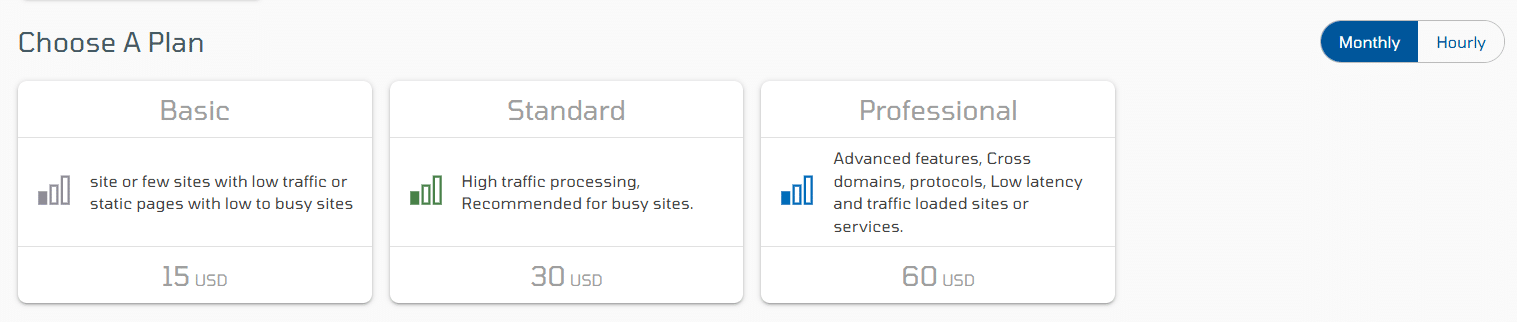
Step 2: Choose a Plan
Select an appropriate Load Balancer plan based on your application needs. Plans differ in bandwidth, concurrent connection limits, and feature support.
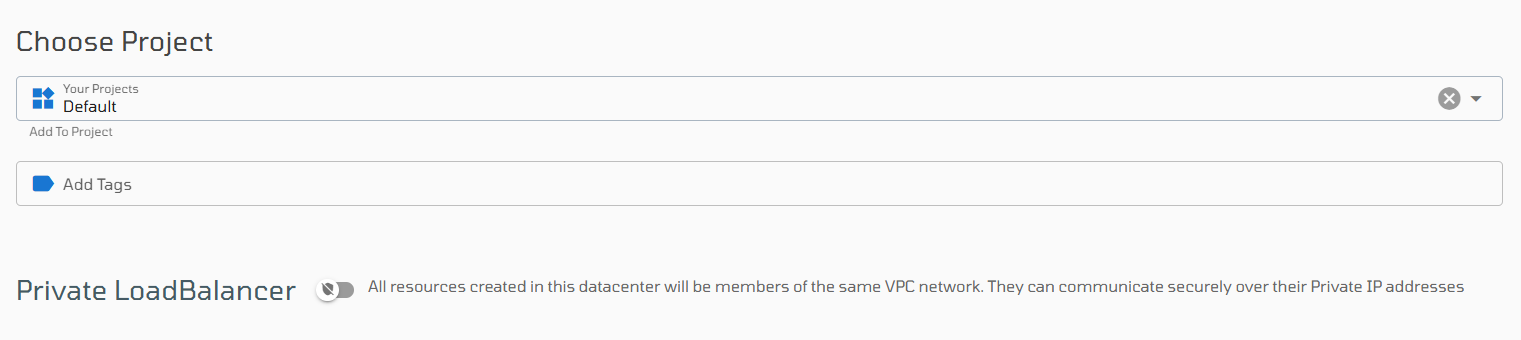
Step 3: Choose a Project
Assign the Load Balancer to an existing Project. Projects help group and organize your infrastructure for better management and billing.
Step 4: Enable Private Load Balancer (Optional)
Use the toggle to enable Private Load Balancer mode.
🔒 This mode ensures all resources within the selected datacenter communicate over private IP addresses using a VPC (Virtual Private Cloud). It’s ideal for internal applications or microservice environments.
Step 5: VPC Setup
Configure your VPC network settings:
- Select an existing VPC or create a new one.
- Assign private IP range and subnets if needed.
💡 This step ensures secure, isolated traffic between your Load Balancer and backend resources.

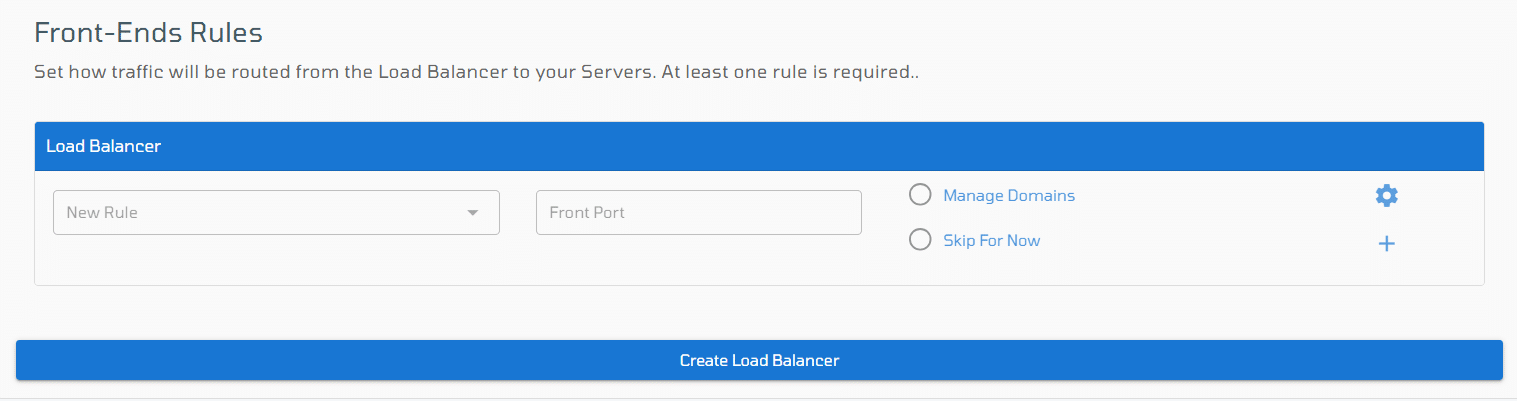
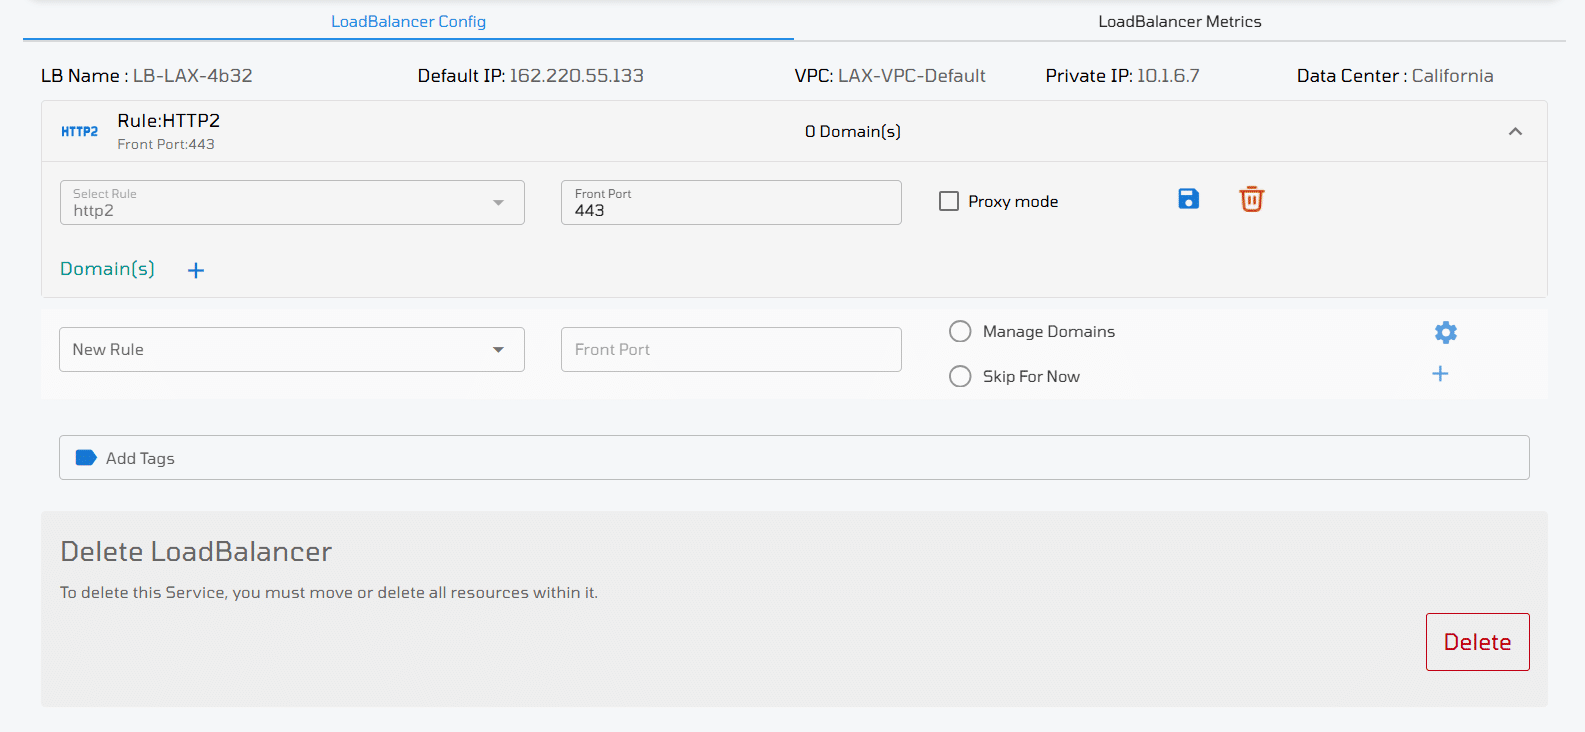
Step 6: Configure Front-End Rules
In this step, you’ll define how the Load Balancer receives and handles external traffic. You can add multiple rules depending on your application’s requirements.
New Rule: you can select from the following protocols:
HTTP
HTTPS
HTTP/2
TCP
Choose the appropriate protocol depending on how your application is accessed.
Front Port: After selecting a protocol, specify the Front Port, this is the port that listens for external traffic (e.g., 80 for HTTP, 443 for HTTPS).
Manage Domain (Optional): Toggle the “Manage Domain” option to enable custom domain configurations. This gives you the ability to attach domains and manage SSL certificates.
When enabled, two options appear:
Select From Certificate: Choose an existing SSL certificate uploaded to your account.
Custom Domain Name: Enter a domain name that should be associated with this rule (e.g., app.example.com).
Once you’ve completed the configuration, Click the “+” icon to add the rule to the Load Balancer. Finally click on Create Load Balancer to start the LB creation process.

Once the Load Balancer is created, it will appear in the Load Balancer list.
Click on the Load Balancer name to access and manage its settings.
The Load Balancer settings page is divided into two main sections:
Load Balancer Configuration : Manage front-end rules, backend pools, SSL certificates, and networking options.
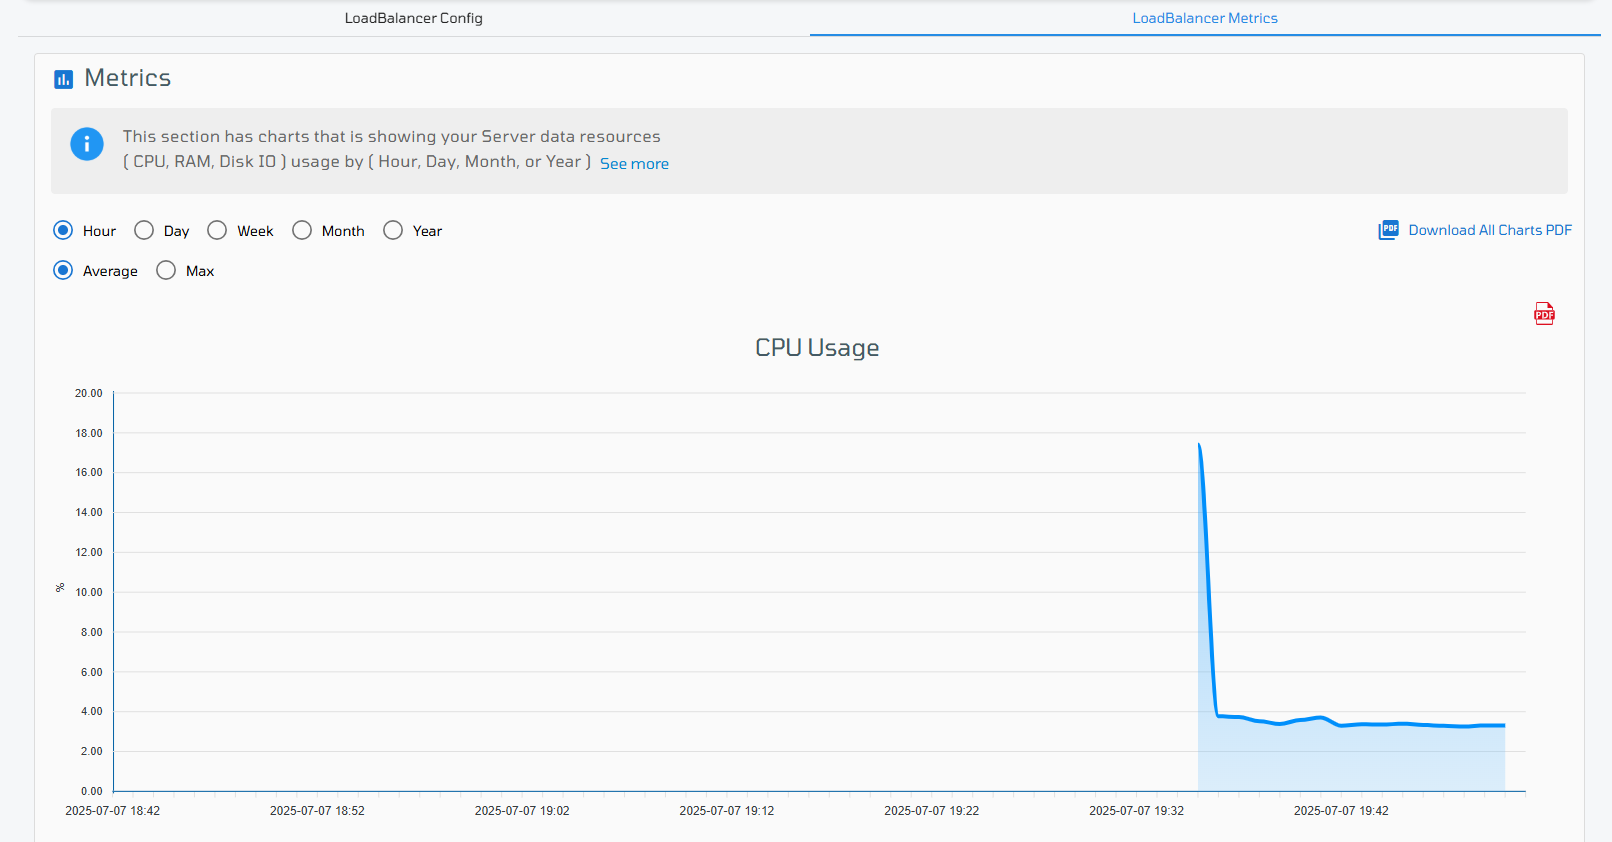
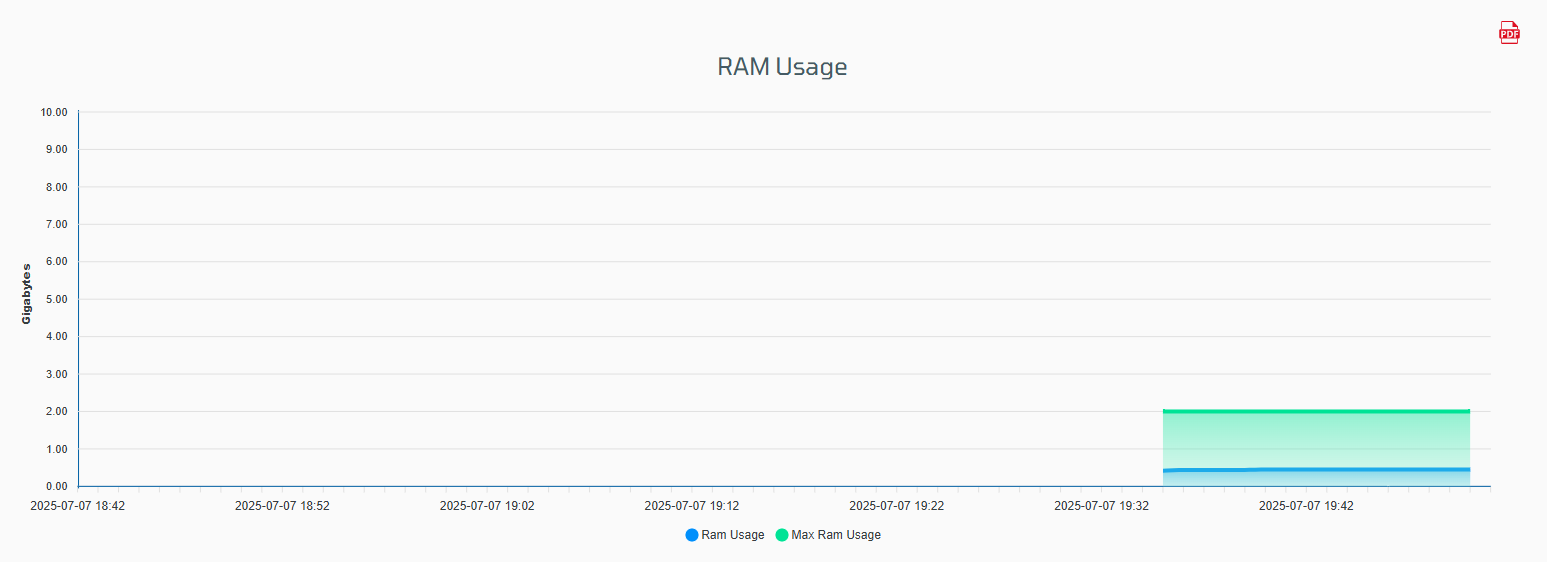
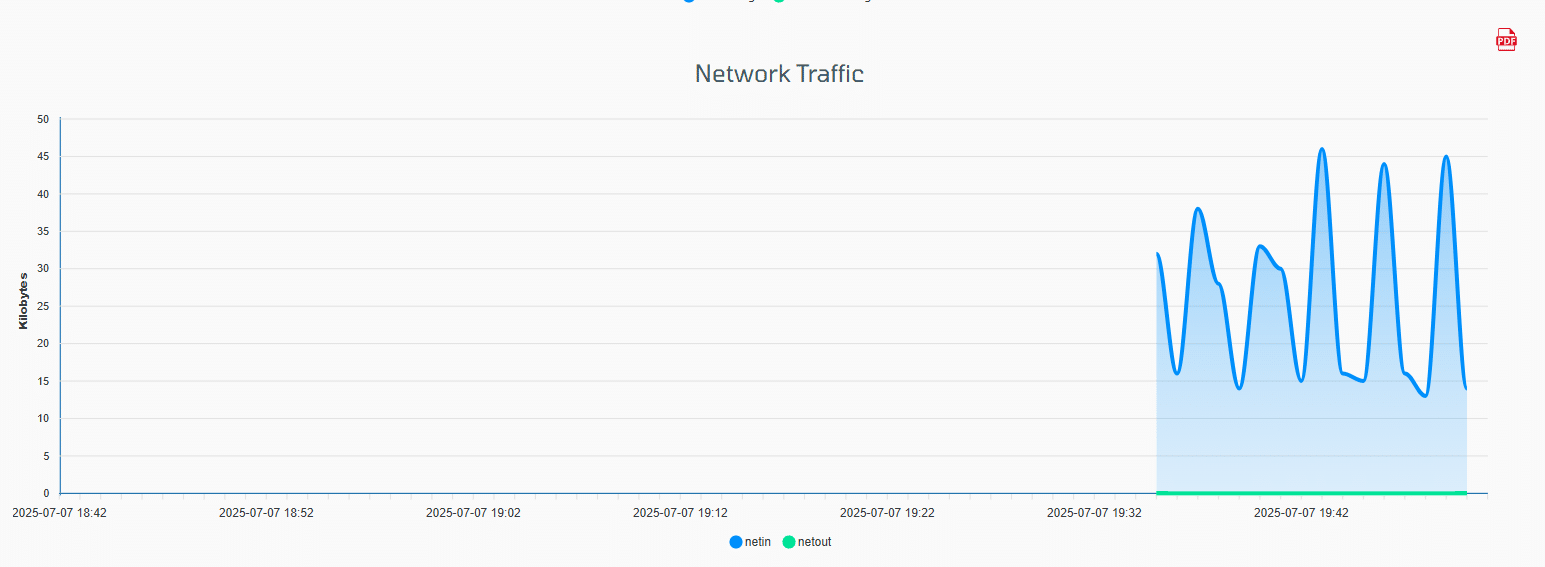
Load Balancer Metrics: Monitor real-time traffic statistics, connection details, and server health status.