How to Easily Install Reactjs and Build on Ubuntu
React is a free and open-source library for creating user interfaces using UI components in JavaScript. This library is maintained by the Meta Foundation for Software Development as well as several companies and individual developers. For web and mobile apps, it is used to handle the view layer. In addition, React provides an interface that can be reused. React is a cool tool for web development, and as cool as it is, it’s very easy to learn. Learning it at the right time puts you at a higher advantage. You can easily learn NextJS or Remix if you want to advance your web development career with React. So let’s get started with installing react on Ubuntu.
For Ubuntu systems to be registered with VPSie, you need to create a VPSie account if you don’t have one already.
Our example is based on an Ubuntu instance with GUI installed. Here is a link that will guide you to installing Ubuntu’s GUI if you do not already have it installed.
Now open your terminal and run the following commands to update your system.
# apt-get update && apt-get upgrade -y
Step 1: Install Node Js
You can get the latest version of node js from the official website and download it. After downloading it follow the following commands:

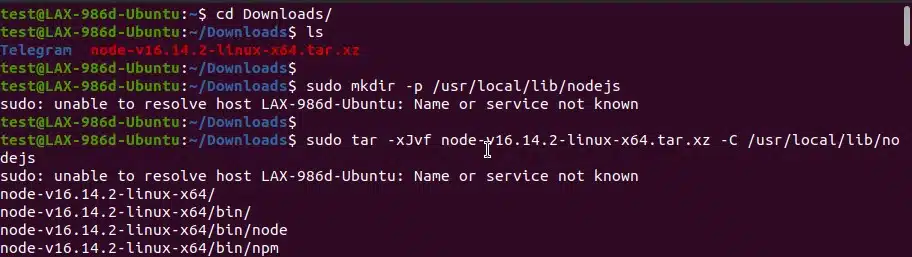
Go to download folder:
# cd Downloads/
Run the following to create a directory with root folder:
# sudo mkdir -p /usr/local/lib/nodejs
Unzip and copy the downloaded file to the folder that we just created:
# sudo tar -xJvf node-v16.14.2-linux-x64.tar.xz -C /usr/local/lib/nodejs
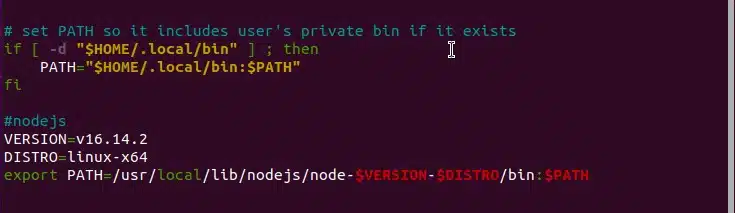
Now open the a file using the following command and add the lines given below.
# sudo nano ~/.profile
Lines to add:
#nodejs
VERSION=v16.14.2
DISTRO=linux-x64
export PATH=/usr/local/lib/nodejs/node-$VERSION-$DISTRO/bin:$PATH
After saving it run the following command:
# . ~/.profile
Now check the versions:
# node --version
# npm --version

Step 2: Install Yarn package Manager
Install the Yarn package manager by running the following command:
# sudo npm install -g yarn

Step 3: Create Reactjs Application
Now that most of the setup has been done, you are ready to create your application. Run the following command to create your application:
# yarn create react-app testapp
The ‘testapp‘ in the command is the name of the application. You can change the name to whatever you wish.

A React application named “testapp” has been installed successfully. A directory called “testapp” has been created in file explorer. There you will find everything you need for your app development. App.js file can be found in SRC folder within that directory where you can build the application.

Step 4: Execute the application
Run the following command to execute the application, First go to the app directory:
# cd testapp/
Then, start your development server by running the following command:
# yarn start

Also you can use the address http://{your-servers-ip}:3000
Once your application is ready for deployment, just create a production build. You can build your application using the following command. A new directory will be created called build just like testapp. Production files will be stored in that directory.
# yarn build

Installing ReactJS and building an application have both been successful. Get started learning ReactJS and exploring coding. Hope you found this useful.