Install Cloudfoundry One Click Deploy
Cloud Foundry is an open-source platform-as-a-service (PaaS) that developers can use to build, deploy, run, and scale their applications. Developed by VMware, the software was transferred to Pivotal Software, which is 2015 transferred the software to Cloud Foundry Foundation. Among the core components of Cloud Foundry are routing, authentication, application lifecycle, application storage, messaging, metrics, and logging.
In this section, we’ll explain how to set up Cloudfoundry in one click on the VPSie platform.
It is necessary to register for VPSie in order to use it. Registering for a free account is available via the following link. After funding your account, click the Add a New VPSie button.
Let’s begin by going through each step:
Step 1: Select Cloudfoundry from Marketplace
In order to set up, you must visit the Marketplace and select Cloudfoundry for your server.

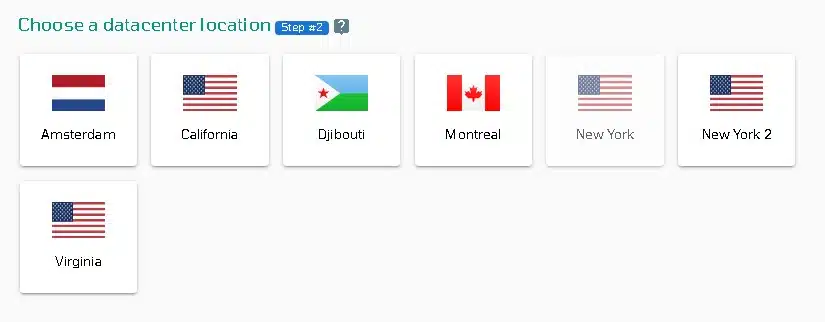
Step 2: Select VPSie DataCenter
Make sure your data center is close to your customers. Data centers should be located close to where your clients are rather than at your own location. In the case of Europeans with clients in the United States, U.S.A. locations must be selected.
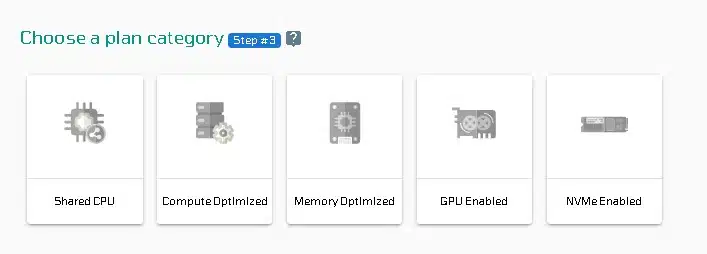
Step 3: Choose your plan category
Choose a plan category and the options within it to determine the best plan for your business.
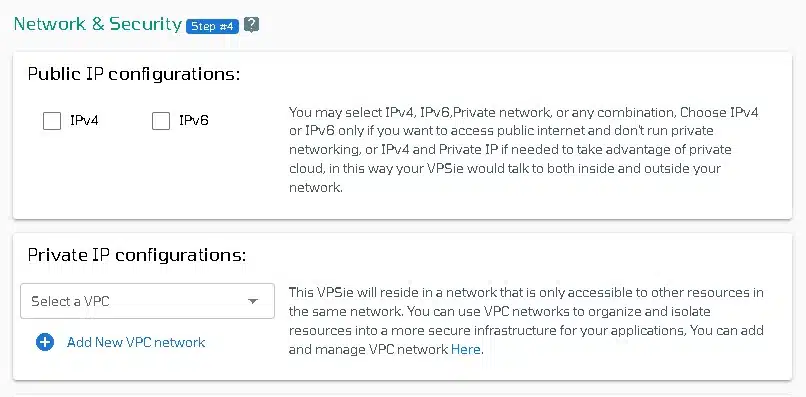
Step 4: Configure your Cloudfoundry server network and security
We recommend you select public IPv4 when selecting an IP address. VPSie provides you with the option of selecting private from the default Virtual Private Cloud(VPC) or creating your own VPC and assigning an private IP from it.
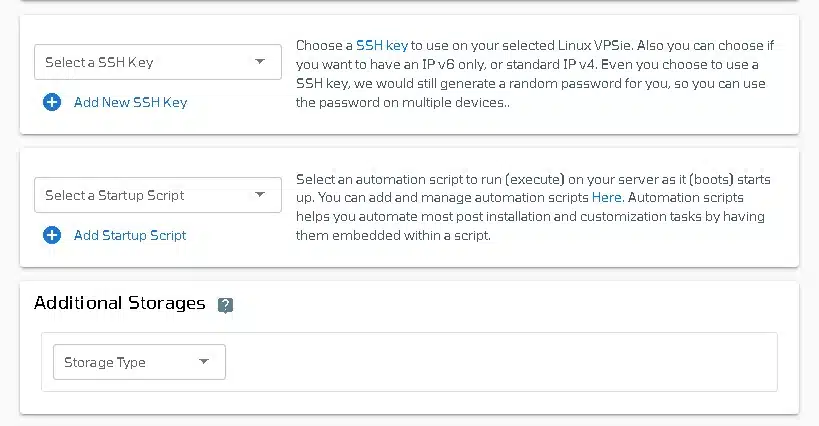
The SSH key and StartUp Script can be added here, as well as new ones that you can create. Note that this step is optional. If you don’t need it, you can skip it.
By selecting from the drop-down, you can add storage to your server in the same way, selecting the storage type and entering the storage size as needed.
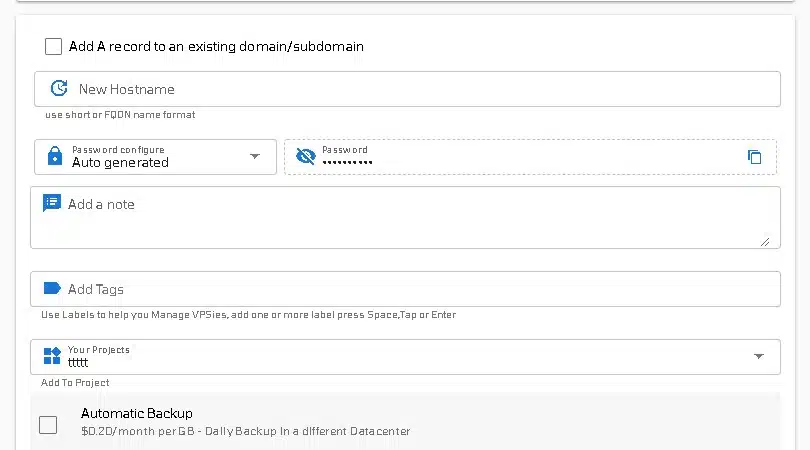
You can edit your hostname on the Hostname tab. By default, VPSie generates one automatically.
You will be given an automatically generated password by VPSie by default. By clicking on the password configure tab and selecting the custom option, you can change your password and add your own.
Create a note and tags for your Cloudfoundry. It is highly recommended that you enable automatic backup.
We are offering a very handy feature that allows you to create multiple Cloudfoundry servers with the same configuration that we created now. Make use of it if necessary. Lastly, click on the Add VPSie button to create your Cloudfoundry.

It will take no more than a minute for your Cloudfoundry to be operational. You will receive an email with all details regarding the server login credentials.
That’s all. Have fun developing. I hope you found this helpful.