In this guide, we’ll walk through the process of installing TYPO3 CMS on Ubuntu 22.04. TYPO3 is a powerful and flexible content management system (CMS) known for its scalability and extensive customization options. Whether you’re setting up a personal blog or a complex corporate website, TYPO3 provides a robust platform with a wide range of features and plugins.
This tutorial is designed for users who have a basic understanding of Ubuntu and command-line operations. By following these steps, you’ll be able to deploy TYPO3 on your VPSie instance and start building dynamic web applications with ease. Let’s dive in!
To start, make sure you’ve created a VPSie account if you haven’t already. Next, proceed by deploying an Debian 12 server configured to meet your specific needs.
Once the server is deployed, SSH into the command line interface. Before installing any packages, it’s essential to update your system’s package list to ensure you have access to the latest versions. Open a terminal and run the following command:
sudo apt-get update -y
Set Up an LAMP Server
You’ll need to set up an LAMP server with Apache, MariaDB, PHP, and additional PHP extensions on your server. Execute the following command to begin the setup.
sudo apt install apache2 mariadb-server php libapache2-mod-php php-common php-gmp php-curl php-intl php-mbstring php-xmlrpc php-mysql php-gd php-xml php-cli php-zip curl git gnupg2 -y
nano /etc/php/8.1/apache2/php.ini
Change the following:
memory_limit = 512M
upload_max_filesize = 100M
post_max_size = 100M
max_execution_time = 360
max_input_vars = 1500
date.timezone = UTC
To apply the changes, save and close the file /etc/php/8.1/apache2/php.ini, and then restart the Apache service using:
systemctl restart apache2
Configure TYPO3 Database
Next, you need to create a database and a user for TYPO3. Start by logging into the MariaDB shell with the following command:
mysql
Replace typo3_database with the name you want to give to your TYPO3 database:
CREATE DATABASE typo3_database;
Replace typo3_user, password, and typo3_database with appropriate values. This user will be associated with the TYPO3 database:
GRANT ALL PRIVILEGES ON typo3_database.* TO 'typo3_user'@'localhost' IDENTIFIED BY 'password';
After granting privileges, flush the privileges to apply the changes:
FLUSH PRIVILEGES;
EXIT;
Install TYPO3 CMS
First, visit the TYPO3 official website and download the latest version of TYPO3 using the curl command:
curl -L -o typo3_src.tgz https://get.typo3.org/12.4.16
Once the download is completed, extract the downloaded file with the following command:
tar -xvzf typo3_src.tgz
Next, move the extracted directory to the Apache web root directory:
mv typo3_src-12.4.16 /var/www/html/typo3
Next, give proper permission and permission with the following command:
chown -R www-data:www-data /var/www/html/typo3
chmod -R 775 /var/www/html/typo3
Create Virtual-host for TYPO3
Next, create an Apache virtual host configuration file to host TYPO3 CMS. Use the following command:
nano /etc/apache2/sites-available/typo3.conf
Then, add the following lines:
					<VirtualHost *:80>
     ServerAdmin admin@example.com
     DocumentRoot /var/www/html/typo3
     ServerName typo3.example.com
     <Directory /var/www/html/typo3>
        Options +FollowSymlinks
        AllowOverride All
        Require all granted
     </Directory>

     ErrorLog ${APACHE_LOG_DIR}/error.log
     CustomLog ${APACHE_LOG_DIR}/access.log combined

</VirtualHost>
Save and close the file, then activate the virtual host configuration and the rewrite module by running the following commands:
sudo a2dissite 000-default.conf
a2ensite typo3.conf
a2enmod rewrite
Finally, restart the Apache service to apply the changes:
systemctl restart apache2
Access TYPO3 CMS Web Interface
If you are setting up TYPO3 on a fresh server, you will need to create a FIRST_INSTALL file in the TYPO3 web root directory. You can do this by running the following command:
touch /var/www/html/typo3/FIRST_INSTALL
chown -R www-data:www-data /var/www/html/typo3/FIRST_INSTALL
Now, open your web browser and navigate to TYPO3 by entering the URL http://<your-domain/IP>.
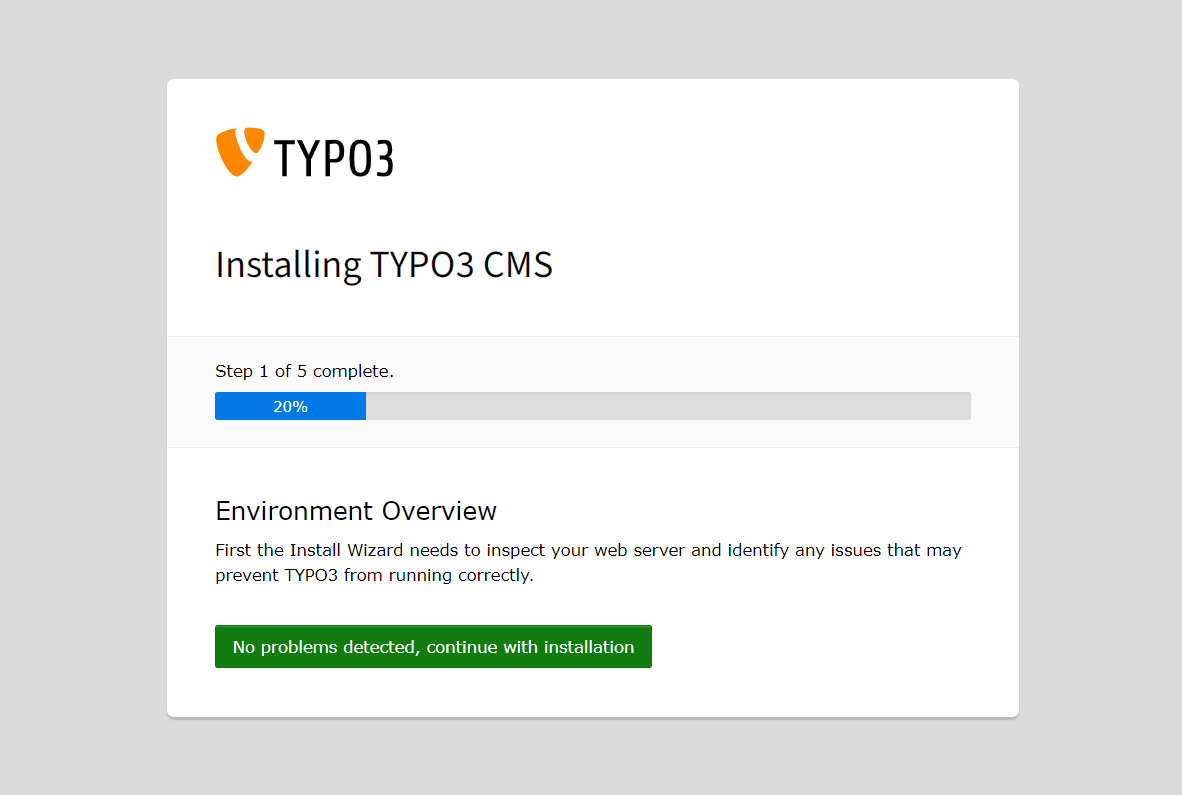
Continue with installation…
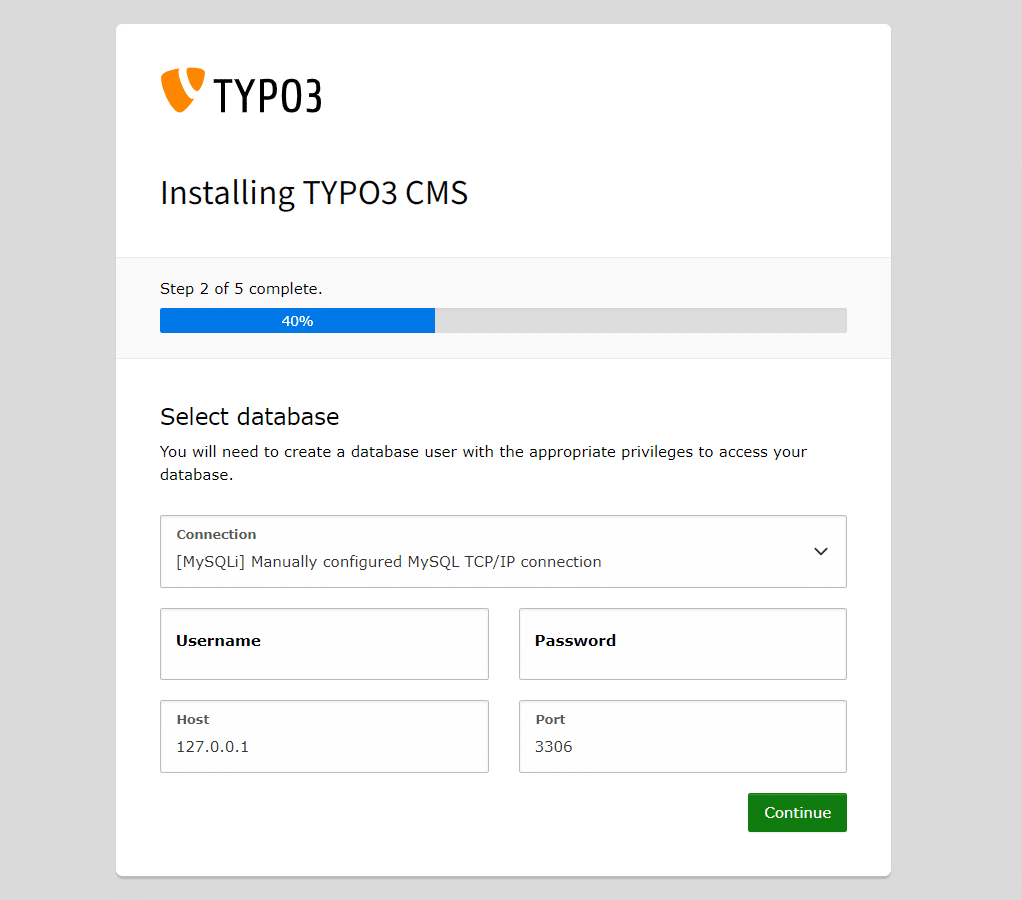
Please provide your database username, password, and host, then click the Continue button.
Please choose your TYPO3 database name and then click the Continue button.

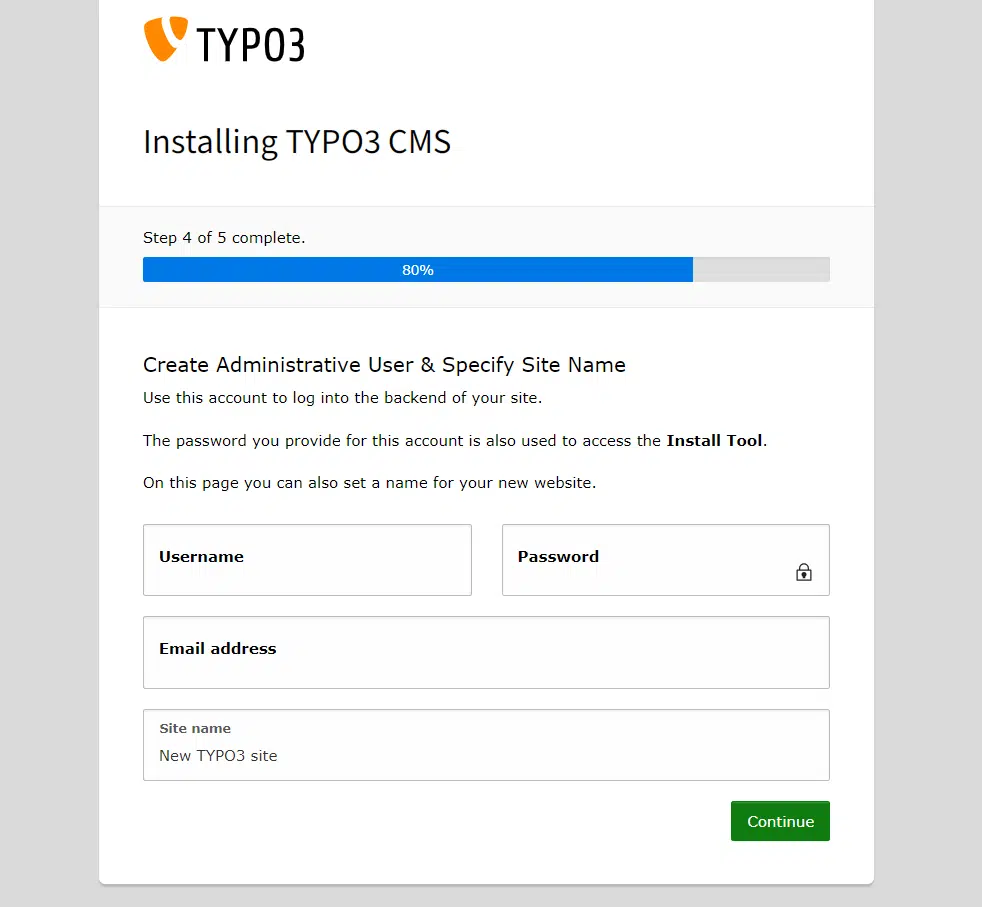
Next, enter your admin username, password, and site name, then click the Continue button. You will be redirected to the TYPO3 login page.
Installation is now complete. The Installation Wizard offers an option to create an empty page at your website’s root to help you get started.
If you wish to use this feature, select “Create empty starting page“. Next, proceed directly to the backend. Please verify if needed.

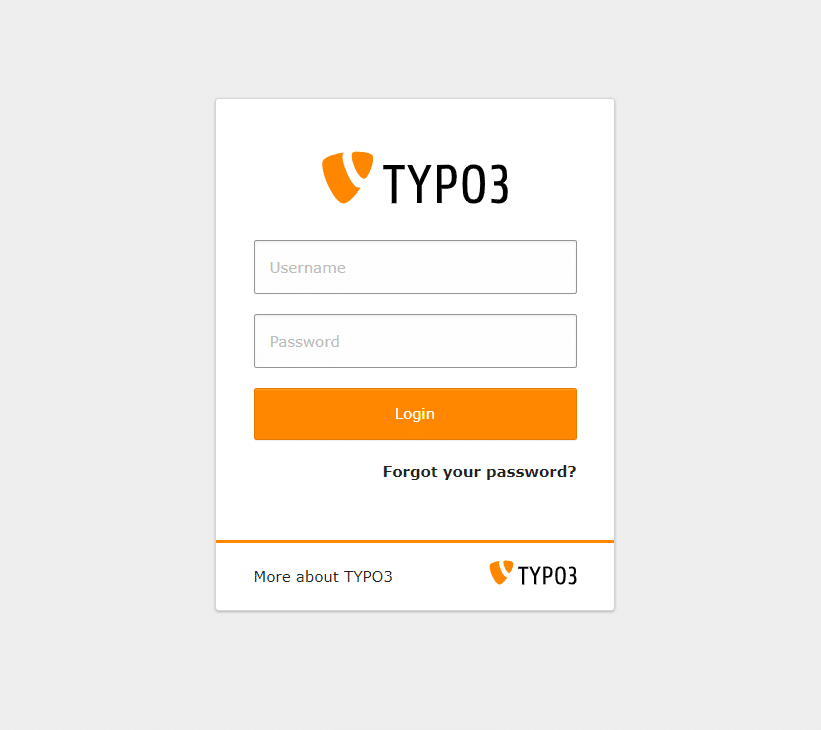
Please enter your admin username and password, then click the Login button.
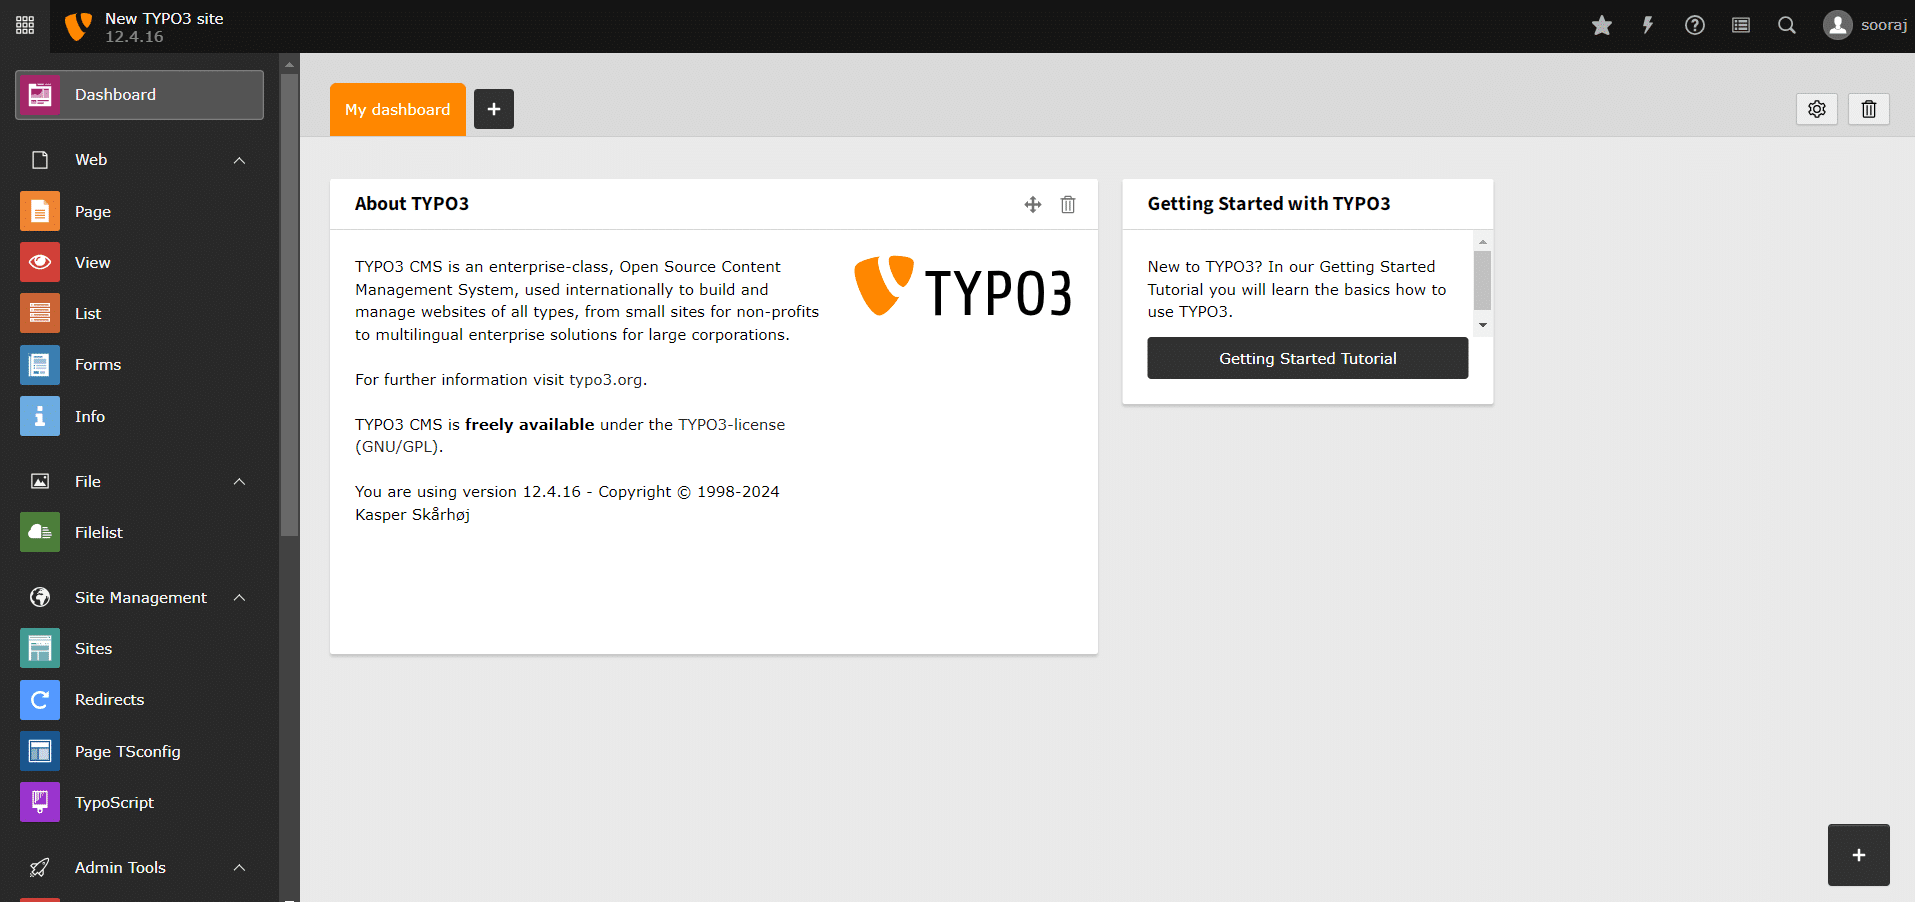
You should now navigate to the TYPO3 CMS Dashboard and explore the available options.
In conclusion, installing TYPO3 CMS on Ubuntu 22.04 is a straightforward process that allows users to leverage its powerful features for managing content efficiently. By following these steps, you can quickly set up a robust content management system tailored to your needs, ensuring seamless website management and customization.