How to Install and configure Nessus Vulnerability Scanner on Debian
What is Nessus Vulnerability Scanner?
Nessus Vulnerability Scanner identifies vulnerabilities, misconfigurations, and other security threats within a network. It is designed to scan networks and systems to identify potential vulnerabilities attackers can exploit. The scanner has a database of known vulnerabilities and can identify new vulnerabilities as they are discovered. IT professionals and security researchers widely use it to assess the security posture of a network or system.
Nessus plugins come in many flavors and are very flexible. Let us get started with the installation process.
Step 1: Getting your system up and running
Those who already have a system up and running should skip this step and do update their system.
- Sign in to your system or register a newly created one by logging in to your VPSie account.
- Connect by SSH using the credentials we emailed you.
- Once you have logged into your Debian instance, run these commands to update your system.
# sudo apt update

# sudo apt -y upgrade
Step 2: Download and Install Nessus Vulnerability Scanner
Installing Nessus on Debian is as easy as downloading the .deb package from the Nessus download page. You can install Nessus by running the following command after downloading the file.
# cd Downloads

# sudo apt install -f ./Nessus-10.0.2-debian6_amd64.deb
Step 3: Launch and enable the Nessus service
Run the following commands to start and enable the nessusd service:
# sudo systemctl start nessusd

# sudo systemctl enable nessusd.service
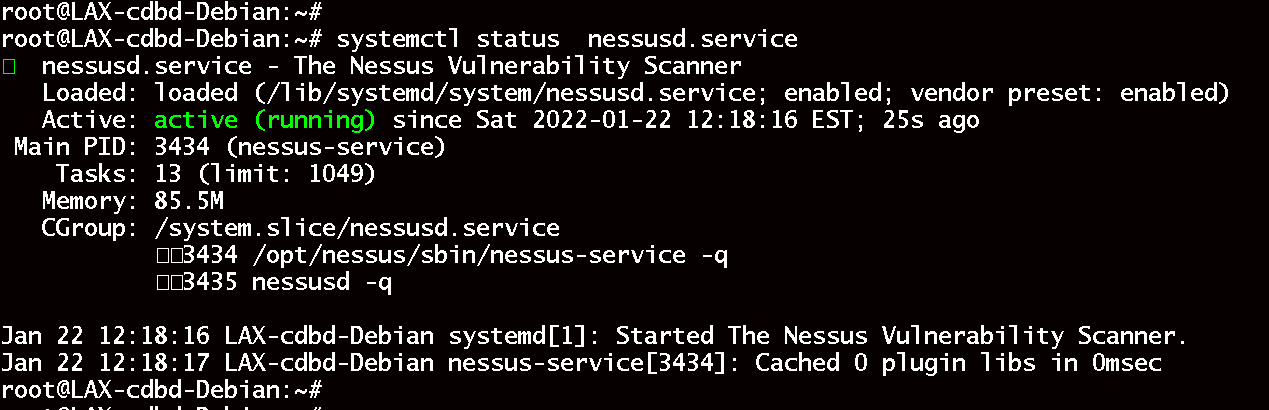
Check if the service is running:
# systemctl status nessusd.service
Make sure Nessus is listening on port 8834:
# sudo ss -plunt|grep 8834
Allow the port(8834) Nessus listens on if you have a UFW enabled:
# sudo ufw allow 8834/tcp
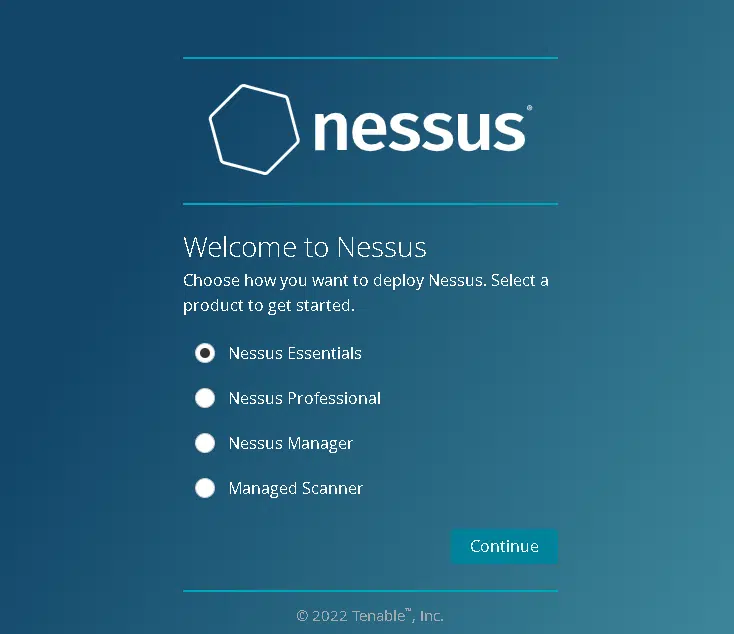
Step 4: Configure Nessus
You can now access the web interface at https://{ServerIP}:8834.
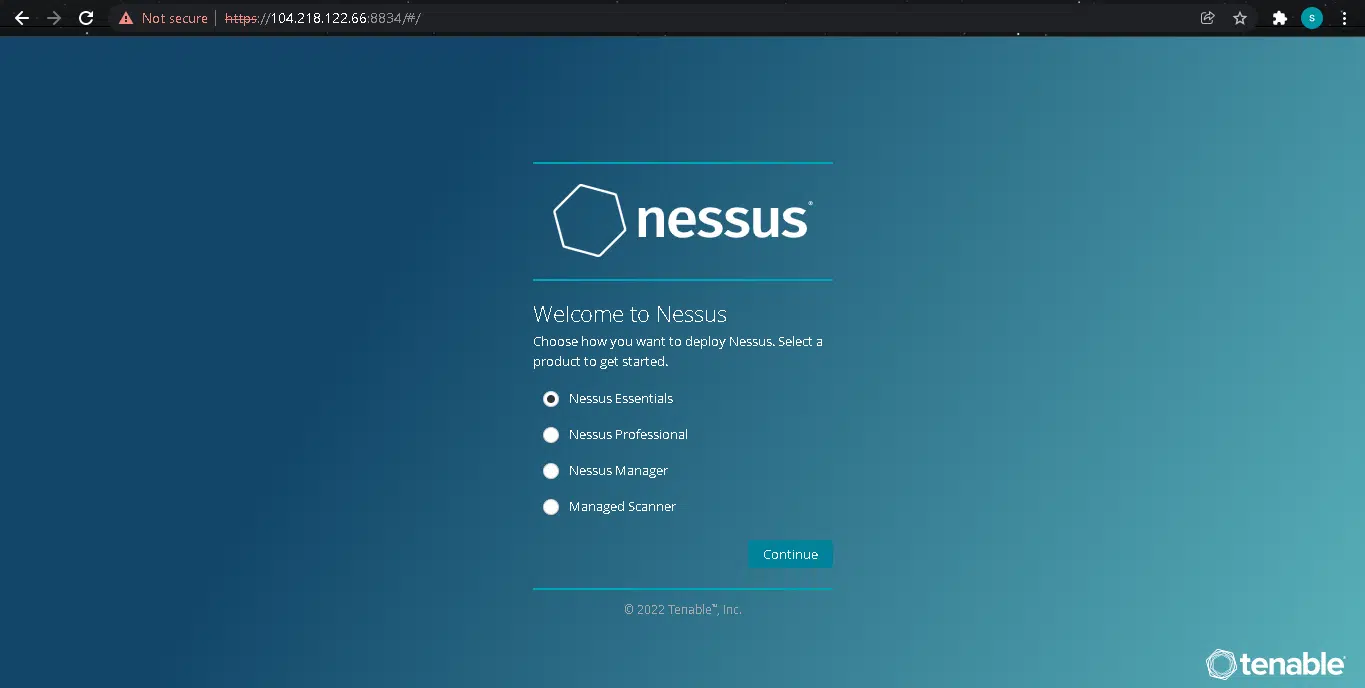
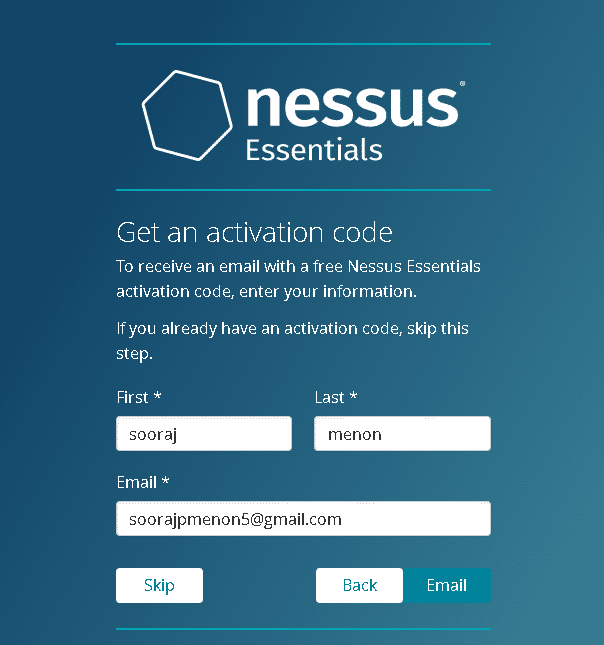
We will now install Nessus Essentials. Nessus will send you an activation code via email after you provide your details.
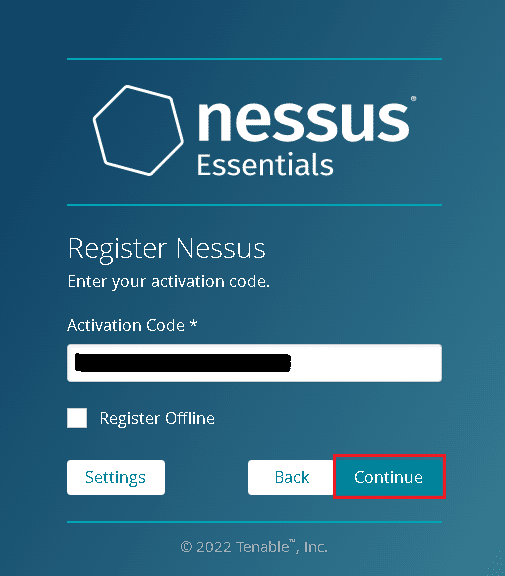
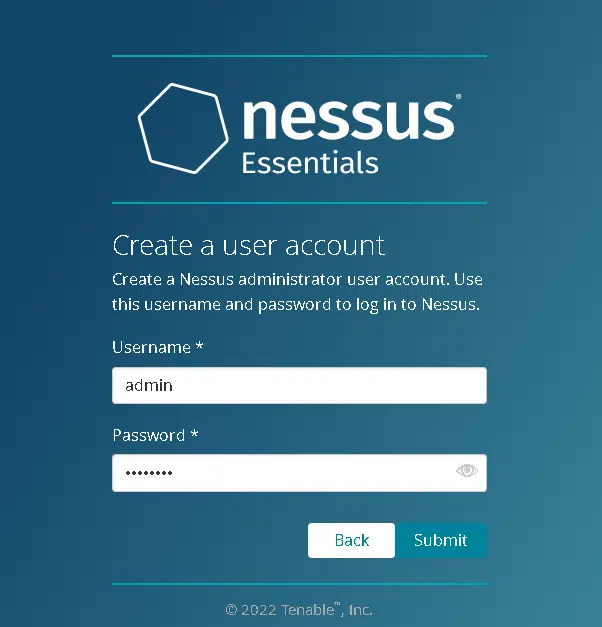
Set up an admin account for Nessus.
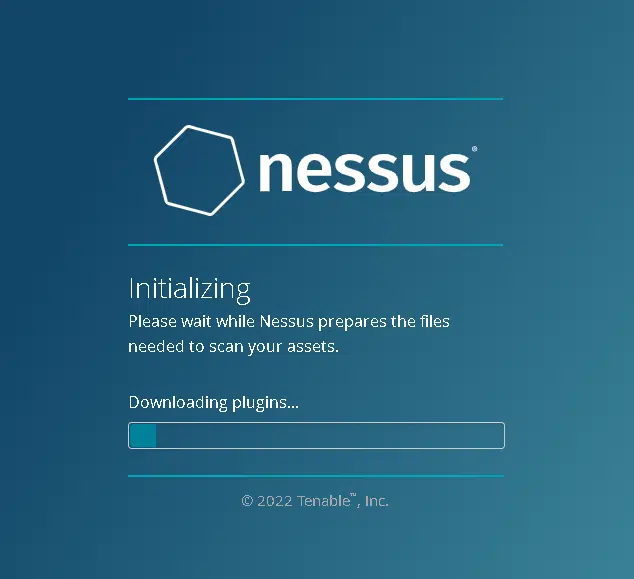
Plugins required by Nessus will be compiled and installed during this process. Please be patient during this process.
Step 4: Scan for vulnerabilities using Nessus
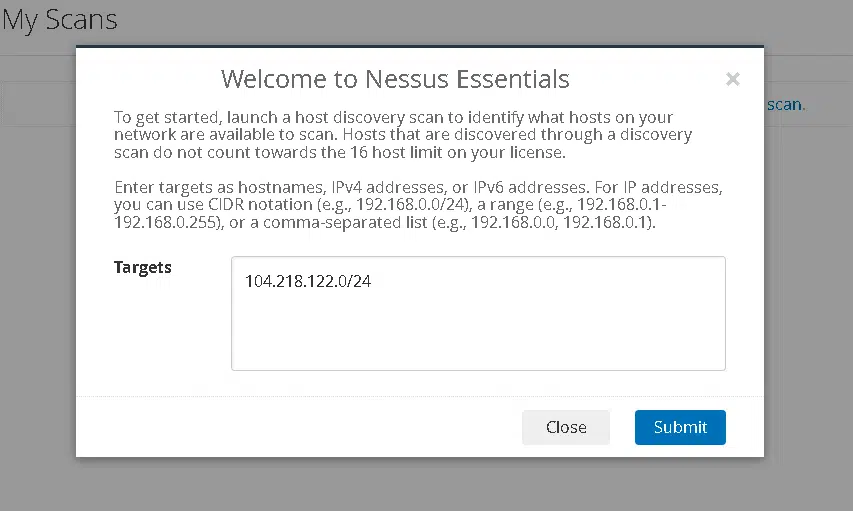
After you finish, the scanning process can begin. Specify the network range or target list, so if you specify 104.218.122.0/24, the entire subnet will be scanned. Next, you will be able to see a list of hosts from which you can choose one to begin scanning.
In My scan section, you can find the results after the scan has been completed. Select the scan report you just completed and look at it.

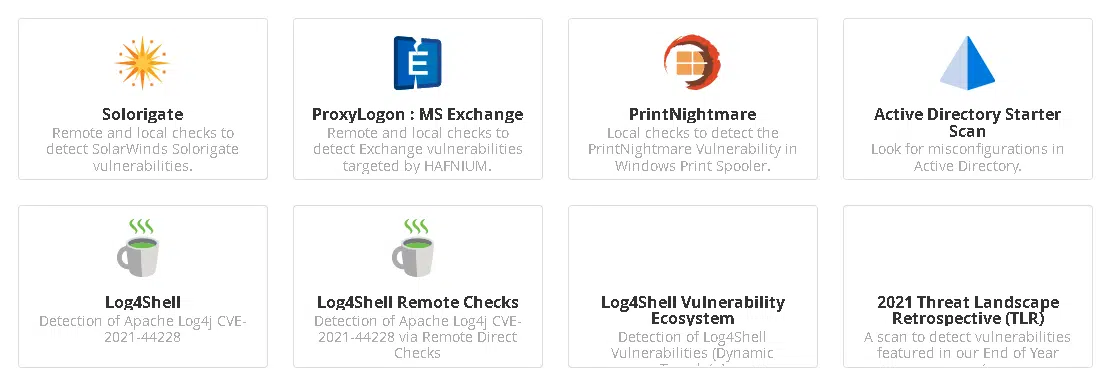
It’s worth checking out the available scan templates. Below are the templates I’ve got.

On your Debian system, we have successfully installed and configured Nessus Vulnerability Scanner. A scan of various systems on a network has also been conducted to check if vulnerabilities exist.
Compared to other systems
Several vulnerability scanners are available in the market, each with unique features and capabilities. Nessus is a widely used vulnerability scanner often compared to other scanners such as OpenVAS and Qualys. Although each scanner has advantages and disadvantages, Nessus is known for its simplicity, precision, and ability to handle large-scale operations.
Nessus is known for its accuracy in identifying vulnerabilities and ability to scale to large networks. The scanner is also easy to use, with a user-friendly interface that allows users to identify vulnerabilities and take appropriate action quickly. In contrast, OpenVAS is known for its open-source nature and ability to integrate with other security tools. Qualys is known for its cloud-based architecture and ability to perform scans from the cloud.
Use cases of Nessus Vulnerability Scanner.
Nessus is used by organizations of all sizes and in various industries to identify and remediate vulnerabilities within their networks and systems. Some everyday use cases of Nessus include:
- Vulnerability assessment – Nessus can be used to perform regular vulnerability scans on a network or system to identify potential security threats.
- Compliance auditing – Nessus can audit systems against various compliance standards such as PCI-DSS, HIPAA, and SOX.
- Patch management – Nessus can identify missing patches on systems and guide how to remediate them.
- Configuration auditing – It is possible to utilize Nessus to verify if the system configurations meet the necessary security standards and adhere to the organizational policies.
- Threat hunting – Nessus can be used to proactively identify potential threats within a network and take appropriate action to prevent them.
Features of Nessus Vulnerability Scanner
Nessus has many features that make it a powerful tool for identifying vulnerabilities and security threats. Some of its notable features include:
- Vulnerability scanning – Nessus can check networks and systems to identify potential vulnerabilities attackers can exploit.
- Compliance auditing – Nessus can audit systems against various compliance standards and guide how to remediate any issues.
- Patch management – Nessus can identify missing patches on systems and guide how to remediate them.
- Configuration auditing -Nessus can review system configurations to guarantee that they meet security standards and conform to the policies set by the organization.
- Reporting – Nessus provides detailed reports that can be used to identify and prioritize vulnerabilities and security threats.
- Integration – Nessus can integrate with other security tools to comprehensively view an organization’s security posture.
Advantages of Nessus Vulnerability Scanner
Nessus has several advantages, making it a popular choice among IT professionals and security researchers. Some of its key benefits include:
- Accuracy – Nessus is known for identifying vulnerabilities, which helps organizations prioritize remediation efforts.
- Scalability – Nessus can scale to large networks, making it a good choice for organizations with complex IT environments.
- Ease of use – Nessus has a user-friendly interface that makes it easy to use and understand, even for those without a strong background in cybersecurity.
- Customization – Nessus allows users to customize scans and reports to fit their needs and requirements.
- Timeliness – Nessus is constantly updated with the latest vulnerabilities and security threats, ensuring that organizations are always up-to-date on potential risks.
Disadvantages of Nessus Vulnerability Scanner
While Nessus has many advantages, there are also some disadvantages to consider. Some of its disadvantages include:
- Cost – Nessus is not a free tool, and the cost can be prohibitive for smaller organizations or those on a tight budget.
- Resource-intensive – Nessus can be resource-intensive, especially when scanning large networks, leading to performance issues.
- False positives – Investigating and resolving false positives produced by Nessus, like with other vulnerability scanners, can pose a significant challenge.
Nessus Alternative options
While Nessus is a popular and effective vulnerability scanner, several alternative options exist. Some of the most notable alternatives include:
- OpenVAS – OpenVAS is an open-source vulnerability scanner similar to Nessus in many ways, including its accuracy and scalability.
- Qualys – Qualys is a cloud-based vulnerability scanner known for its scalability and ability to perform scans from the cloud.
- Rapid7 – Rapid7 is a vulnerability scanner known for its ease of use and comprehensive reporting capabilities.
Conclusion
Nessus Vulnerability Scanner is a powerful tool that can help organizations identify and remediate vulnerabilities within their networks and systems. Its advantages include its accuracy, scalability, ease of use, customization options, and timeliness. However, it has some disadvantages, including its cost and resource-intensive nature. Several alternative options are also available, including OpenVAS, Qualys, and Rapid7. Ultimately, the choice of vulnerability scanner will depend on an organization’s specific needs and requirements.
Thanks for reading! I hope it was informative for you!
Nessus Vulnerability Scanner is a popular commercial vulnerability scanner used to identify and remediate vulnerabilities within computer systems, networks, and applications.
Nessus works by scanning a network or system for vulnerabilities, using a database of known vulnerabilities to compare against the target system. It then generates a report of vulnerabilities found, which can be used to remediate any issues.
Nessus is used by organizations of all sizes to identify and remediate vulnerabilities within their networks and systems. It is commonly used in industries such as healthcare, finance, and government.
Nessus has several advantages, including its accuracy, scalability, ease of use, customization options, and timeliness. It is also known for its ability to scan large networks, making it a good choice for complex IT environments.
Some of the disadvantages of using Nessus include its cost, resource-intensive nature, and the potential for false positives. It also requires regular updates to stay current with the latest vulnerabilities and security threats.