Set up Ajenti Control Panel on Ubuntu
The Ajenti control panel provides various server management functions through an open-source web interface. The application installs packages, runs commands, and displays information about the server, such as the amount of RAM used, free disk space available, etc. This is all accessible through a web browser. Okay, let’s start.
Step 1: Configure the VPSie cloud server
Those who already have a system up and running should skip this step and do update their system.
- Sign in to your system or register a newly created one by logging in to your VPSie account.
- Connect by SSH using the credentials we emailed you.
- Once you have logged into your Ubuntu instance, run these commands to update your system.
# apt-get update && apt-get upgrade -y
Do a reboot,
# sudo reboot
Step 2: Install Ajenti 1.x
The first step is to install the python-imaging dependency:
# wget http://security.ubuntu.com/ubuntu/pool/universe/p/pillow/python-imaging_3.1.2-0ubuntu1.6_all.deb

#sudo apt install -f ./python-imaging_3.1.2-0ubuntu1.6_all.deb
Run the following command to import and add the Ajenti repository GPG key:
# wget http://repo.ajenti.org/debian/key -O- | sudo apt-key add -

# echo "deb http://repo.ajenti.org/ng/debian main main ubuntu" | sudo tee /etc/apt/sources.list.d/ajenti.list
Now we will Install Ajenti 1. x :
# curl -O https://raw.githubusercontent.com/ajenti/ajenti/master/scripts/install.sh
After downloading the script, run the following commands to begin the installation:
# bash install.sh
Step 3: Manage Ajenti Service
You can stop the Ajenti service using the following command:
# sudo systemctl start ajenti
You can start the Ajenti service using the following command:
# sudo systemctl stop ajenti
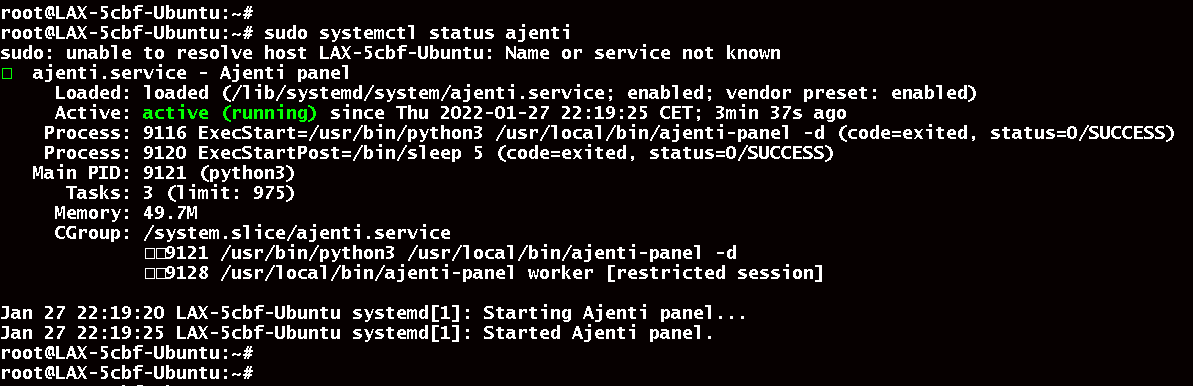
Ajenti’s status can also be verified with the following command:
# sudo systemctl status ajenti
Port 8000 is the default port used by Ajenti. To find out, run the following command:
# ss -tunelp | grep 8000
To access the Ajenti web interface, open your web browser and go to http://{ServerIP}:8000.
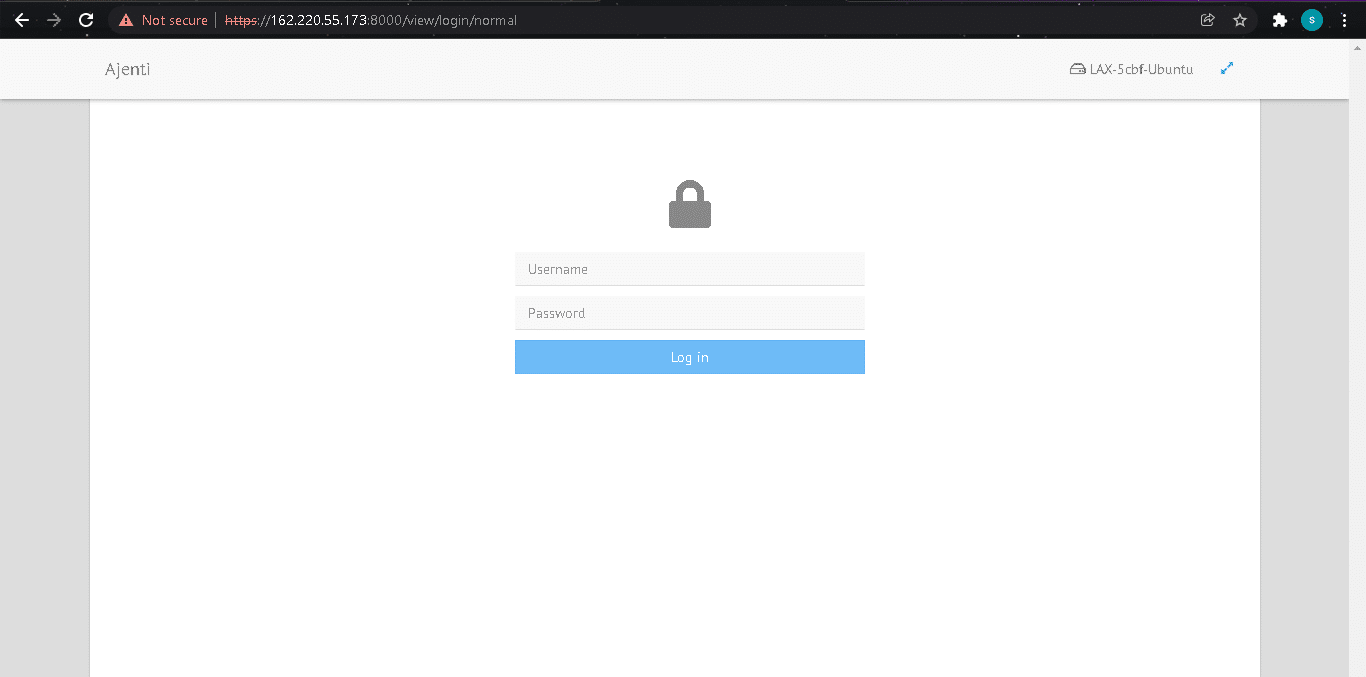
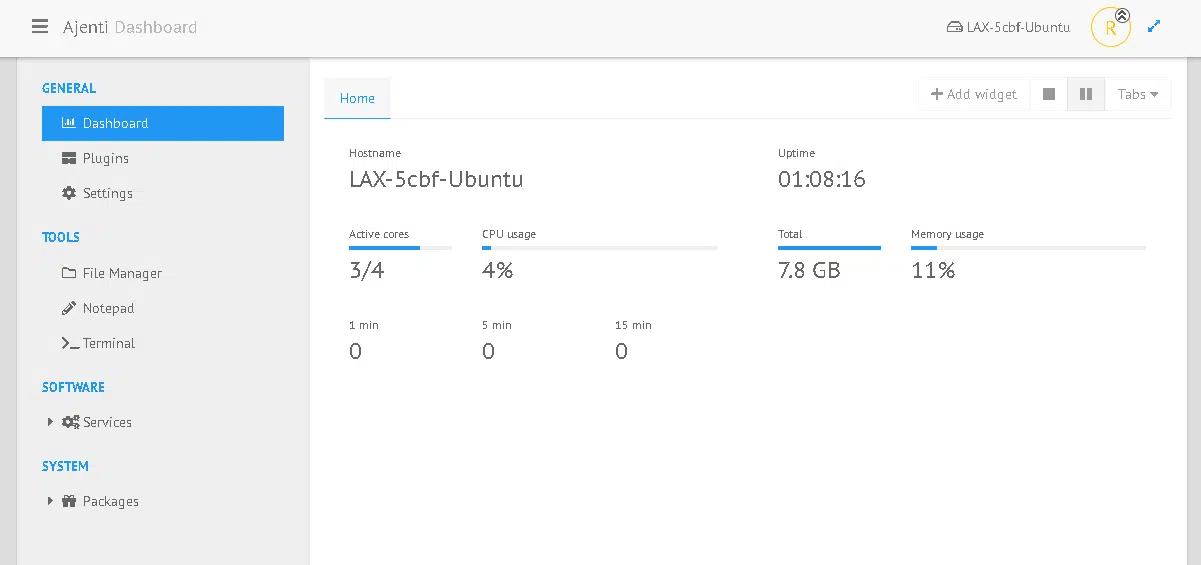
Sign in with your username and password. As soon as you reach your Dashboard, you will see your server information and can begin using the application.
Ajenti is now ready for use. Thanks for reading! I hope it was informative for you!
Ajenti Control Panel is an open-source web-based control panel that allows you to manage your Ubuntu server through a user-friendly web interface. It provides a centralized platform to manage various aspects of your server, such as system settings, user accounts, installed packages, and more.
To install Ajenti Control Panel on Ubuntu, follow these steps:
Open a terminal window on your Ubuntu system.
Update your system’s package list by running the following command:
sudo apt-get update - Install the Ajenti package repository by running the following command:
sudo apt-get install -y ajenti - Once the installation is complete, start the Ajenti service by running the following command:
sudo service ajenti start - Open your web browser and navigate to the following address:
https://<your-server-ip>:8000/ Replace <your-server-ip> with the IP address of your Ubuntu system.
You should now see the Ajenti login page. Enter your root username and password to log in.
Once you’ve logged in, you’ll have access to the Ajenti Control Panel dashboard. From here, you can configure and manage various aspects of your Ubuntu system, including system settings, user accounts, and installed packages.
Yes, Ajenti Control Panel is compatible with a wide range of Linux distributions, including Debian, CentOS, and Fedora. However, the installation process may vary depending on the specific distribution you’re using.
Yes, Ajenti Control Panel is completely free and open-source software. You can download and use it without any licensing fees or restrictions.
Yes, Ajenti Control Panel is designed with security in mind and includes various features to help protect your server, such as SSL encryption, firewall management, and user access controls. However, it’s still important to follow best practices for server security, such as regularly updating your system and configuring strong passwords.