Understanding Sub-Accounts in a Hybrid Cloud Environment
In today’s evolving cloud landscape, many businesses are turning to hybrid cloud solutions to meet their growing infrastructure needs. A key part of managing this environment effectively is understanding how account permissions and sub-accounts function within your VPSie tenant.
What Are Sub-Accounts?
Sub-accounts allow the main account holder to delegate access and control to other users while maintaining separation of billing and resource ownership. This hybrid model gives organizations the flexibility to:
- Invite team members or partners as sub-account users.
- Assign custom roles and permissions to each user.
- Manage shared resources without sharing billing responsibility.
- Ensure secure, role-based access across the platform.
For instance, if User A is the main account holder, they can invite User B or User C as sub-accounts. Each sub-account has its own wallet (prepaid or post-paid) and is only billed for resources they create. However, they can also access shared resources from User A without incurring additional costs.
Flexible Role Management
Roles and permissions are fully configurable by the main account owner (User A). Invitations can be revoked or modified at any time, enabling dynamic control over who can do what within the environment.
This ensures a secure, flexible, and efficient way to manage cloud infrastructure, especially useful for teams, resellers, or organizations operating in collaborative environments.
To get started:
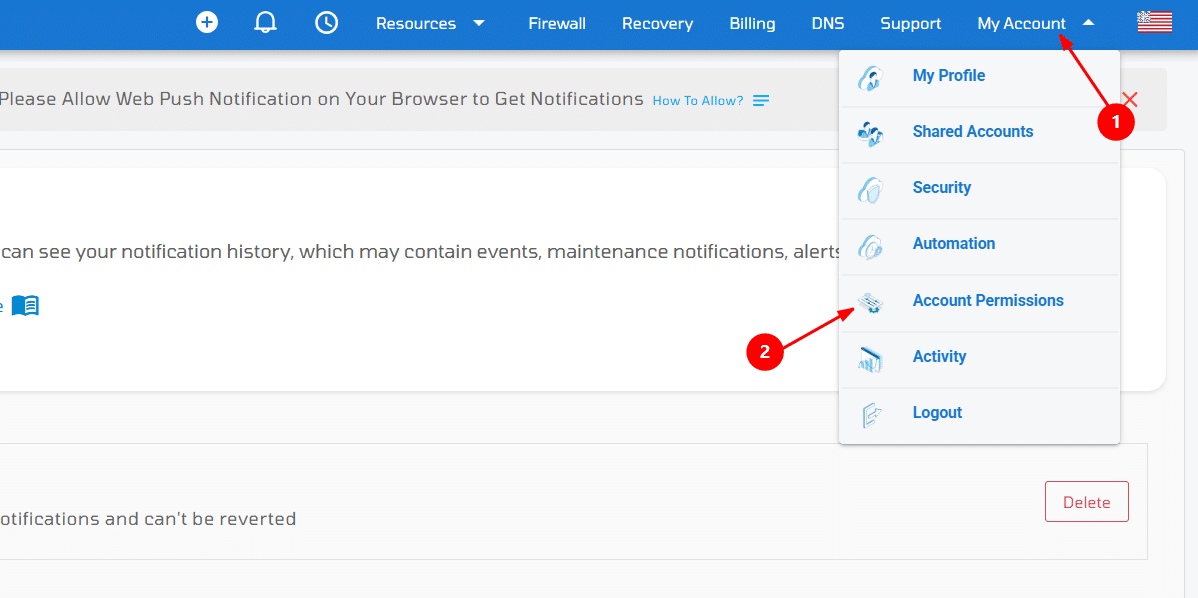
Navigate to My Account → Account Permissions → Roles & Permissions
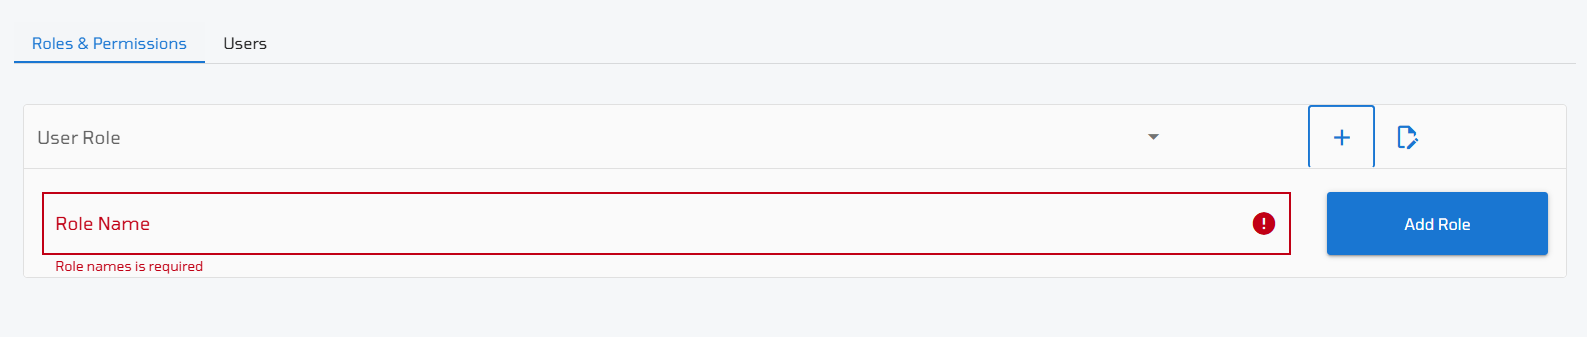
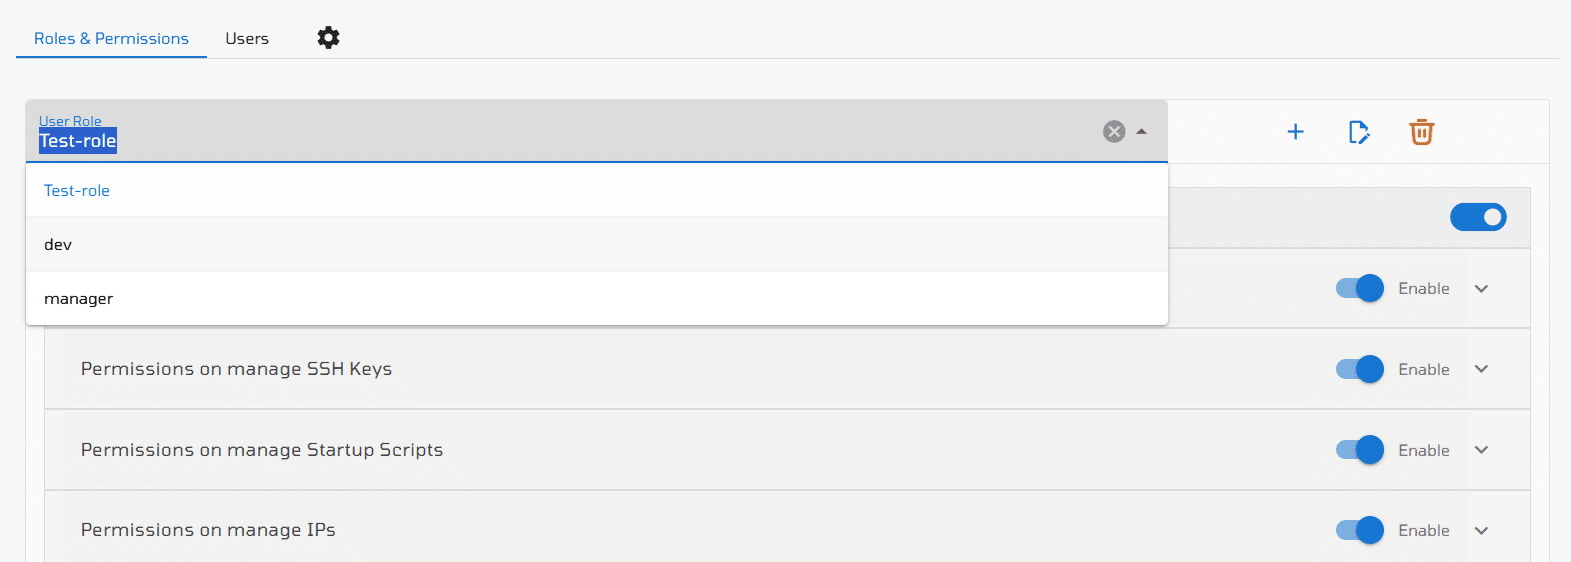
1. Roles & Permissions: This is the main section where you can view, manage, and create custom roles. Any roles you’ve previously created will be listed here for easy access and modification.
2. Add New Role: To create a new role, simply provide a Role Name. No additional details are required at this stage.
- Select Role – Choose a role from the dropdown to manage its permissions.
- Manage Permissions – Enable or disable specific permissions using the toggle switches.
- Add New Role – Click the + icon to create a new custom role.
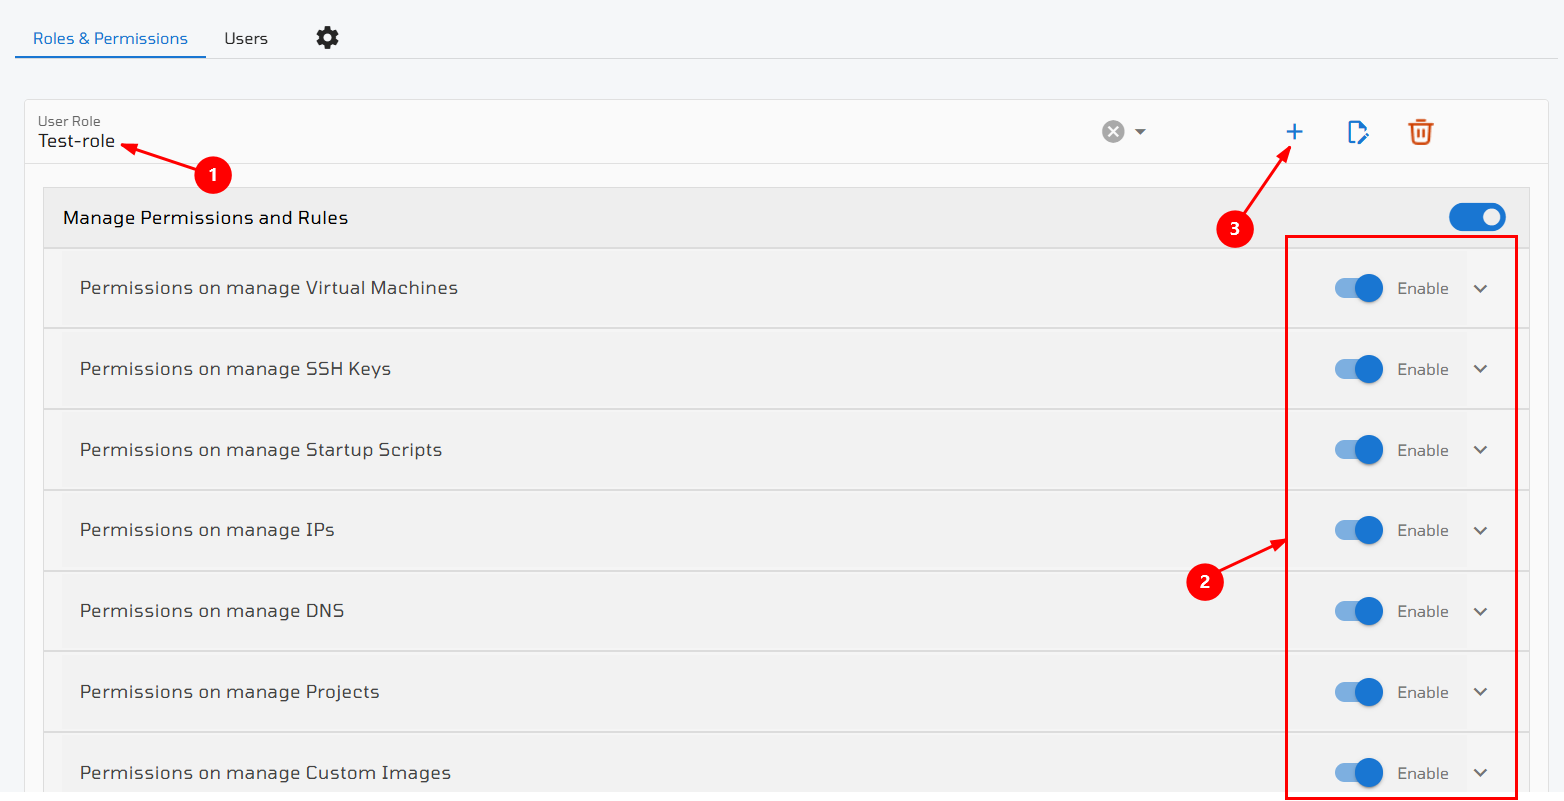
3. Edit Role Permissions: To modify permissions for an existing role, select the role from the User Role dropdown menu. Then, use the toggles to enable or disable specific permissions as needed.
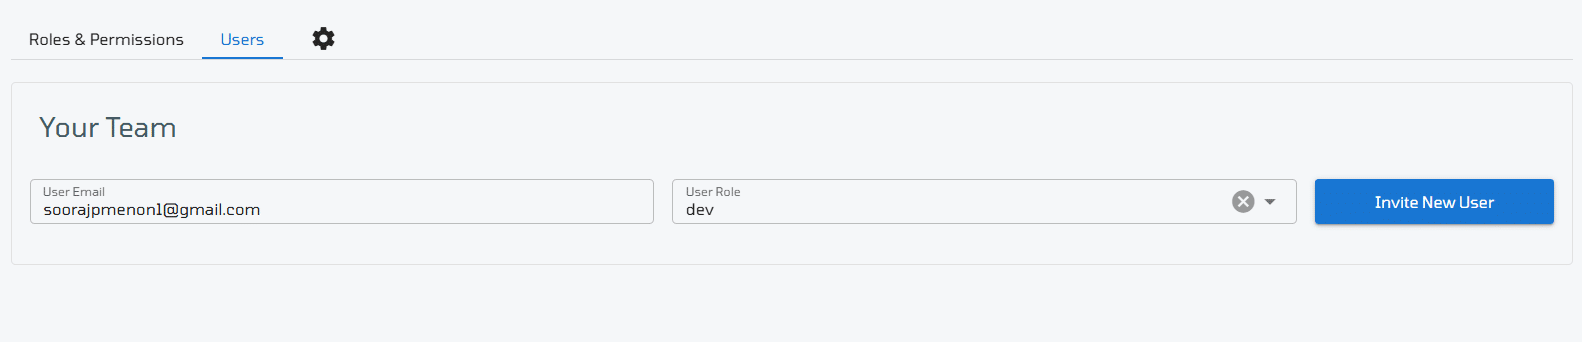
4. Inviting a User: In the Users section, you can invite others to access your resources with the permissions defined in a selected role.
To invite a new user:
- Enter the email address of the sub-account.
- Select the user role you want to assign.
- Click Invite New User to send the invitation.
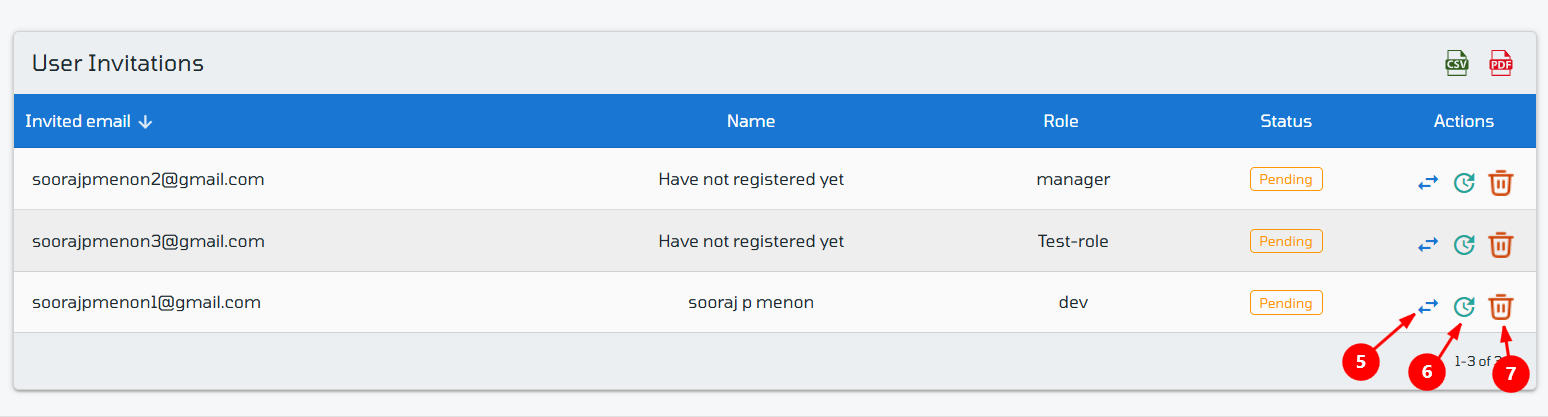
5. Manage Invited Users: You can view a list of all invited users, resend or revoke invitations, or invite additional users. The user list can also be exported in PDF or CSV format for record-keeping or audits.
- Invited Email – The email address of the user you’ve invited.
- Name – The name associated with the user’s VPSie account. If the user hasn’t registered yet, it will display “Have not registered yet”. Note: The user must create a VPSie account to access shared resources.
- Role – The role you assigned to the user during the invitation process.
- Status – Indicates whether the invitation has been accepted or is still pending.
- Change Role – You can modify the assigned role directly from the invitation interface.
- Resend Invitation – If the user hasn’t responded, you can resend the invitation.
- Delete Invitation – Remove the invitation entirely if access is no longer needed.
Accepting an Invitation from Your User Account
To accept an invitation to access another user’s resources:
Navigate to My Account → My Profile → Profile Requests
Locate the pending invitation and click Accept to join the associated account with the assigned role.

Accessing a Shared Account
To access an account that has been shared with you:
- Navigate to My Account → Shared Accounts.
- You will see a list of shared accounts available to you.
- Click the Login button next to the desired account to access its resources.