This tutorial will show you how to deploy PrestaShop on vpsie using our one-click deployment option and Create your online store with PrestaShop in minutes.
PrestaShop is a free shopping cart software. It allows you to build an e-commerce website for free and start selling online with hundreds of powerful features.
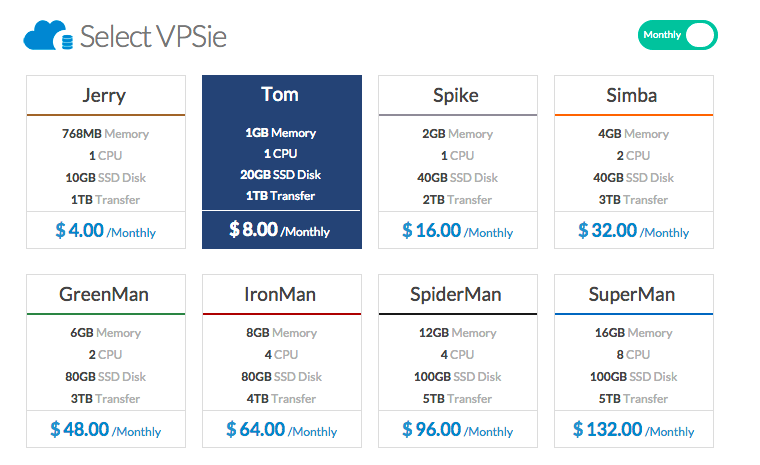
First, let me list some facts to eliminate confusion and unnecessary headaches. Our setup will only work with 1GB of Ram or higher; therefore,e deploying it on the Jerry package will not work.
Having that clear, let’s start the deployment of the PrestaShop using VPSie. First, log in to your VPSie account, head over to the first tab, VPSie, at the bottom of the page, and click the Add New VPSie button.
On the next screen, select Tom package or above.
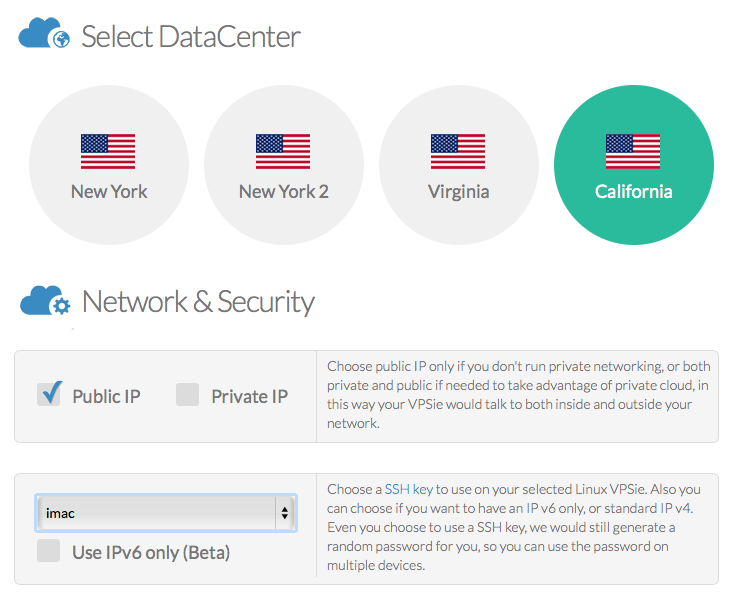
For the sake of simplicity, we will only select Public IP and choose the ssh key we have previously added to our account (if you don’t like the ssh key, you will have to wait for the email after the vpsie is created to get your password), then select the DC where you want your PrestaShop deployed.
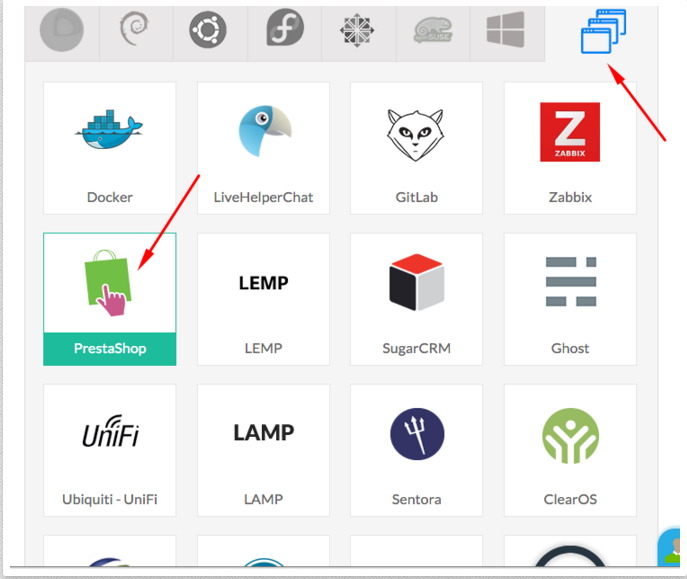
Next, you click on the Apps tab and select PrestaShop from the application lists, then type your hostname and click on Create VPSie button on the bottom.
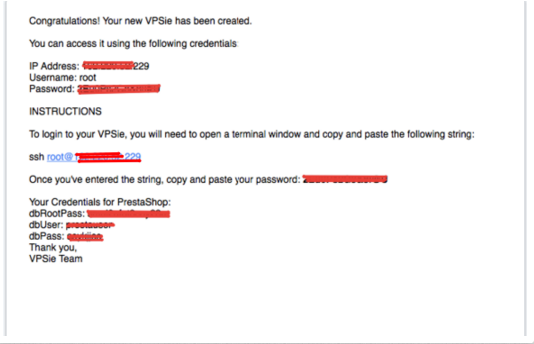
You will receive an email confirmation that will look something like the screenshot below – which will have your
Database root password ( you will need for database maintenance as root )
Prestashop database username ( you will need one for the Prestashop setup wizard )
Prestashop database password ( you will need it for the Prestashop setup wizard )
IP assigned to your server (Routable IP on the Internet ready for browsing)
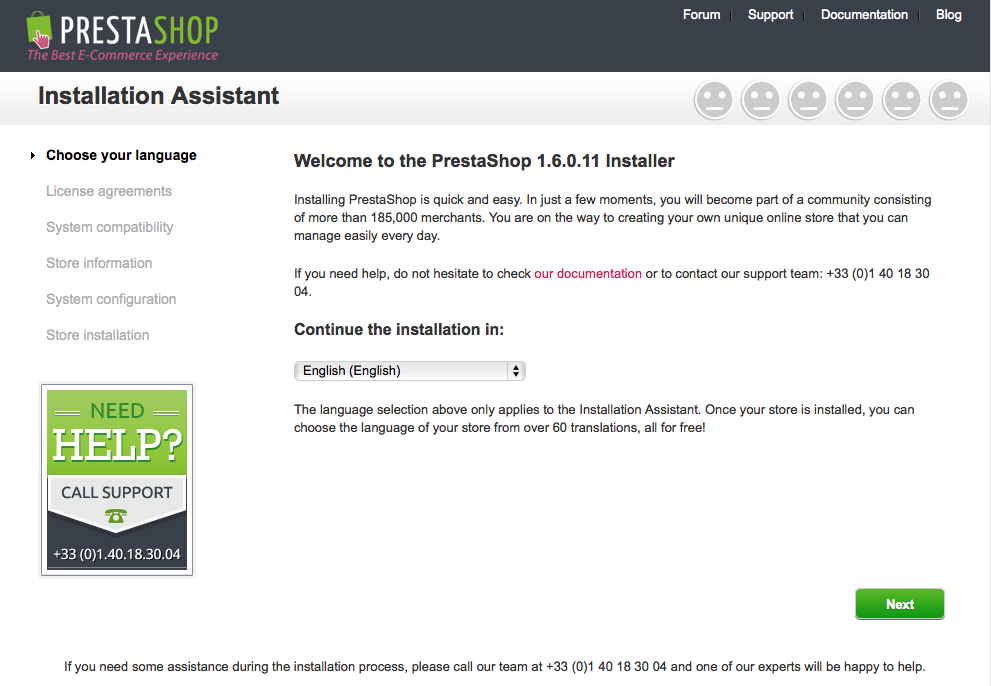
You can now browse https://VPSie-IP to follow the PrestaShop installer. You must select your language on the first page and then click the Next button.
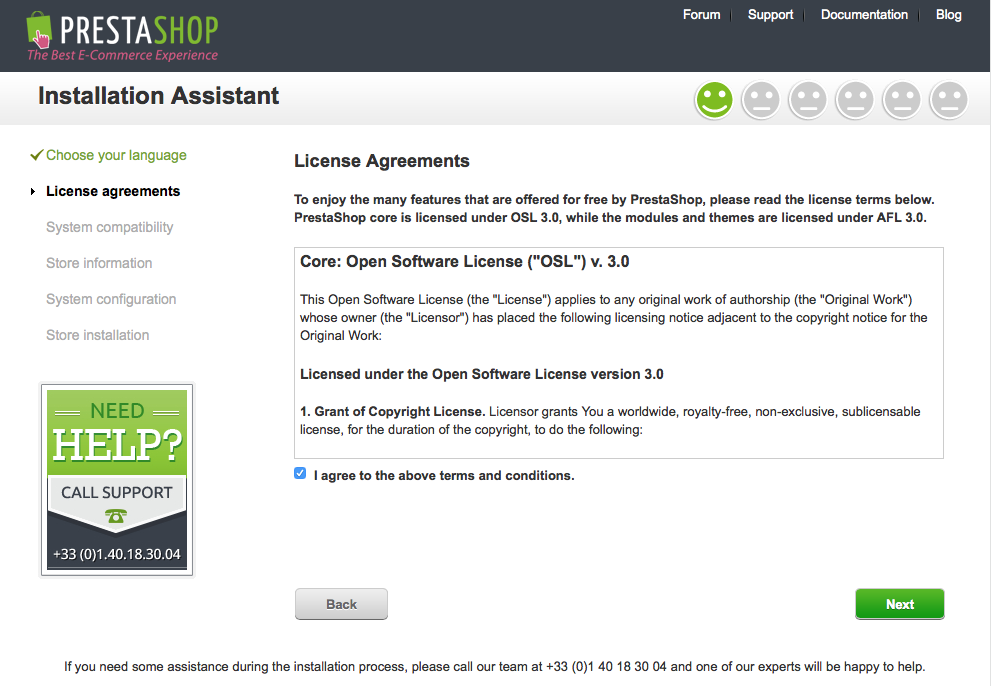
On the next page, you will need to read the License Agreements carefully and accept them. After you have done that, click the Next button to move forward.
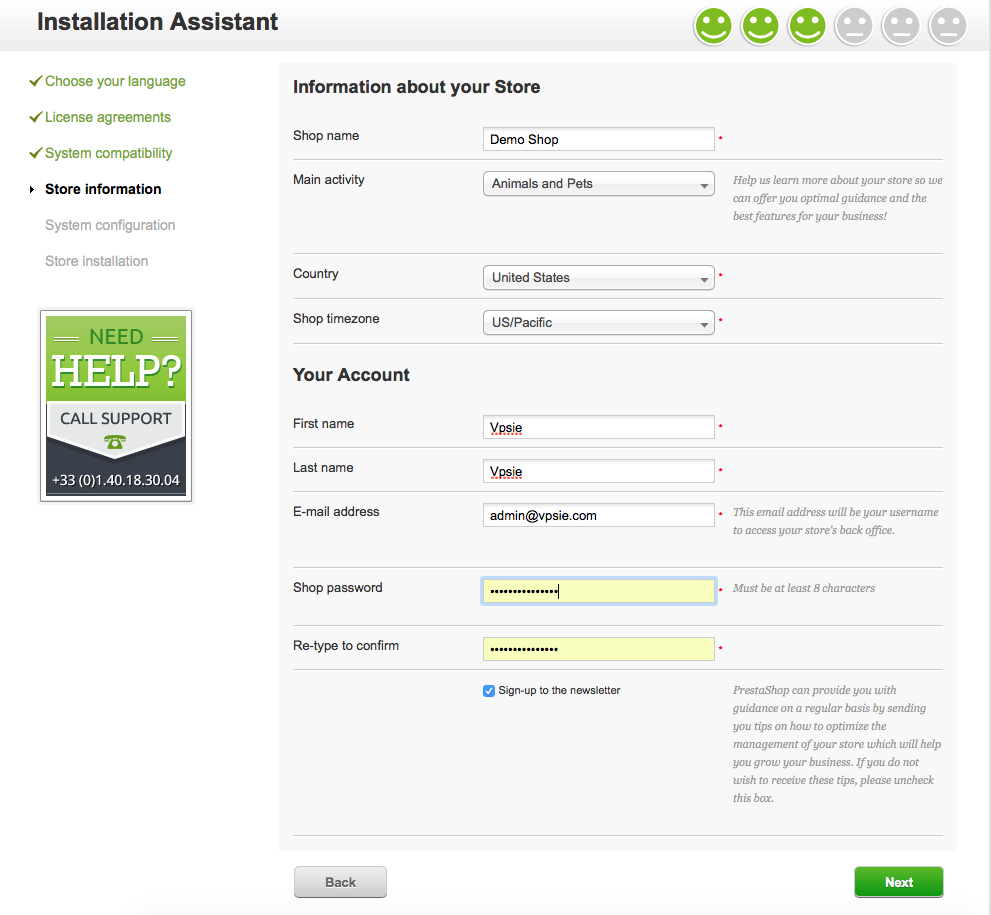
On the next page, fill out the form with your shop information, select the shop type, time zone, name, and email address, and select a strong password. When done, click next.
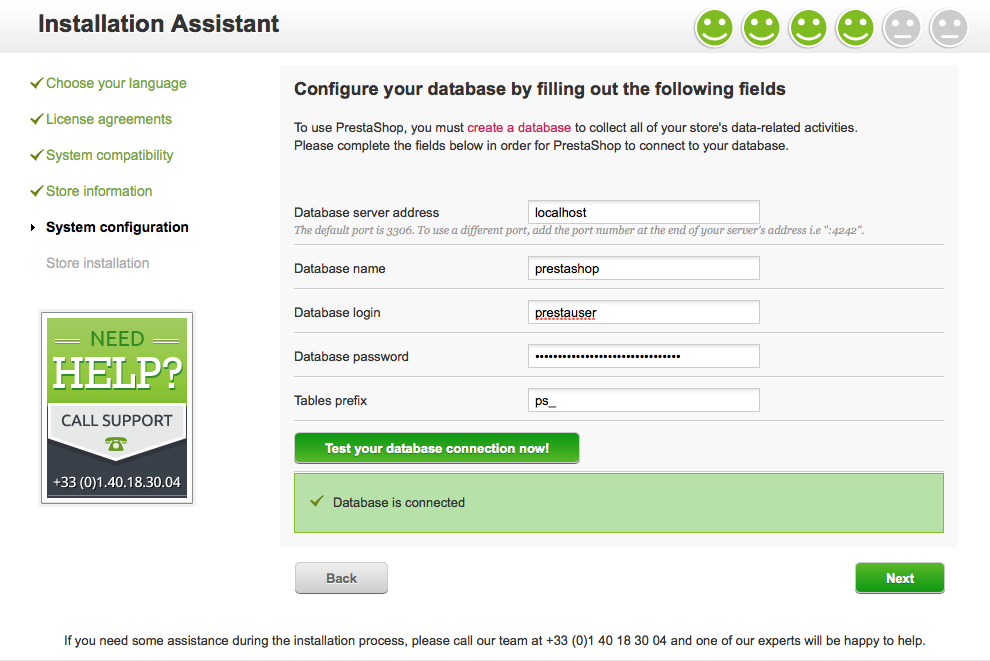
In the next screen, you need to fill up the information for your database. You will find the mysql user and mysql password details on your login screen. After completing the form with all the information, click the “Test your database connection” button. If it’s successful, then you can click on the Next button.
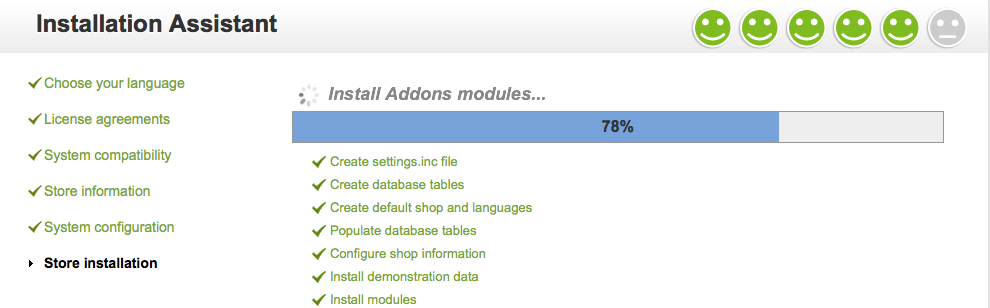
On the next screen, you must wait for the installation script to do its thing.
When done, you will be prompted and told that you need to delete the install folder from your server.
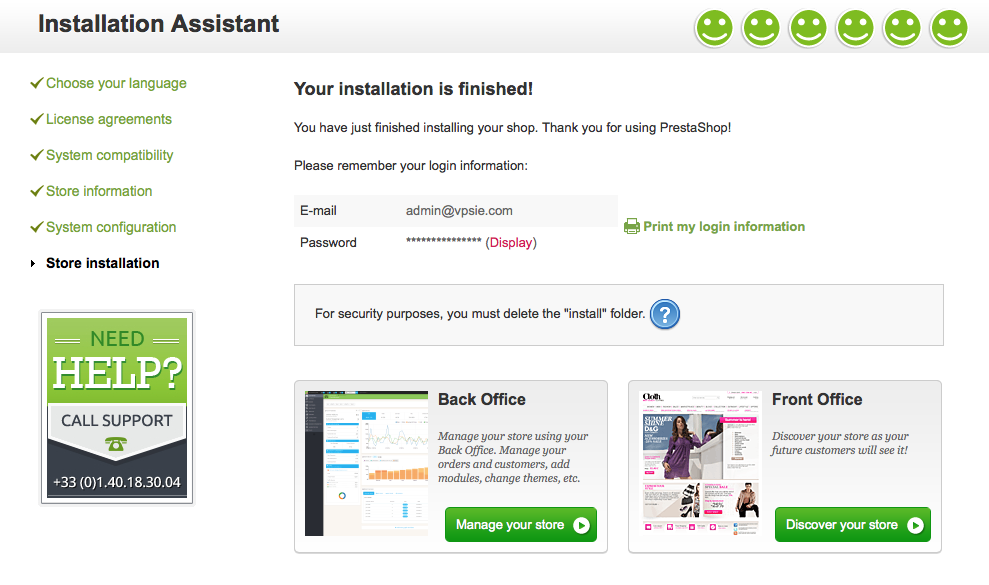
To do that, you will need to login to your PrestaShop vpsie console (Click on your VPSie—> Access —> Console Access) and run the following commands:
# cd /var/www/html/prestashop
# rm -rf install/

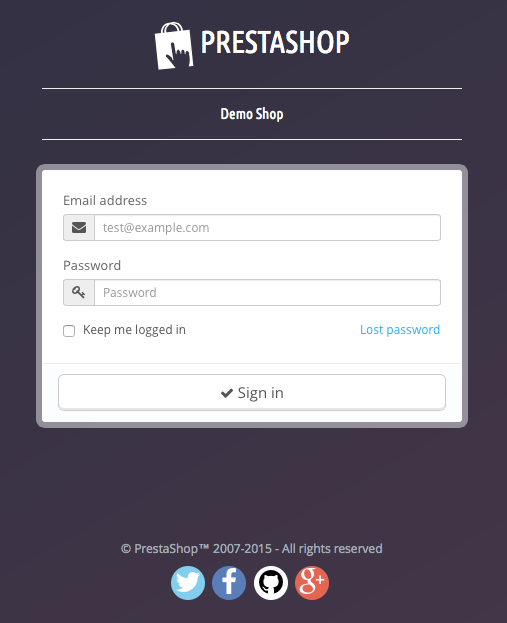
When done, you can access your admin panel by browsing http:///admin and login in with the email address and password you filled in the form during the installation.
Once that is done, your shop will be populated with your excellent products and start selling. We wish you great success in your business.