Control Panel - Server Groups
Table of Contents
Server Groups in the VPSie Control Panel let you organize your servers into logical groups for better management and clarity. Whether you’re grouping by project, role, or environment (such as development, staging, or production), this feature helps streamline your infrastructure.
You’ll also notice an Affinity toggle when creating a group. When enabled, Affinity ensures that all servers in the group are deployed on the same physical host or within close proximity. This can help reduce latency and improve performance for tightly connected services. However, be aware that it may reduce redundancy, so it’s best used when performance between servers is a higher priority than fault tolerance.
With Server Groups, managing your cloud environment becomes cleaner, more organized, and more efficient.
Add a Server Group
Creating a Server Group is quick and easy. Just follow these steps:
- Go to the Control Panel and navigate to the Server Groups section.
- Fill in the following details:
Group Name: Enter a name that clearly identifies the group (e.g., “Web Servers”, “Dev Environment”).
Enable Affinity (Optional): Toggle this on if you want all servers in this group to be placed on the same physical host or nearby for low-latency communication.
Group Description (Optional): Add a short description to explain the purpose of the group for future reference.
Once done, click Add Server Group to create it.

Your new server group will now be available, and you can begin adding servers to it as needed.

Manage Server Group
- Click on the Group Name to access the settings of your newly created group. From there, you can view all related details, add servers, and manage configurations.

You can now view all the details of the server group. To attach a server, simply click the “+” icon and select the server you want to add.
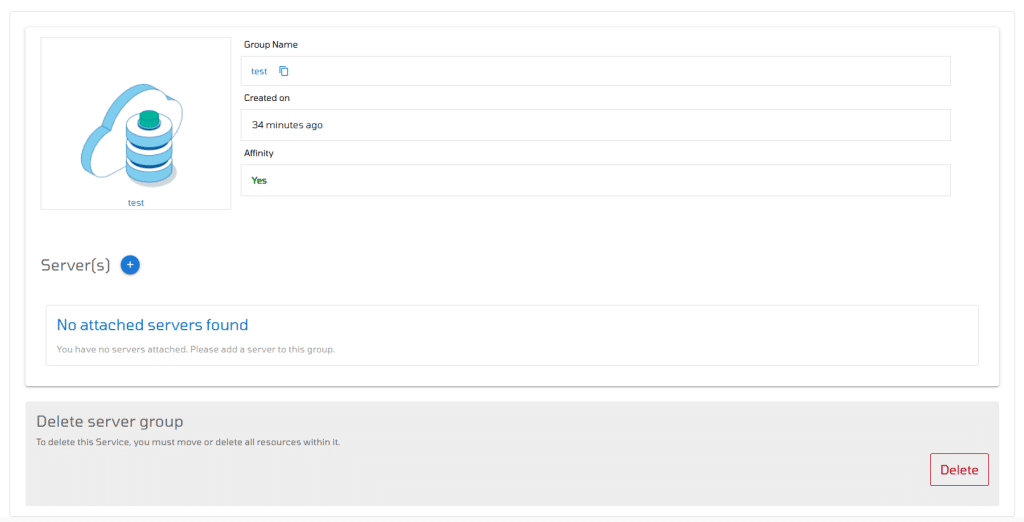
If you need to detach a server from a group after adding it, simply click the trash bin icon next to the server to remove it from the group.

To delete a server group, simply click the Delete button. This will remove the group from your account permanently.


