
How to Install Bitwarden on Ubuntu
Welcome to the definitive Bitwarden installation tutorial for Ubuntu! We’ll walk you through the process of installing this sophisticated open-source password manager on your Ubuntu machine in this comprehensive tutorial. Bitwarden on Ubuntu provides a unified password management experience for individuals, enterprises, and organisations. Bitwarden can benefit everyone looking for increased security and simplicity because to its user-friendly interface and cross-platform compatibility. Say goodbye to remembering a plethora of passwords and the risk of data breaches. Bitwarden enables you to securely store, generate, and auto-fill passwords across devices, whether you’re a busy professional, a tech-savvy enthusiast, or a privacy-conscious user. With Bitwarden on Ubuntu, you can take control of your digital identity and protect important information.
Follow our step-by-step instructions to easily install Bitwarden and unlock its full power on your Ubuntu VM. Let’s get started and take back control of your passwords like never before.
Step 1: Create Ubuntu VPSie Instance
To set up your Ubuntu VPSie instance, follow these steps:
- Visit the VPSie website and sign up for an account if you haven’t already.
- Log in to your VPSie account and navigate to the dashboard.
- Click on the Create New VPSie button to start the instance creation process.
- In the instance creation form, select Ubuntu as the operating system and select the version.
- Choose the desired specifications for your instance, such as CPU, RAM, and storage capacity.
- Specify additional settings like network configuration, security groups, and SSH key if needed.
- Review the configuration details and click on the Add VPSie button to initiate the instance creation.
- Wait for the instance to be provisioned. This process may take a few minutes.
- Once the instance is ready, you will be provided with the necessary information to connect to it, such as the IP address, username, and password.
Use an SSH client like PuTTY (Windows) or Terminal (macOS/Linux) to connect to your Ubuntu VPSie instance using the provided credentials.
Step 2: Upgrade your System
To begin, it is advisable to ensure that all of your system packages are up to date by upgrading them to the latest version. You can accomplish this by executing the following command:
apt update -y
apt upgrade -y
To install the additional dependencies needed, execute the following command:
apt install apt-transport-https ca-certificates curl software-properties-common -y
Step 3: Install Docker CE Repository
To include the Docker CE official repository in APT, you should execute the following command to add the Docker GPG key:
curl -fsSL https://download.docker.com/linux/ubuntu/gpg | apt-key add -
Next, add the Docker CE repository using the following command:
add-apt-repository "deb [arch=amd64] https://download.docker.com/linux/ubuntu $(lsb_release -cs) stable"
Step 4: Install Docker CE
You can install the latest version of Docker CE using the following command:
apt install docker-ce -y
Verify the status using the following command:
systemctl status docker
Step 5: Install Docker Compose
To ensure the functionality of your system, it is necessary to install Docker Compose. You can acquire and install it by executing the provided command below.
curl -sL "https://github.com/docker/compose/releases/download/1.29.2/docker-compose-$(uname -s)-$(uname -m)" -o /usr/local/bin/docker-compose
To grant execution permission to the downloaded binary, please use the following command:
chmod +x /usr/local/bin/docker-compose
Verify the Docker Compose version
docker-compose --version
Step 6: Create a User for Bitwarden
To add a new user to both the sudo and docker groups, you can utilize the following command:
useradd -G docker,sudo -s /bin/bash -m -d /opt/bitwarden bitwarden
Set Password for the bitwarden using the following command:
passwd bitwarden
Now, change the ownership to the bitwarden directory:
chown -R bitwarden: /opt/bitwarden
Step 7: Install Bitwarden
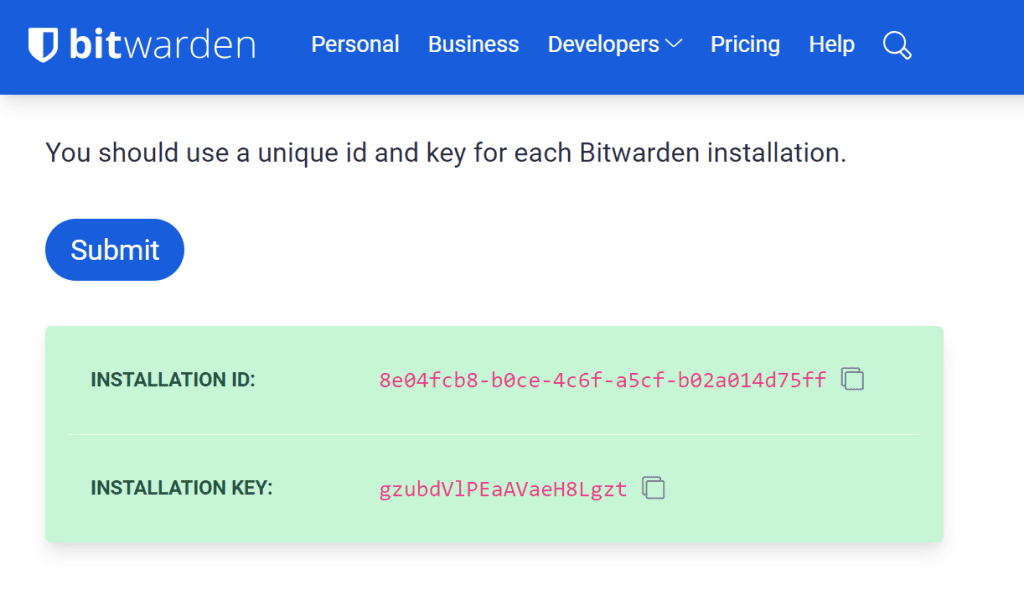
To begin, please navigate to the hosting page of Bitwarden and retrieve the installation key and ID by entering your mail address.
Now, switch the user to Bitwarden and download the Bitwarden installation script using the following command:
su - bitwarden
curl -Lso bitwarden.sh https://go.btwrdn.co/bw-sh
set execution permission to the downloaded script:
chmod +x bitwarden.sh
Now, install the Bitwarden password manager with the following command:
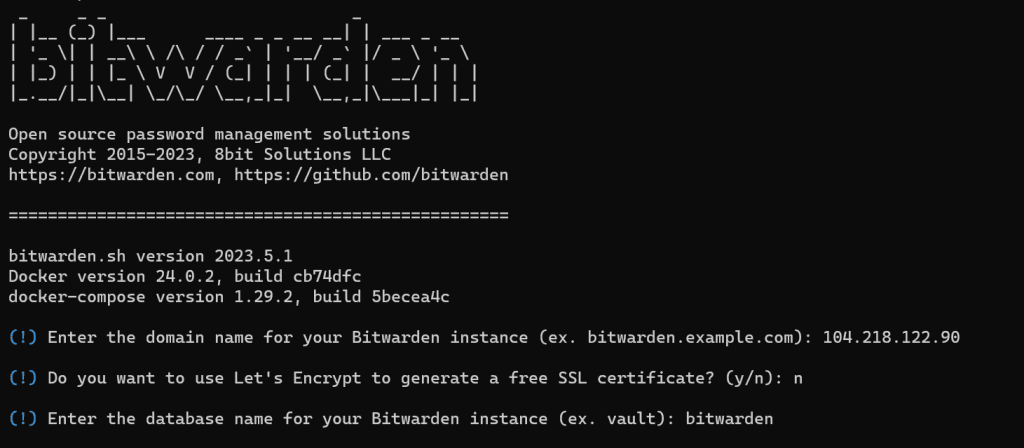
sudo ./bitwarden.sh install
To proceed, please provide the following details as indicated in the screenshot below: your domain or IP, SSL information, and database name. In this tutorial, SSL is not being used, so if you want SSL, enter y accordingly.
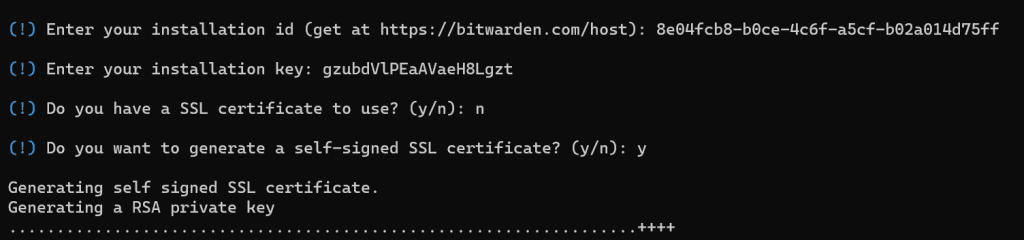
You will be asked to provide the Bitwarden installation key, id, and SSL information provide it from copying it from bitwarden host page.
Now, start the Bitwarden service using the following command:
sudo ./bitwarden.sh start
Enter the following command to verify all downloaded docker images:
sudo docker images
To check all running containers run the following command:
sudo docker ps
Step 8: Access Bitwarden Web Interface
Once you have completed the installation and configuration of the Bitwarden password manager, you are ready to access its web user interface (UI) by visiting the following URL:
https://your-server-ip
Upon accessing the URL, you will be greeted with the Bitwarden web page.
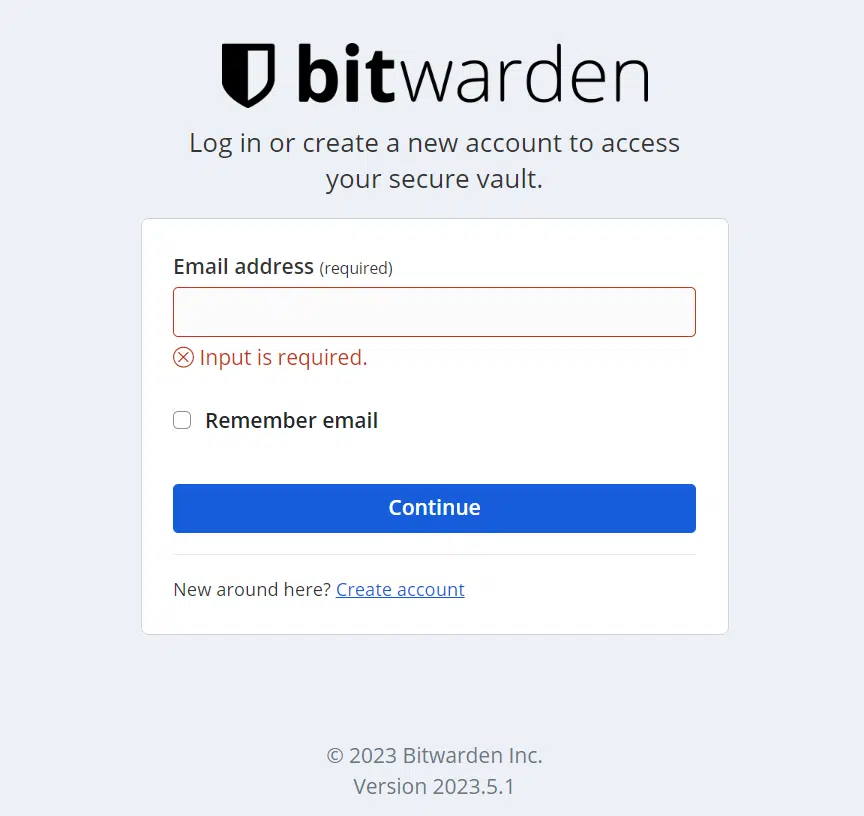
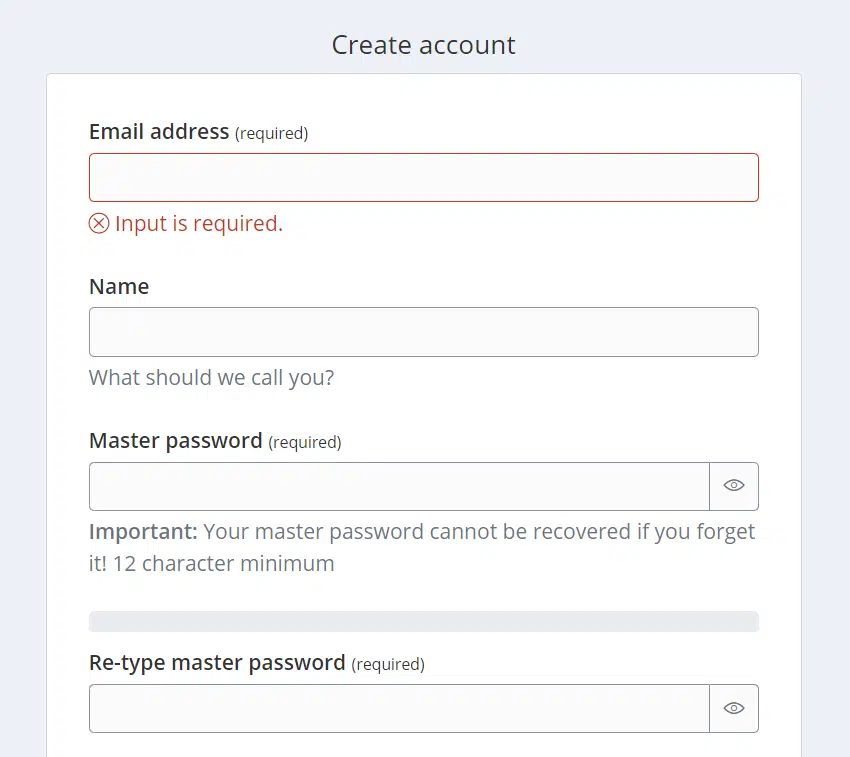
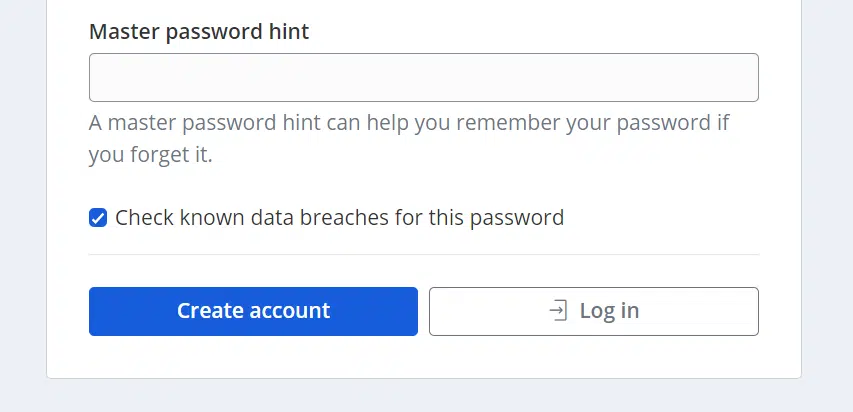
Click on the Create Account button for a new Bitwarden account and enter you details on the fields and create a new account.
Once the account is created, you will be redirected to the Bitwarden login page. Provide your email address, password and click on the Log in with master password button.
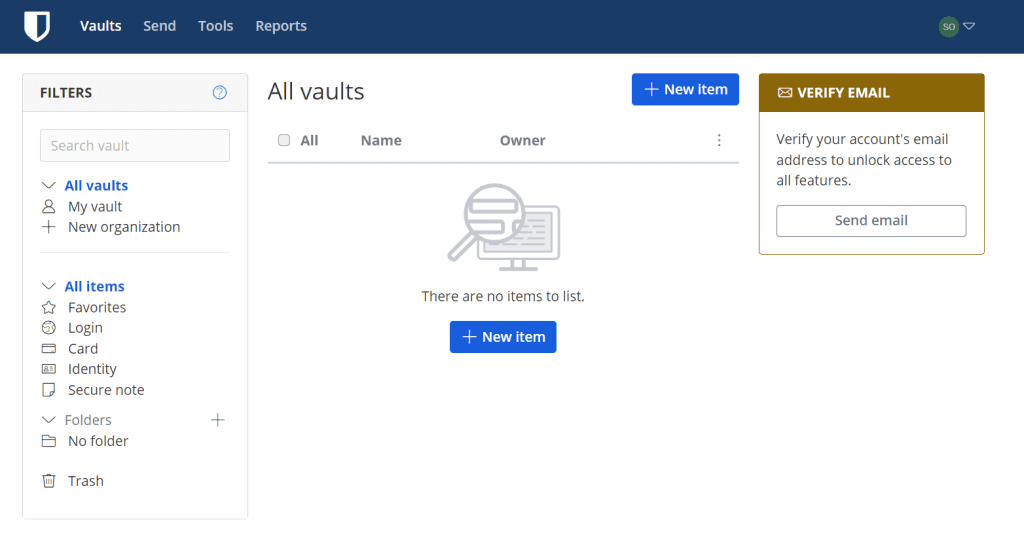
Done! Now you have the ability to input your passwords and easily share them across multiple devices.