Please go to the Releases page to get the appropriate package for your operating system and architecture from the VPSieCLI GitHub repository.
After you have downloaded the zip file, proceed to extract its contents.
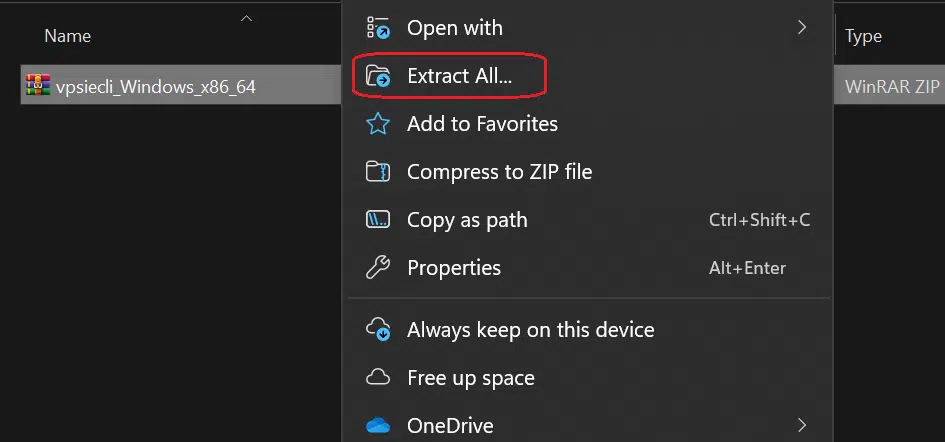
After extracting the contents, create a new folder named vpsiecli in your file system and move the executable file into it.
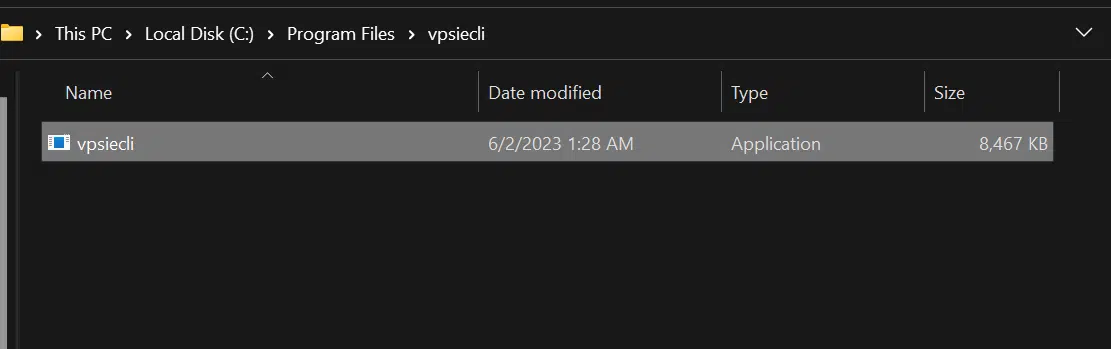
Finally, we need to include the path to this folder in the environment variable.
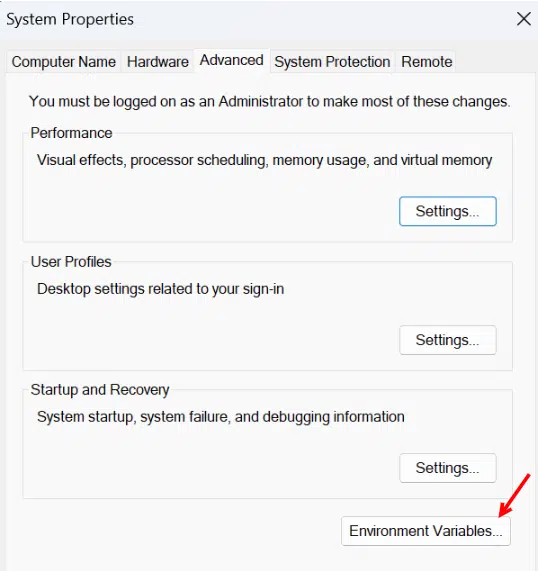
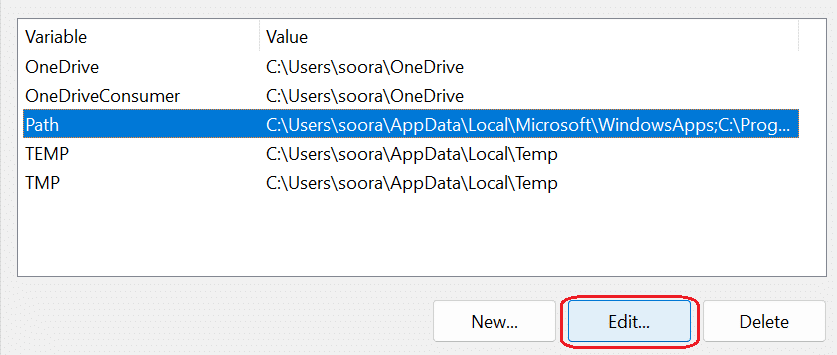
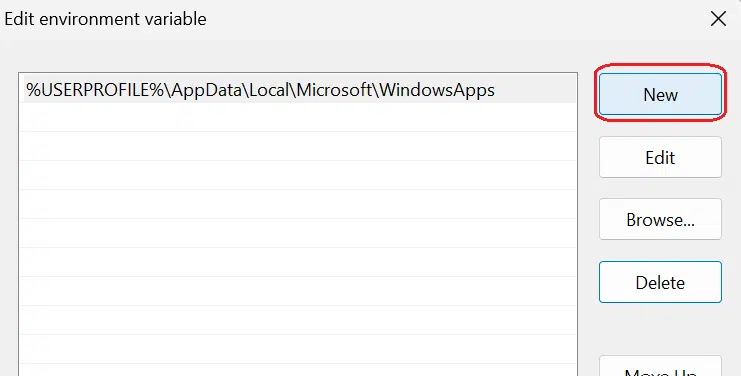
Click on New and add the file path for the executable file for vpsiecli.
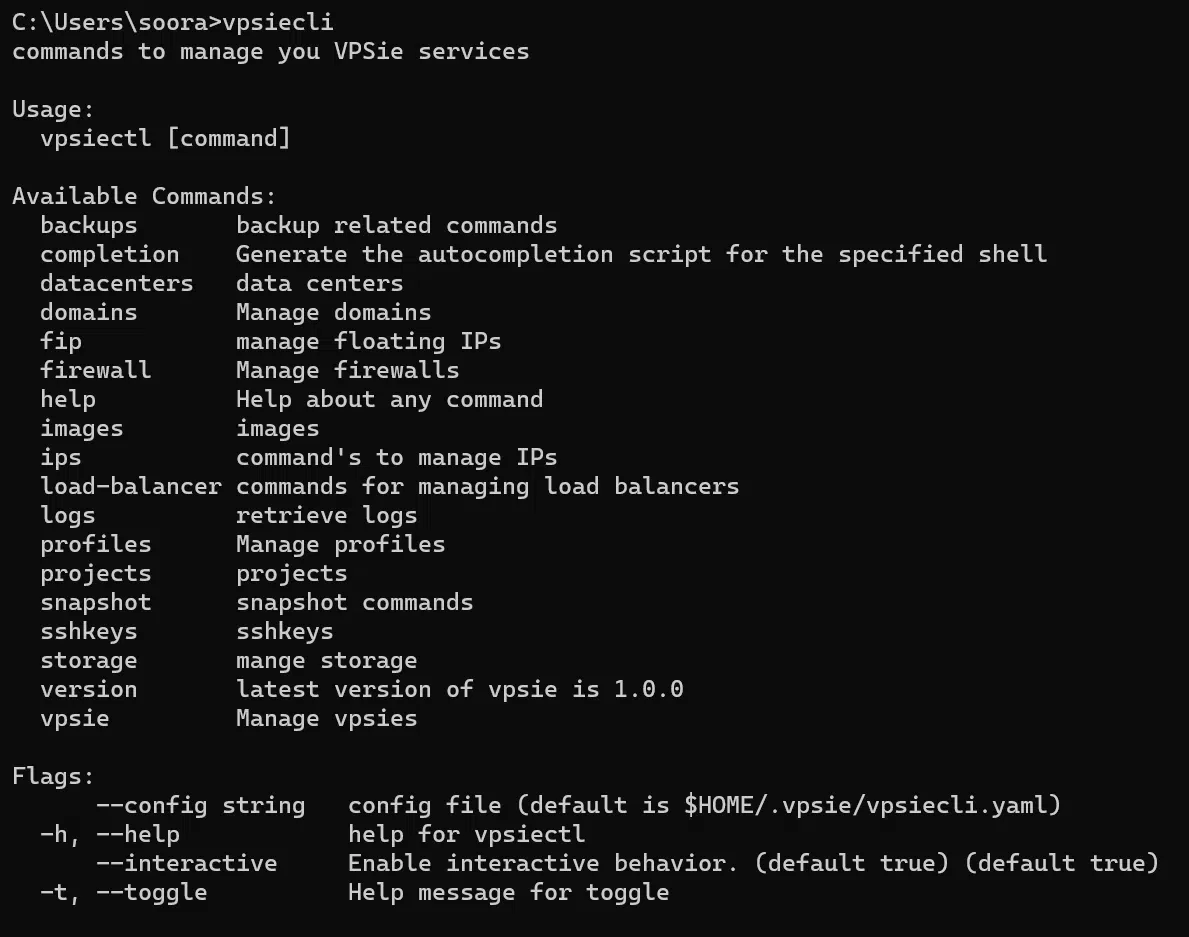
The installation of VPSieCLI is now complete. To verify the installation, please follow these steps:
- Open the command prompt.
- Enter the command vpsiecli
To install VPSieCLI using Windows PowerShell, follow the steps below:
Open PowerShell as an administrator and run the following command to download the most recent version of VPSieCLI:
Invoke-WebRequest https://code.k9.ms/cloud/cli/-/releases/v0.0.7/downloads/vpsiecli_Windows_x86_64.zip -OutFile ~\vpsiecli_Windows_x86_64.zip
Expand-Archive -Path ~\vpsiecli_Windows_x86_64.zip
New-Item -ItemType Directory $env:ProgramFiles\vpsiecli\
Move-Item -Path ~\vpsiecli_Windows_x86_64\vpsiecli.exe -Destination $env:ProgramFiles\vpsiecli\
[Environment]::SetEnvironmentVariable(
    "Path",
    [Environment]::GetEnvironmentVariable("Path",
    [EnvironmentVariableTarget]::Machine) + ";$env:ProgramFiles\vpsiecli\",
    [EnvironmentVariableTarget]::Machine)
$env:Path = [System.Environment]::GetEnvironmentVariable("Path","Machine")
Please go to the Releases page to get the appropriate package for your operating system and architecture from the VPSieCLI GitHub repository.
To obtain the most up-to-date release of VPSieCLI for Linux through wget, please utilize the following command(Check the above link for the lateast version):
cd~
wget https://code.k9.ms/cloud/cli/-/releases/v0.0.7/downloads/vpsiecli_Linux_x86_64.tar.gz
Once you have obtained the suitable package for your operating system, extract the vpsiecli executable by executing the following command:
tar xvf vpsiecli_Linux_x86_64.tar.gz
rm -f vpsiecli_Linux_x86_64.tar.gz
mv vpsiecli /usr/local/bin
nano ~/.bashrc
export PATH="/usr/local/bin:$PATH"
source ~/.bashrc
Please go to the Releases page to get the appropriate package for your operating system and architecture from the VPSieCLI GitHub repository.
To obtain the most up-to-date release of VPSieCLI for Linux through wget, please utilize the following command(Check the above link for the lateast version):
cd~
wget https://code.k9.ms/cloud/cli/-/releases/v0.0.7/downloads/vpsiecli_Darwin_x86_64.tar.gz
Once you have obtained the suitable package for your operating system, extract the vpsiecli executable by executing the following command:
tar xvf vpsiecli_Darwin_x86_64.tar.gz
rm -f vpsiecli_Darwin_x86_64.tar.gz
sudo mv vpsiecli /usr/local/bin
nano ~/.bash_profile
export PATH="/usr/local/bin:$PATH"
source ~/.bash_profile