This guide will show you How to complete common dashboard tasks in VPSie (Create, Clone, Console access, Delete and Restore).
Create, Clone, Console access, Delete and Restore are common dashboard tasks in VPSie Control Panel.Common dashboard tasks provide you to easily and quickly manage many processes.
To follow this tutorial you need one account in VPSie.If you don’t have an account, you can register by following this
link.
Create VPSie Task
Create task provide you to quickly create VPS server.
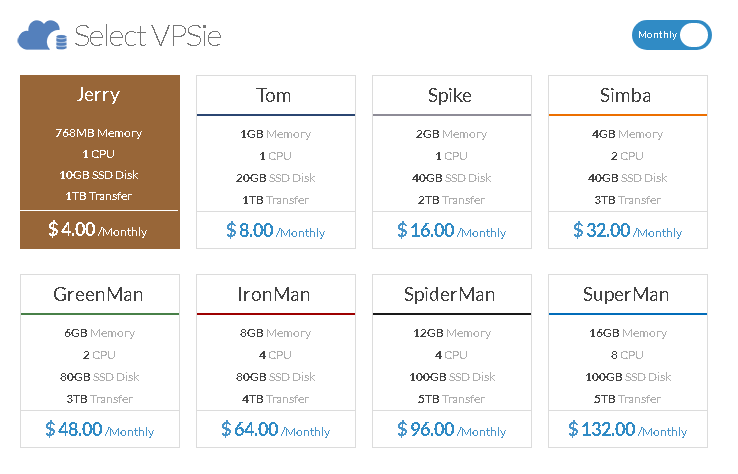
First, select any plan which you want.
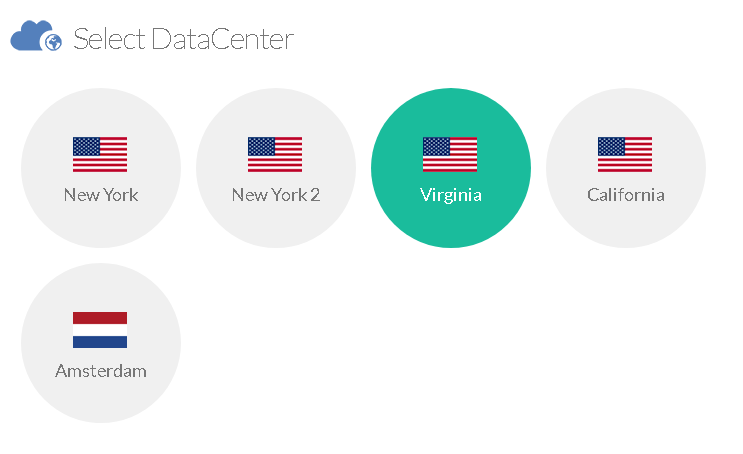
After, Select any Data Center.
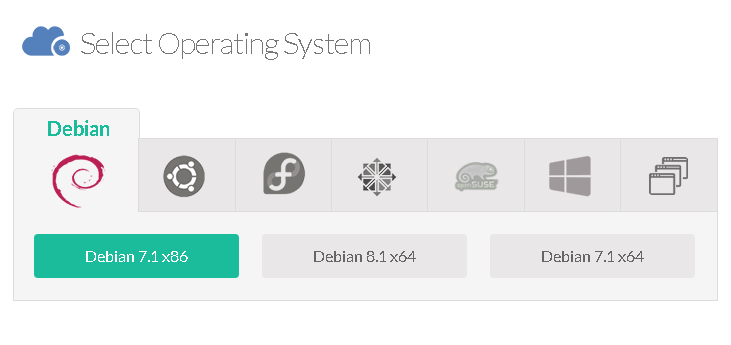
Next, choose any operating system.

Type any hostname.Free choose. You can use FQDN or simple hostname – Typed exactly where it says EnterHostname
After finishing those steps, click Create VPSie and your server will be up 30 seconds later.
Access details will be emailed to you.
Manage VPSie
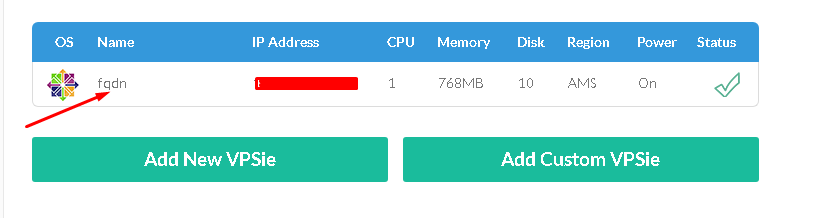
The main dashboard of VPSie shows all the current active VPSie(s) both powered on and powered off instances.
You can click on any of them for granular management which include console access, Password reset, network changes, backups and snapshot options and activity logs.
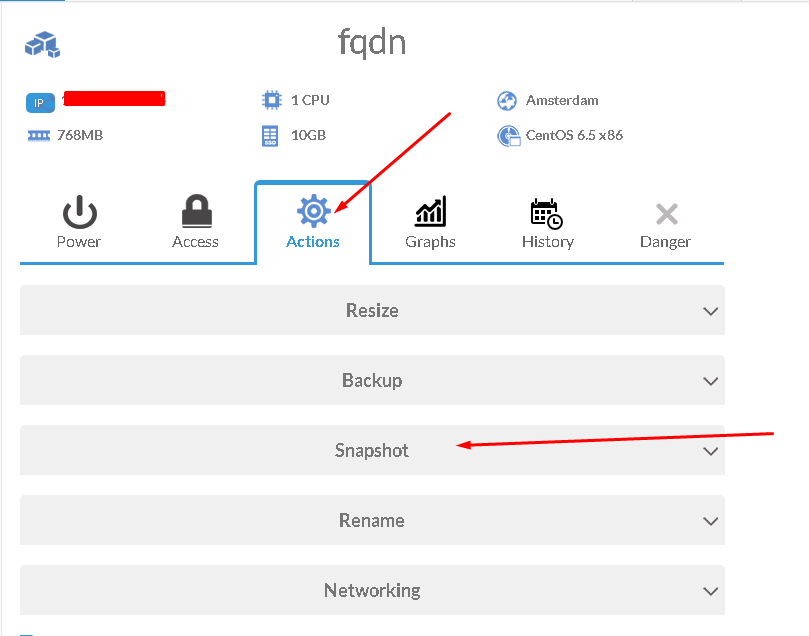
First Click on VPS that you want to manage.
Example for creating a snapshot —> Actions button and select Snapshot
Next, type any Snapshot Name and click Snapshot Now.

Greetings, you successfully cloned VPS.
Console access
This will open up a connection to your VPSie, The same as if you are in front of a physical server using a Keyboard and mouse!.
First, go to VPS Control Panel and click in VPS to manage it.
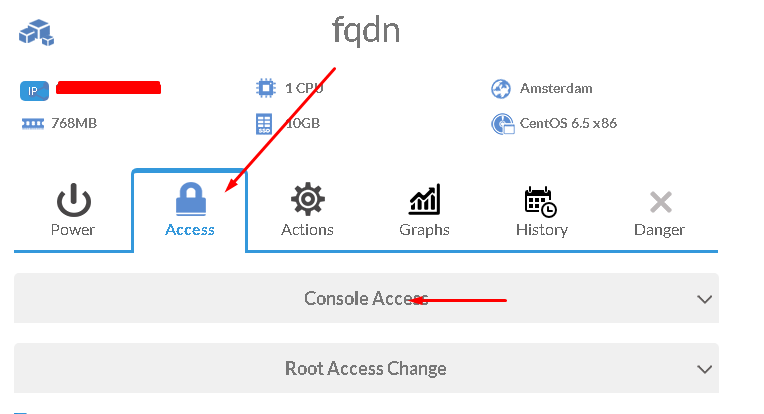
After, Click Access button and choose Console access.
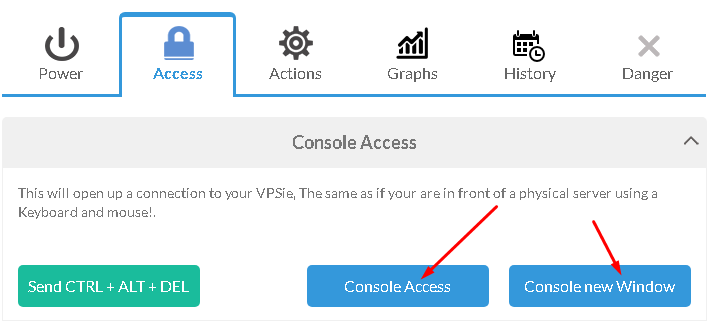
Now click on Console Access button and log in with access details that emailed to you.
Delete VPSie
This will destroy your VPSie, files and ALL associated BACKUPs. Destroy might take up to 8 minutes. Proceed with caution!
First, go and manage VPS in VPSie Control Panel.
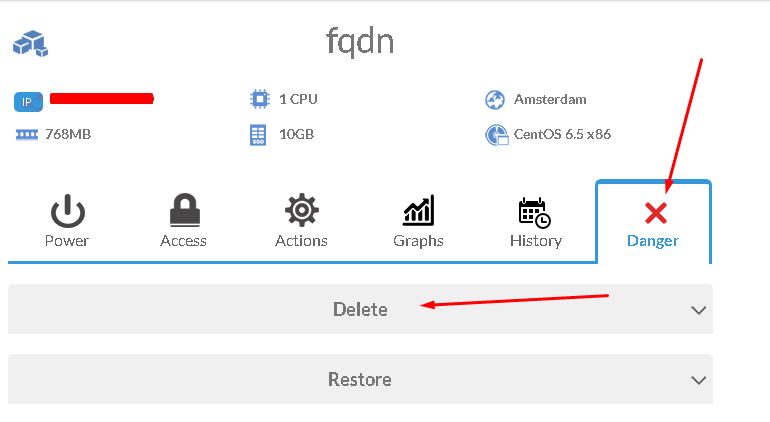
After, click Danger button and choose Delete.
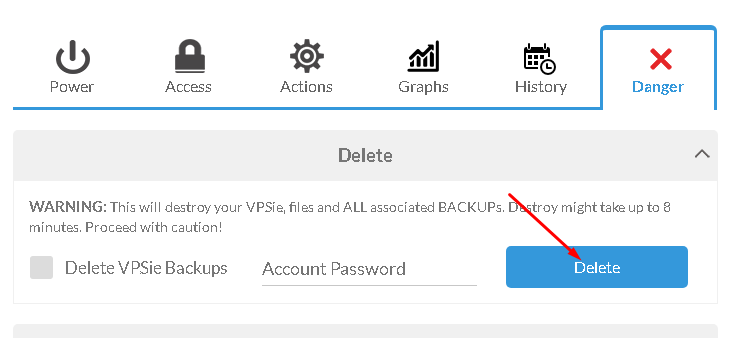
Put Account Password in the text area and click Delete to confirm this action.
Rebuild Task
This will destroy your VPSie, files and ALL associated BACKUPs. Resulting in a fresh build of the original image you selected when you originally created your VPSie. Proceed with caution!
This task is specifically helpful if you would like to change the underlying operation system (example from LAMP to LEMP or pure Ubuntu) while keeping the same IP unchanged – very helpful if you have DNS records already created and many other scenarios.
First, go to VPS management.
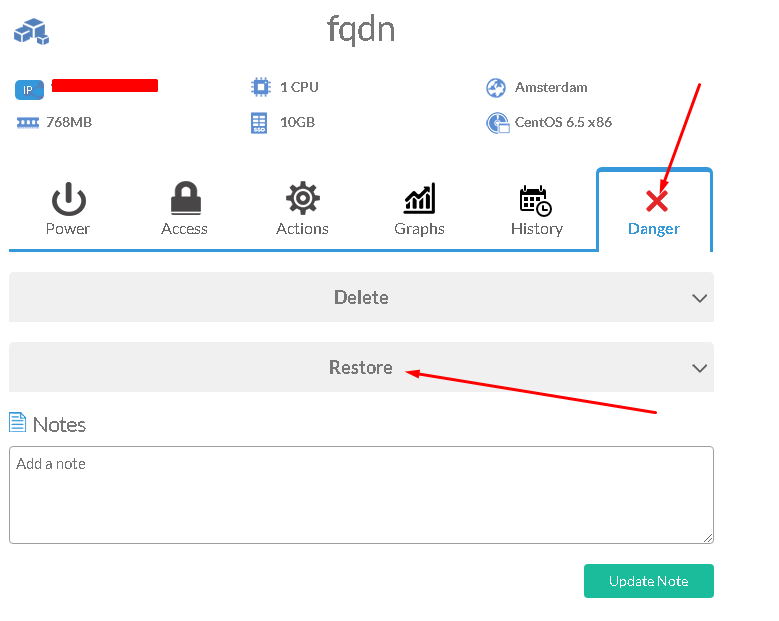
Click Danger button and select Restore.
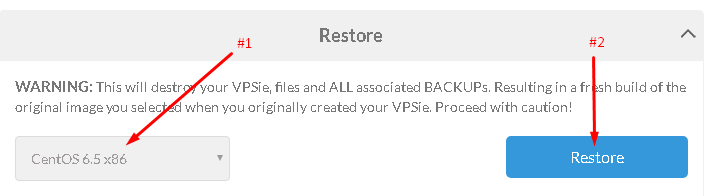
#1 Click in that area and choose the operating system that you want to restore.
#2 Click Restore to confirm this action
Enjoy