
In the DevOps automation, Ansible has emerged as a powerful tool for managing complex IT infrastructure with ease. However, orchestrating Ansible workflows efficiently demands a user-friendly interface. This is where Ansible Semaphore steps in, offering a robust web-based GUI for managing Ansible tasks and playbooks. If you’re a Debian 12 user keen on streamlining your DevOps processes, this guide is your gateway to installing Ansible Semaphore seamlessly on your system. Whether you’re a seasoned DevOps engineer or a beginner delving into automation, follow along as we navigate through the installation process, empowering you to harness the full potential of Ansible Semaphore on your Debian 12 environment.
First, let’s begin by creating your VPSie Account if you haven’t already done so, and then proceed to install the Debian 12 server as per your requirements.
To initiate the installation, please SSH into your system. Our first step is to advise updating your system prior to installing any software. To accomplish this, kindly execute the following commands:
sudo apt-get update -y
Install Dependencies
Execute the following apt command to install essential dependencies on your system.
sudo apt install git curl wget software-properties-common
To install Ansible, PostgreSQL, and Nginx execute the command below.
sudo apt install ansible postgresql nginx
Run the following command to check the current status of both the PostgreSQL services.
sudo systemctl is-enabled postgresql
sudo systemctl status postgresql
Run the following command to check the current status of both the Nginx services.
sudo systemctl is-enabled nginx
sudo systemctl status nginx
Configure PostgreSQL
Access the PostgreSQL shell by typing in the command provided.
sudo -u postgres psql
Please input the following commands to set up a fresh PostgreSQL database and user specifically for Ansible Semaphore’s use.
CREATE USER semaphore WITH PASSWORD 'your-password';CREATE DATABASE semaphoredb OWNER semaphore;
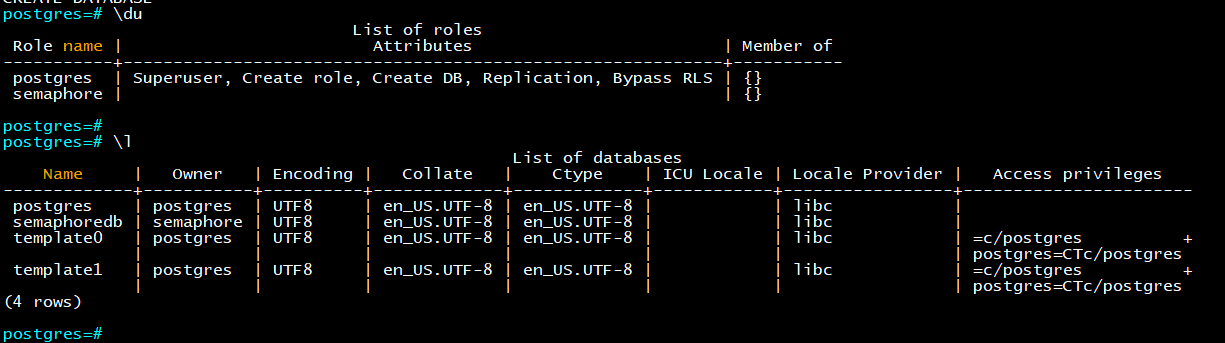
To confirm the creation of users and databases on your PostgreSQL server, input the provided queries. Upon successful execution, you should observe semaphoredb in the database list and semaphore listed among PostgreSQL users.
\du
\l
\q
Install Ansible Semaphore
Use this command to fetch the Debian package file for Ansible Semaphore. Check out the most recent version from the official Ansible Semaphore GitHub repository:
VER=$(curl -s https://api.github.com/repos/ansible-semaphore/semaphore/releases/latest|grep tag_name | cut -d '"' -f 4|sed 's/v//g')
wget -q https://github.com/semaphoreui/semaphore/releases/download/v2.9.64/semaphore_2.9.64_linux_amd64.deb
Now enter the following dpkg command to install the Ansible Semaphore Debian package file.
sudo dpkg -i semaphore_2.9.64_linux_amd64.deb
After successfully installing Ansible Semaphore, you’ll find the semaphore binary file in the /usr/bin directory.
Execute the command below to confirm the complete path of the semaphore binary file:
which semaphore
To enable bash completion for the ‘semaphore’ command utility, start by installing the ‘bash-completion’ package on your Debian system. You can do this by running the following command with apt:
sudo apt install bash-completion
After installing ‘bash-completion’, access the bash configuration file ~/.bashrc with this command in the nano editor:
sudo nano ~/.bashrc
Append the following configurations to the end of the line.
if [ -f /usr/share/bash-completion/bash_completion ]; then
. /usr/share/bash-completion/bash_completion
elif [ -f /etc/bash_completion ]; then
. /etc/bash_completion
fi
source <(semaphore completion bash)
Save and close the file.
Next, reload the ~/.bashrc configuration file.
source ~/.bashrc
Use the following command and press TAB to display the available options and parameters for the Ansible Semaphore command utility.
semaphore

Configure Ansible Semaphore
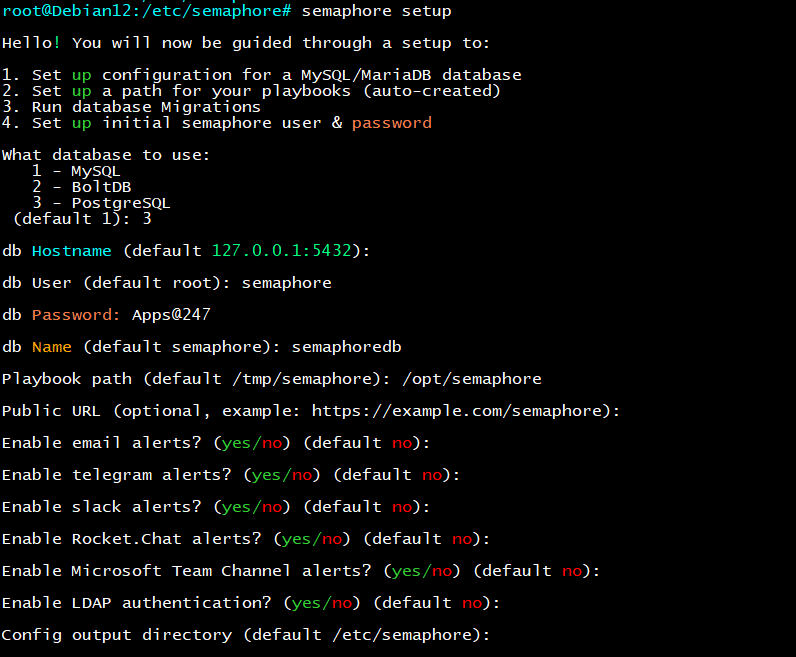
To begin, establish a fresh directory named /etc/semaphore for configuration purposes, and relocate your current working directory into it. This designated directory will serve as the storage space for the Ansible Semaphore configuration.
mkdir -p /etc/semaphore; cd /etc/semaphore
Execute the following command to initiate and tailor the setup of the Ansible Semaphore installation:
semaphore setup
At the outset, you’ll be prompted to choose the database. Enter 3 to select PostgreSQL, then input your credentials and follow the remaining steps as depicted in the image below.
Run Ansible Semaphore with Systemd
You’re going to craft a fresh systemd unit file dedicated to overseeing the Ansible Semaphore process. This setup will streamline Ansible Semaphore management via the systemctl command tool.
To initiate this, utilize the nano editor with the command:
sudo nano /etc/systemd/system/semaphore.service
Next, insert the following lines into the file.
[Unit]
Description=Semaphore Ansible
Documentation=https://github.com/ansible-semaphore/semaphore
Wants=network-online.target
After=network-online.target
[Service]
Type=simple
ExecReload=/bin/kill -HUP $MAINPID
ExecStart=/usr/bin/semaphore service --config=/etc/semaphore/config.json
SyslogIdentifier=semaphore
Restart=always
[Install]
WantedBy=multi-user.target
Save the file and exit the editor.
To refresh the systemd manager and implement the new systemd unit file, input the following command:
sudo systemctl daemon-reload
Initiate and enable the semaphore service by using the subsequent systemctl commands:
sudo systemctl start semaphore
sudo systemctl enable semaphore
Confirm the status of the semaphore service to ensure it is both running and enabled:
sudo systemctl status semaphore
Access Ansible Semaphore Web Interface
You can now conveniently access Ansible Semaphore via your web browser. Simply open your browser and enter the server’s IP address followed by the default port, 3000.
http://X.X.X.X:3000/ 
Please input the username and password previously established, then select SIGN IN.
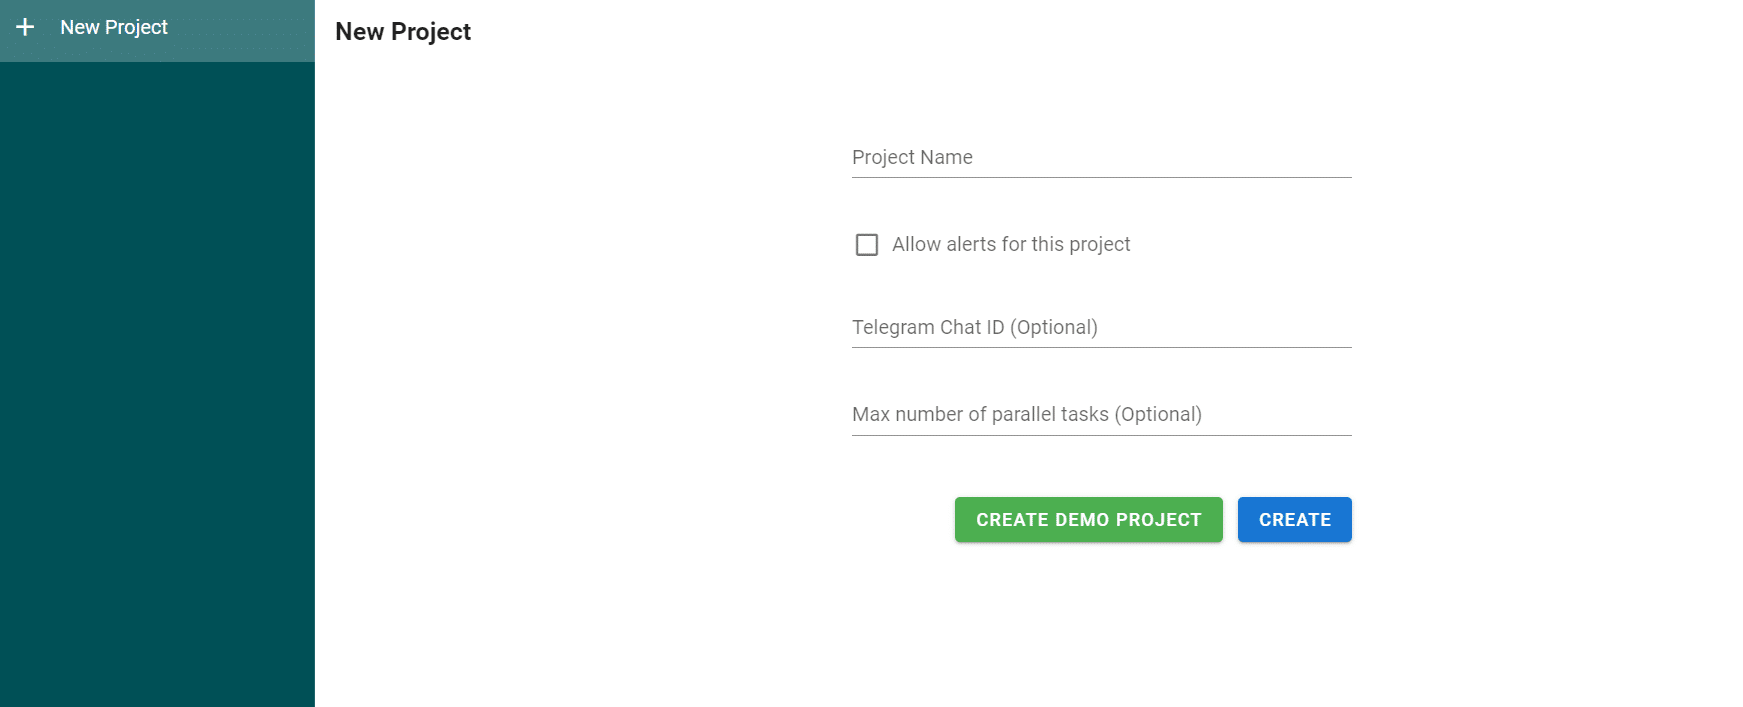
You’ll now be prompted to initiate your installation’s inaugural project. Enter the project’s name, then hit CREATE.
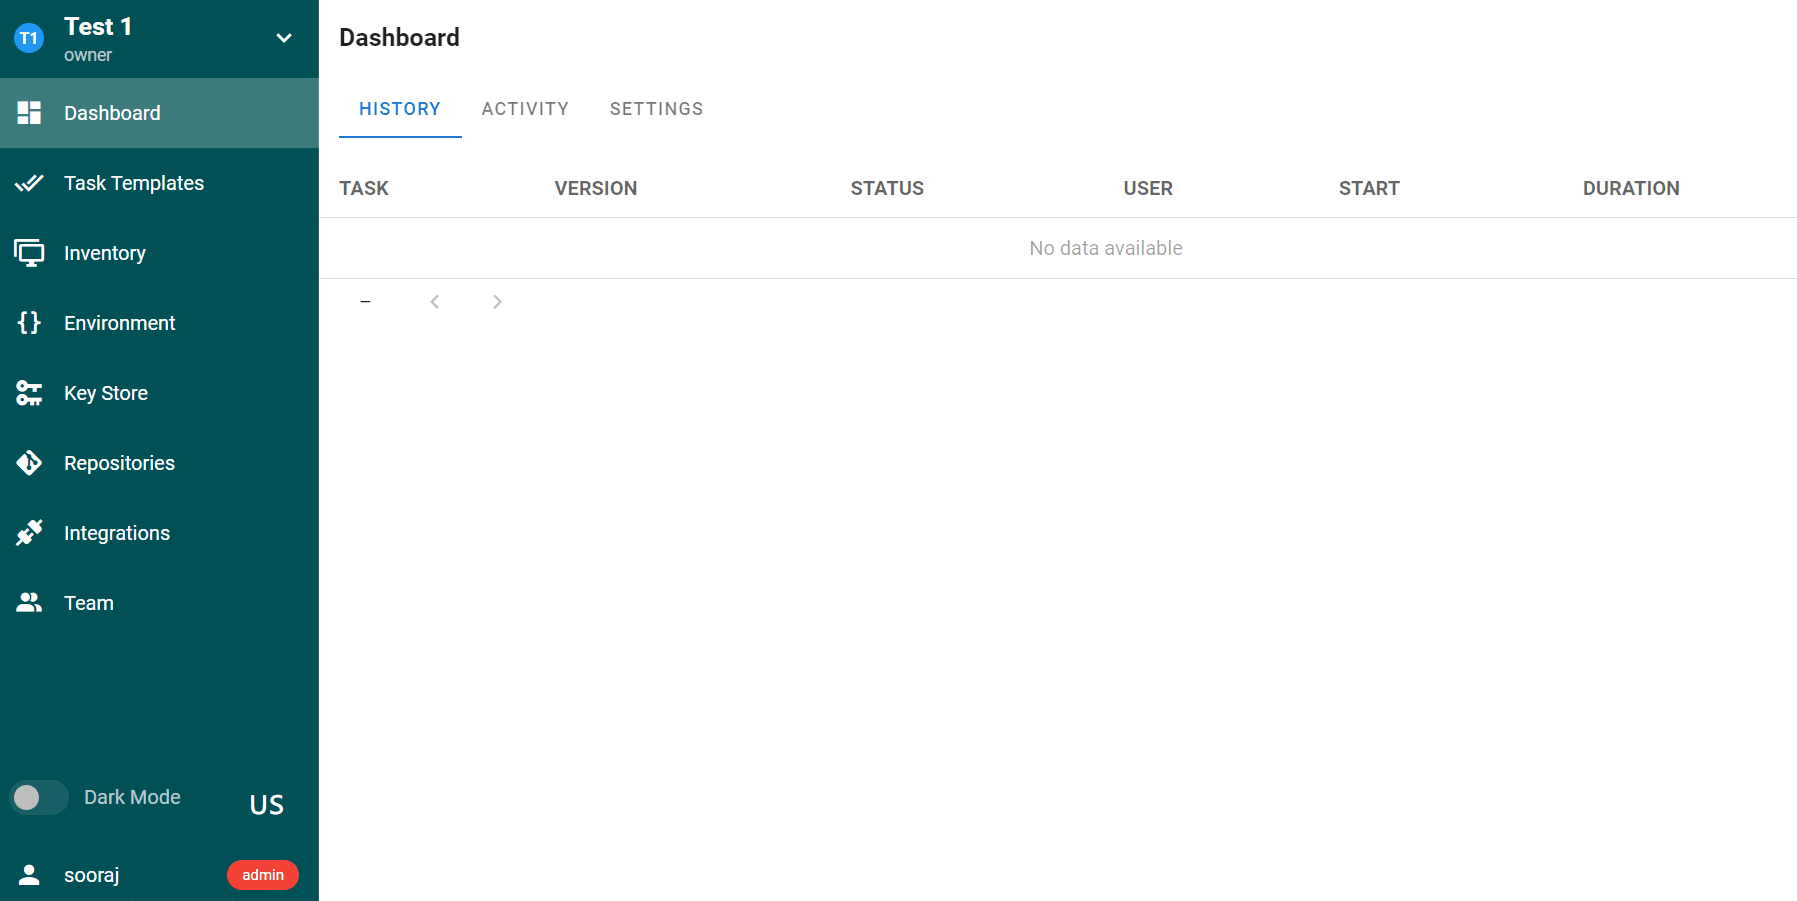
Once the initial project is established, you’ll be directed to the administration dashboard of Ansible Semaphore.
In conclusion, setting up Ansible Semaphore on Debian 12 is a straightforward process that streamlines your Ansible workflows. With its intuitive interface and robust features, Semaphore enhances your automation tasks, making system administration more efficient and enjoyable on the Debian platform.