Navigating the dynamic landscape of container orchestration platforms can be both exciting and challenging for those diving into the realm of Kubernetes. Amidst the plethora of tools available, Rancher Kubernetes Panel emerges as a powerful and user-friendly option for managing Kubernetes clusters. In this guide, we’ll embark on a journey to install Rancher Kubernetes Panel on Ubuntu 22.04, offering a comprehensive walkthrough that simplifies the installation process, enabling you to harness the full potential of Kubernetes with ease. Whether you’re a seasoned DevOps engineer or an enthusiastic newcomer, this tutorial aims to equip you with the knowledge to deploy Rancher Kubernetes Panel effortlessly and elevate your container orchestration experience. Let’s dive in!
First, let’s begin by creating your VPSie Account if you haven’t already done so, and then proceed to install the Ubuntu 22.04 server as per your requirements.
To initiate the installation, please SSH into your system. Our first step is to advise updating your system prior to installing any software. To accomplish this, kindly execute the following commands:
sudo apt-get update -y
Install Docker
If Docker isn’t already installed on your server, you can get it set up with the following command:
sudo apt-get install docker.io
After the installation finishes, confirm Docker’s proper installation by executing the following command:
docker --version
Manage Docker Services
The Docker service is typically handled by systemd. You can easily manage it using the systemctl command. To initiate the Docker service and set it to start automatically upon system reboot, execute the following command:
systemctl start docker
systemctl enable docker
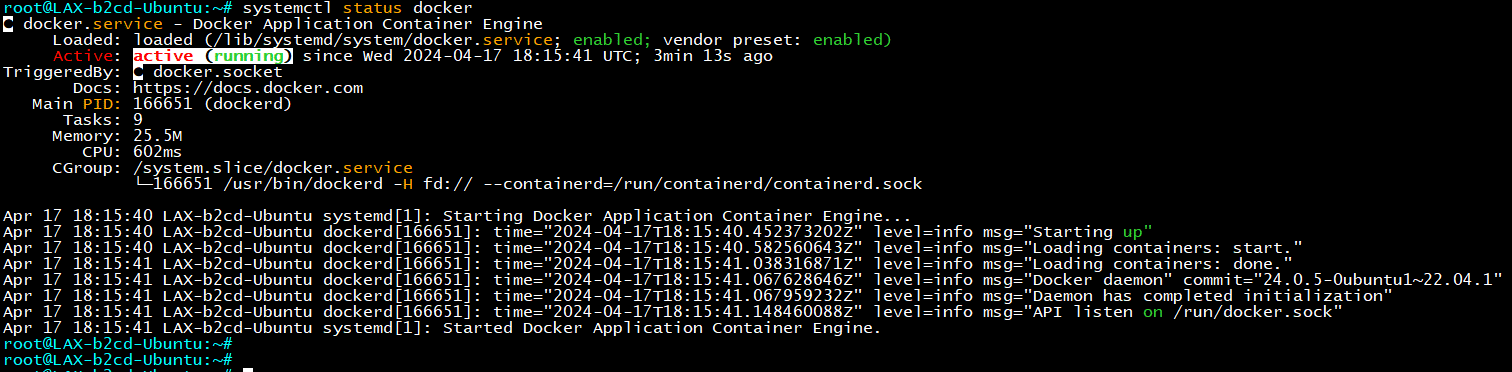
You can also check the status of the Docker with the following command:
systemctl status docker
Install Rancher
To set up Rancher, you’ll want to fetch the Rancher server image and execute it within a Docker container. Achieve this by executing the command below:
docker run -d --name=rancher-server --restart=unless-stopped -p 80:80 -p 443:443 --privileged rancher/rancher:v2.4.18
This command fetches the most recent Rancher server image and executes it within a Docker container.
You can view the downloaded Rancher image from the Docker Hub registry by using the following command:
docker images
You can confirm the active container by executing the subsequent command:
docker ps
Access Rancher Web Interface
Rancher has been successfully installed and is now running on port 443. You can access it by entering the URL https://your-server-ip in your browser. This will redirect you to the welcoming Rancher screen.
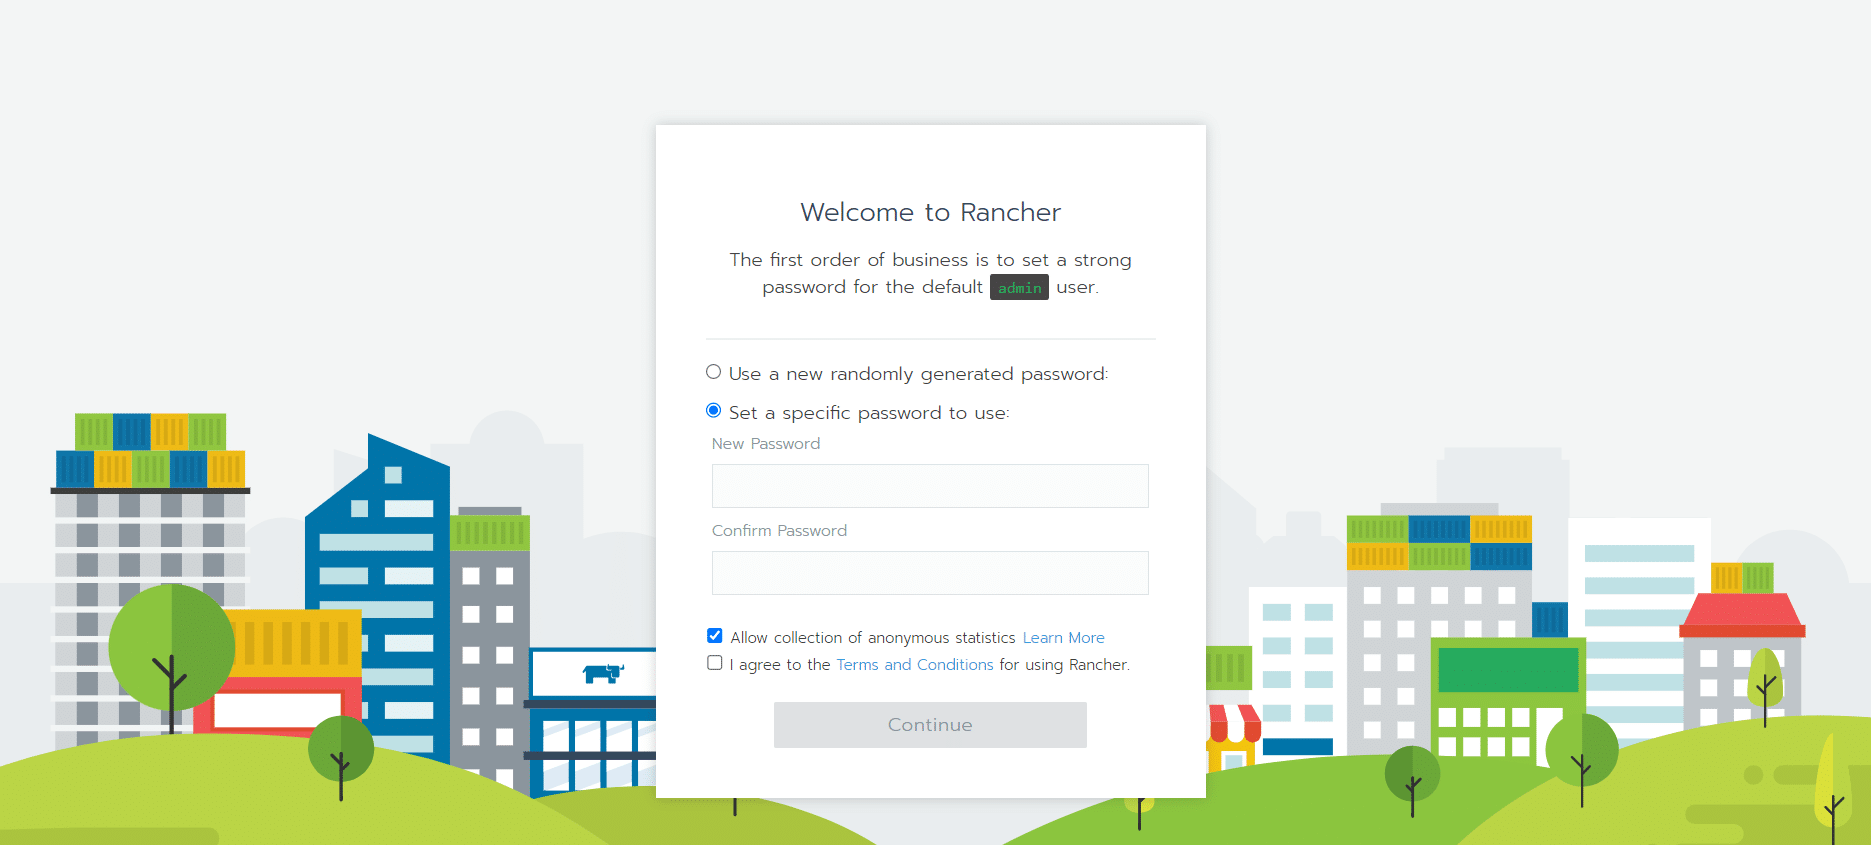
Create your admin password and then proceed by clicking the Continue button.
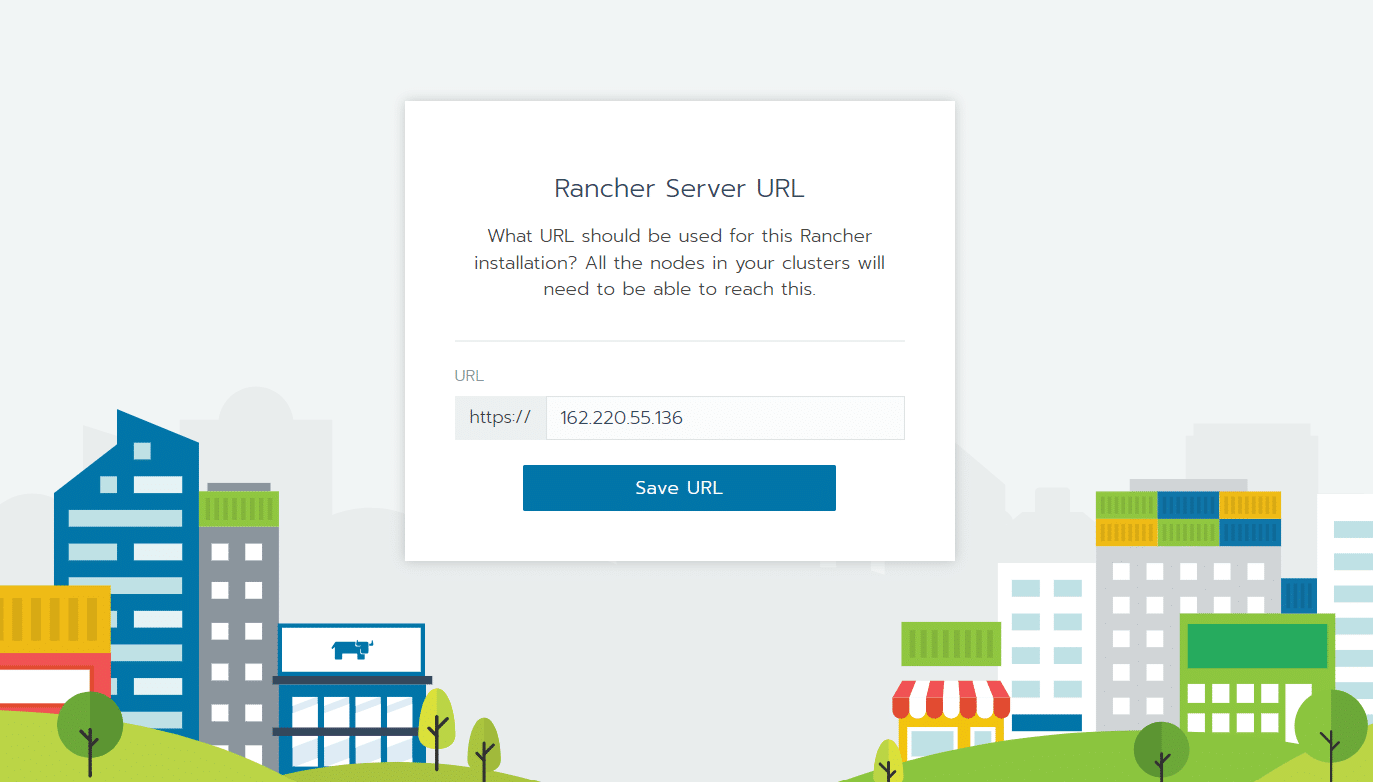
Define your server URL and click on the Save URL button.
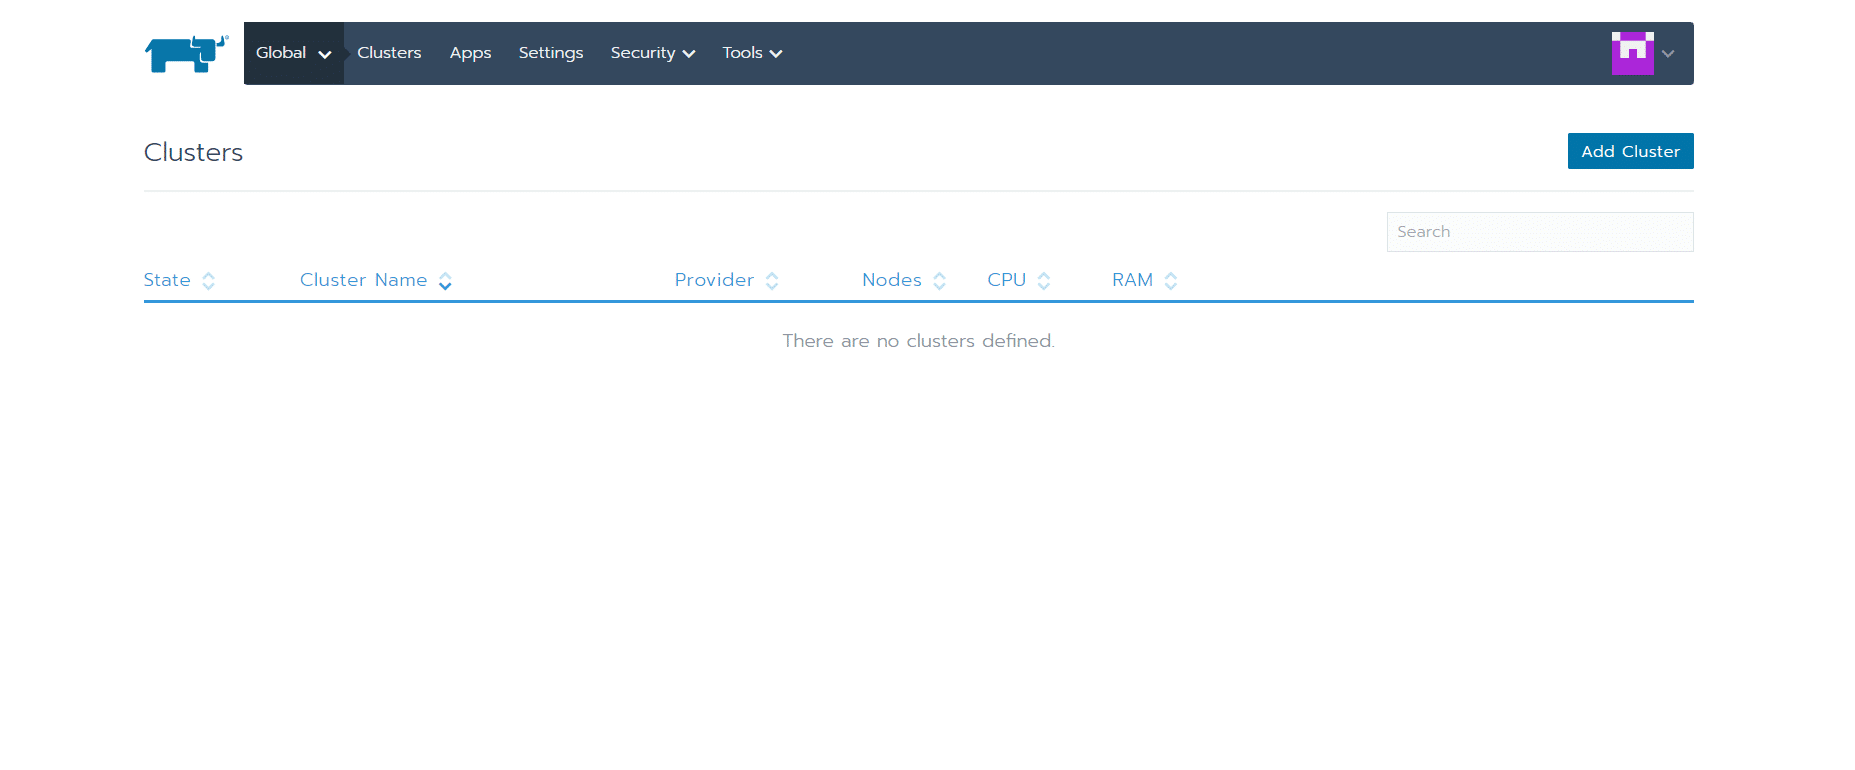
To administer your Kubernetes clusters, you must incorporate one or more hosts into Rancher. A host refers to a server or virtual machine where Kubernetes operates. Access the Rancher UI homepage and initiate the process by clicking the Add Cluster button, then proceed with the instructions provided.
By following the steps outlined in this guide, users can quickly deploy and manage Kubernetes clusters using Rancher’s intuitive graphical interface, empowering them to efficiently orchestrate containerized applications in their infrastructure. With Rancher’s comprehensive features and robust management capabilities, administrators can streamline their Kubernetes operations and scale their deployments with ease.